Free Crochet Pattern Bunny in a Carrot Sleeping Bag
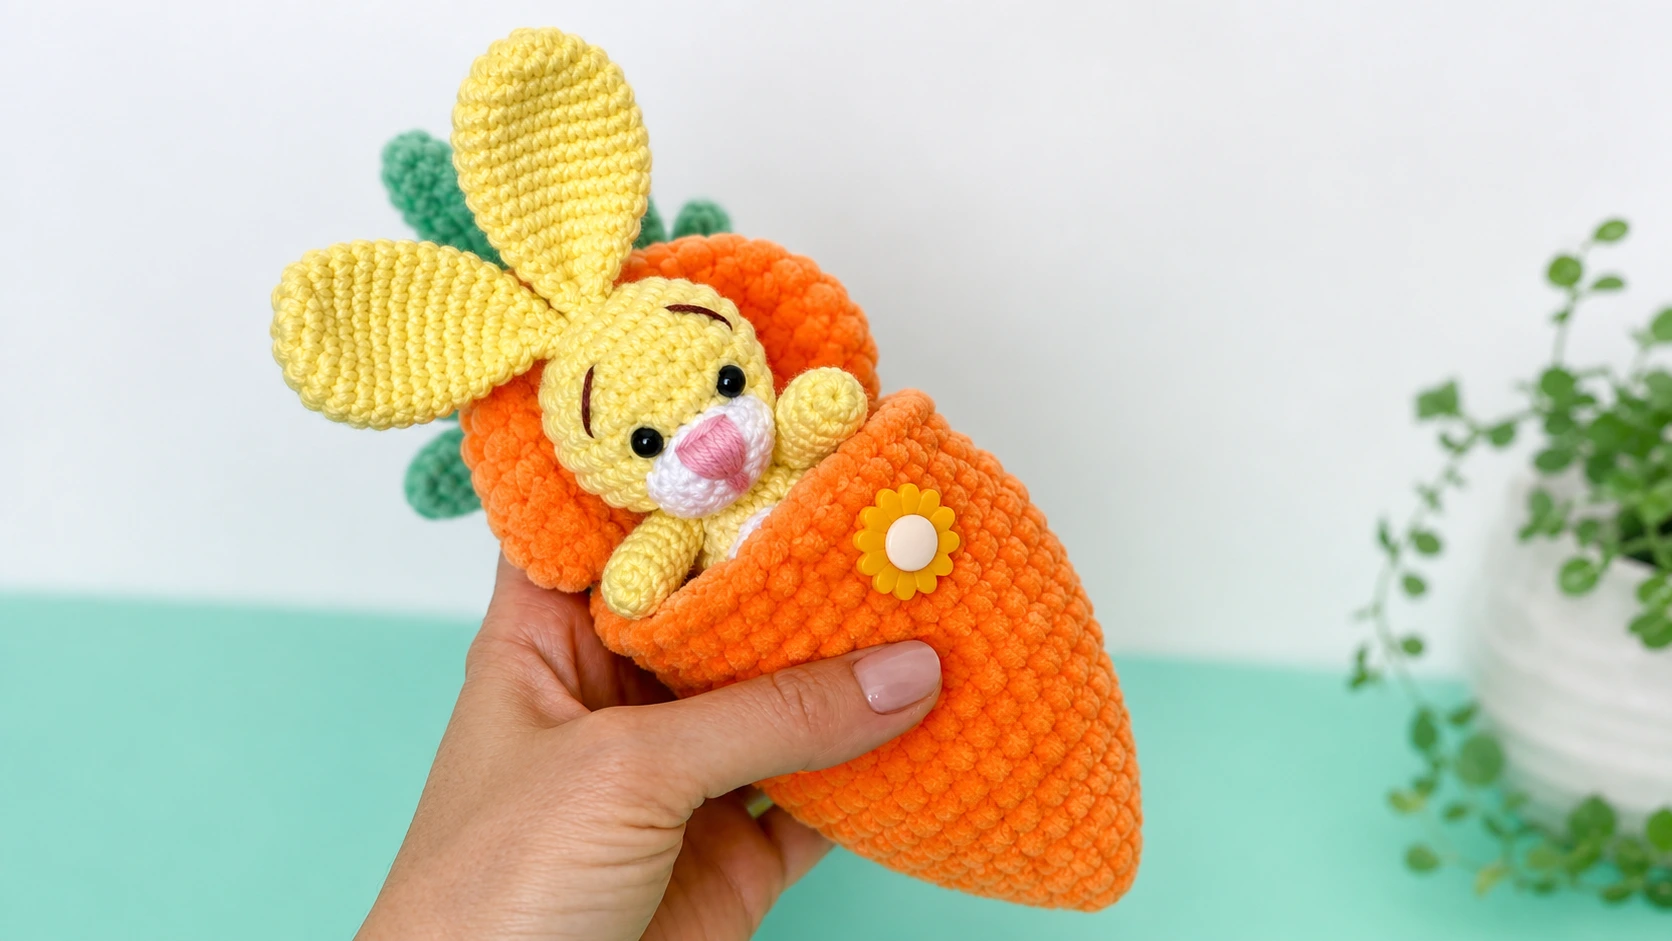
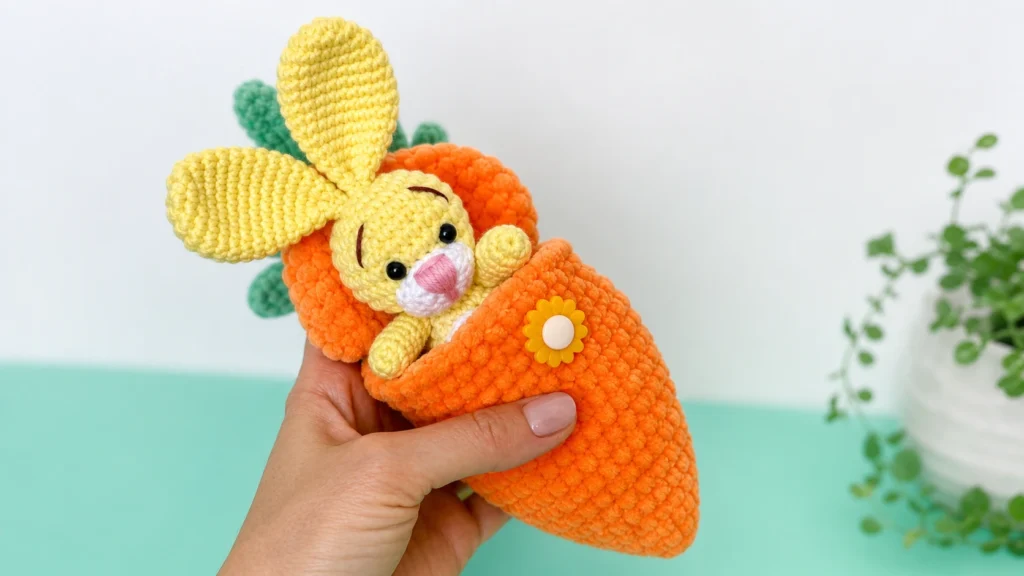
If you love a project with a little surprise built in, this free crochet pattern bunny is going to charm you. You make a tiny yellow bunny, about 10 cm (4 inches) tall without the ears, and a bright orange carrot that opens up like a snug sleeping bag so the bunny can tuck right inside. It fastens with a button, so the little one nestles in and peeks out the top. It is a quick, joyful make that works beautifully as an Easter gift, a pocket toy, or a spring decoration.
The bunny uses basic amigurumi shapes, so it is friendly for confident beginners, and the carrot is a simple pouch with a buttonhole. Read through the whole pattern once so the assembly makes sense, then gather your yarn and hook.
What You Will Make
This is a two-part project: a small stuffed bunny and a plush carrot pouch that holds it. The bunny has a separate muzzle, ears, arms, legs, a belly patch, and a little tail, all sewn together and given a sweet embroidered face. The carrot is worked in the round with a chained opening and buttonhole so it wraps around the bunny, then finished with a few green leaves at the top. Together they make a keepsake that opens and closes.
Quick facts:
- Skill level: Easy, basic amigurumi skills needed
- Finished size: Bunny about 10 cm (4 in), or 15 cm (6 in) with ears
- Time to make: A relaxed day or two evenings
- Construction: Multi-piece bunny plus a separate carrot pouch
Materials You Will Need
- Cotton yarn (the original uses Premier Cotton Fair or Yarn Art Jeans):
- yellow for the bunny, about 20 g
- white for the muzzle, belly, and tail, about 5 g
- Plush yarn (such as Premier Parfait Chunky or Himalaya Dolphin Baby):
- orange for the carrot, about 15 to 20 g
- green for the leaves, about 5 g
- Black safety eyes, 7 to 8 mm (or embroider them for a baby-safe toy)
- One button for the carrot, 15 to 20 mm
- Fiberfill stuffing
- Hook US B/2 (2.5 mm) for the bunny and G/6 (4 mm) for the carrot
- Tapestry needle and scissors
- Pink and brown cotton yarn for the face embroidery
Abbreviations
This free crochet pattern bunny uses US crochet terms.
- sc — single crochet
- dc — double crochet
- inc — increase, 2 sc in one stitch
- dec — decrease
- rnd(s) — round(s)
- sl st — slip stitch
- st(s) — stitch(es)
- ch — chain
- rep — repeat
- ( … ) * n — repeat the bracket n times
- = n — the stitch count for that round
Everything is worked in a continuous spiral, so do not join or chain up between rounds unless told to. Keep your stitches tight so the stuffing stays hidden.
How to Crochet the Bunny in a Carrot, Step by Step
Head
With yellow yarn and the 2.5 mm hook, make a magic ring.
- Rnd 1: 6 sc in magic ring = 6
- Rnd 2: inc * 6 = 12
- Rnd 3: (1 sc, inc) * 6 = 18
- Rnd 4: (2 sc, inc) * 6 = 24
- Rnd 5: (3 sc, inc) * 6 = 30
- Rnds 6–10: sc around = 30
- Rnd 11: (3 sc, dec) * 6 = 24
Insert the safety eyes between rounds 8 and 9, about 5 stitches apart, and stuff the head before you decrease further.
- Rnd 12: (2 sc, dec) * 6 = 18
- Rnd 13: (1 sc, dec) * 6 = 12
Fasten off and leave a long tail for sewing.
Muzzle
With white yarn, make a magic ring.
- Rnd 1: 6 sc in magic ring = 6
- Rnd 2: inc in each st = 12
- Rnd 3: (1 sc, inc) * 6 = 18
- Rnd 4: sc around = 18
Join with a sl st and leave a long tail for sewing.
Ears (Make 2)
With yellow yarn, make a magic ring.
- Rnd 1: 6 sc in magic ring = 6
- Rnd 2: inc in each st = 12
- Rnd 3: (2 inc, 4 sc) * 2 = 16
- Rnd 4: 1 sc, 2 inc, 6 sc, 2 inc, 5 sc = 20
- Rnds 5–9: sc around = 20
- Rnd 10: (dec, 8 sc) * 2 = 18
- Rnd 11: (dec, 7 sc) * 2 = 16
- Rnd 12: (dec, 6 sc) * 2 = 14
- Rnd 13: (dec, 5 sc) * 2 = 12
- Rnd 14: (dec, 4 sc) * 2 = 10
- Rnd 15: (dec, 3 sc) * 2 = 8
Join with a sl st and leave a long tail. Make a second ear the same way. The ears stay flat and unstuffed.
Body
With yellow yarn, make a magic ring.
- Rnd 1: 6 sc in magic ring = 6
- Rnd 2: inc in each st = 12
- Rnd 3: (1 sc, inc) * 6 = 18
- Rnd 4: sc around = 18
- Rnd 5: (2 sc, inc) * 6 = 24
- Rnds 6–8: sc around = 24
- Rnd 9: (2 sc, dec) * 6 = 18
Stuff the body firmly.
- Rnd 10: sc around = 18
- Rnd 11: (1 sc, dec) * 6 = 12
Join with a sl st and fasten off.
Arms (Make 2)
With yellow yarn, make a magic ring.
- Rnd 1: 6 sc in magic ring = 6
- Rnd 2: (inc, 2 sc) * 2 = 8
- Rnd 3: sc around = 8
- Rnd 4: (dec, 2 sc) * 2 = 6
- Rnds 5–8: sc around = 6
Stuff lightly. Fold the arm in half and sc 3 across both sides to close. Leave a tail for sewing and make the second arm.
Legs (Make 2)
With yellow yarn, make a magic ring.
- Rnd 1: 6 sc in magic ring = 6
- Rnd 2: inc in each st = 12
- Rnd 3: (2 inc, 3 sc) * 3 = 15
- Rnd 4: 2 sc, dec * 4, 5 sc = 11
- Rnd 5: 2 sc, dec * 2, 5 sc = 9
- Rnds 6–8: sc around = 9
Stuff lightly.
- Rnd 9: (1 sc, dec) * 3 = 6
Fold in half and sc 3 across to close. Leave a tail and make the second leg.
Belly
With white yarn, ch 6.
- Row 1: sc in the 2nd ch from the hook, sc in the next 3, 3 sc in the last ch, then along the other side of the chain sc in the next 3, 2 sc in the last = 12
- Row 2: 2 sc in the first st, 3 sc, 2 sc in each of the next 3, 3 sc, 2 sc in each of the next 2 = 18
Join with a sl st and leave a tail for sewing.
Tail
With white yarn, make a magic ring.
- Rnd 1: 6 sc in magic ring = 6
- Rnd 2: (1 sc, inc) * 3 = 9
Join with a sl st and leave a tail.
Carrot
With orange plush yarn and the 4 mm hook, make a magic ring.
- Rnd 1: 6 sc in magic ring = 6
- Rnd 2: sc around = 6
- Rnd 3: inc in each st = 12
- Rnd 4: sc around = 12
- Rnd 5: (1 sc, inc) * 6 = 18
- Rnd 6: sc around = 18
- Rnd 7: (2 sc, inc) * 6 = 24
- Rnds 8–15: sc around = 24
Check that the carrot is wide and tall enough to hold your bunny before you carry on.
- Rnd 16: 6 sc, ch 24 = 30
- Rnd 17: 6 sc, 9 sc into the chain, skip 6 ch to form the buttonhole, 9 sc into the chain = 24
- Rnds 18–21: sc around = 24
- Rnd 22: (2 sc, dec) * 6 = 18
- Rnd 23: (1 sc, dec) * 6 = 12
- Rnd 24: dec * 6 = 6
Fasten off and weave in the ends. With green plush yarn, sl st into round 24, then (ch 10, sl st in the same st) three times to make the leaves. Sew the button between rounds 13 and 14.
Putting Your Bunny in a Carrot Together
- Eyes: If you use safety eyes, they go in while you crochet the head, or sew them between rounds 8 and 9 with 5 stitches between.
- Head to body: Sew round 13 of the head to round 11 of the body. Stuff the neck firmly so the head does not wobble, and sew around twice.
- Arms: Sew them between rounds 10 and 11 of the body.
- Legs: Sew them between rounds 3 and 4 of the body, sticking the needle through the same spot to keep them flexible.
- Tail: Sew it to the back between rounds 2 and 5.
- Ears: Sew them to the top of the head with a couple of stitches to hold them together.
- Muzzle: Sew it between rounds 8 and 13 of the head, stuffing a little as you go.
- Face: Embroider a pink nose and brown eyebrows between rounds 4 and 8, with about 3 stitches between them.
- Belly: Sew the white belly patch between rounds 3 and 11 of the body.
Tuck the finished bunny into the carrot and button it up.
Tips for a Better Carrot Bunny
- Size the carrot to the bunny. Pause at round 15 of the carrot and test the fit, since yarn and tension vary from maker to maker.
- Stuff the neck well. A firm neck is the difference between a head that holds up and one that flops.
- Keep stitches tight. With a small hook and cotton, snug stitches stop the stuffing from showing.
- Mind the buttonhole. Line the button up with the skipped chains before you sew it so the carrot closes neatly.
Frequently Asked Questions
Is this free crochet pattern bunny suitable for beginners?
Yes. Every piece is a simple amigurumi shape worked in a spiral. As long as you can single crochet, increase, decrease, and sew pieces together, you can make this bunny in a carrot.
What is the carrot pouch for?
The carrot works like a little sleeping bag. It opens with a buttonhole so the bunny tucks inside and peeks out, which is what makes this such a fun keepsake.
Can I make it safe for a baby?
Yes. Skip the safety eyes and button, and embroider the eyes with black yarn instead so there are no small parts.
What yarn should I use?
Cotton yarn on a 2.5 mm hook gives the bunny crisp shaping, while a plush yarn on a 4 mm hook makes the carrot soft and chunky. You can substitute similar weights.
Final Thoughts
A bunny that sleeps inside its own carrot is the kind of detail that makes people smile, and it is exactly why this project is so popular around spring and Easter. It is small, quick, and endlessly giftable. Grab some yellow and orange yarn and give this free crochet pattern bunny a try. Happy crocheting.