Free Crochet Butterfly Pattern: Make a Cute Amigurumi Butterfly Doll
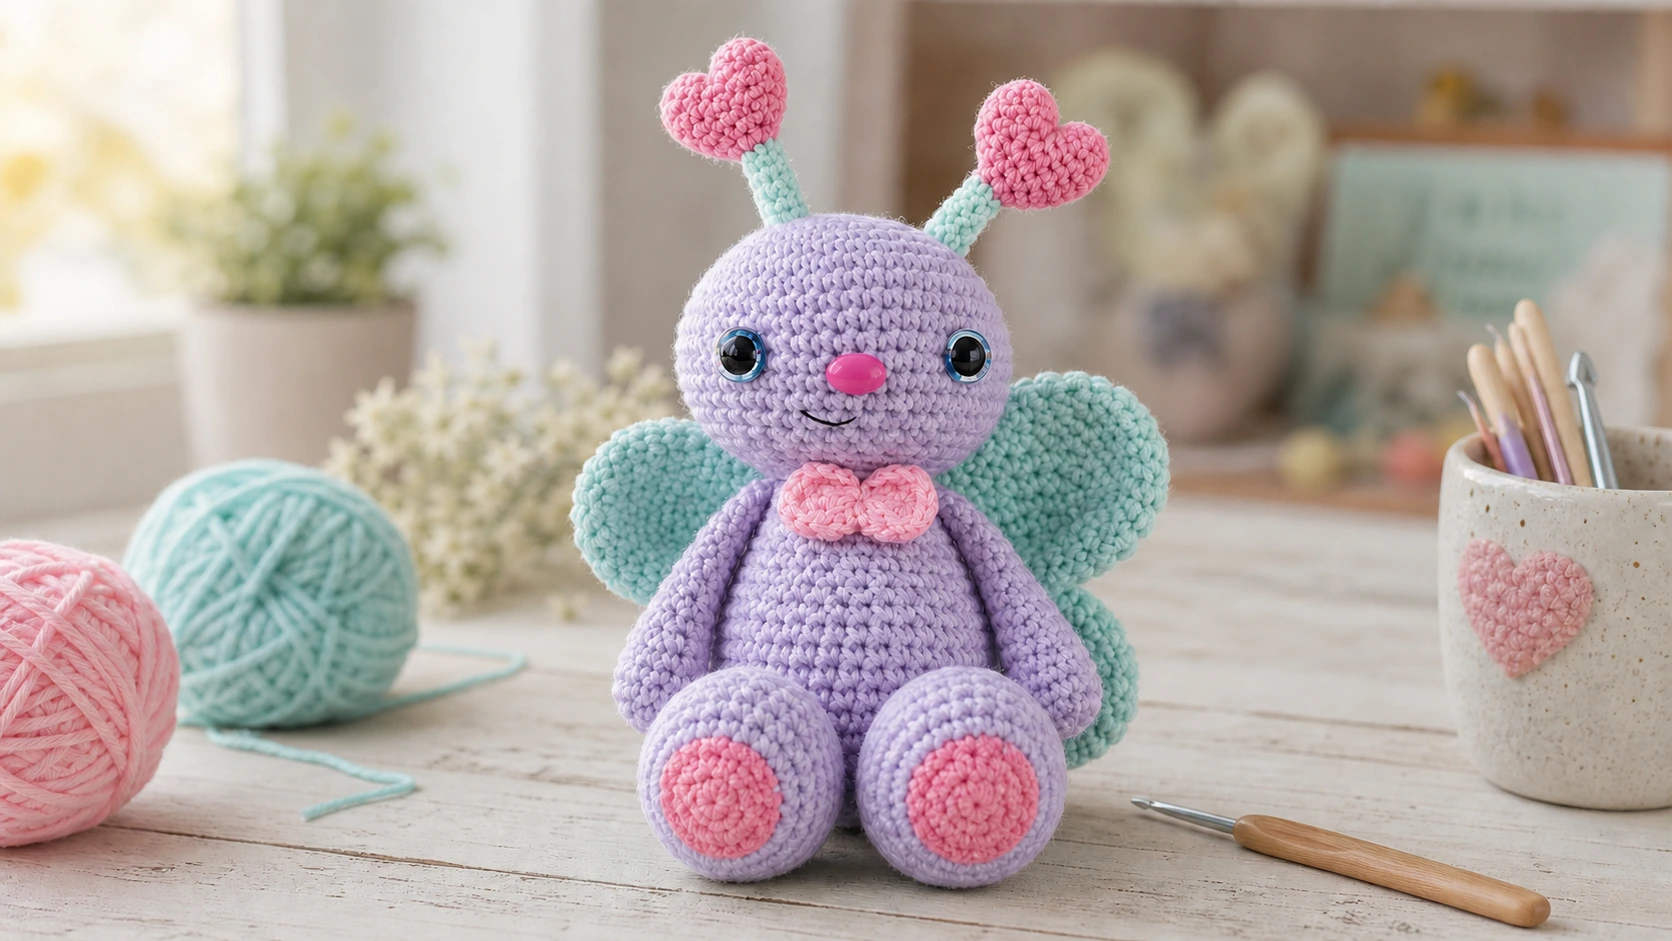
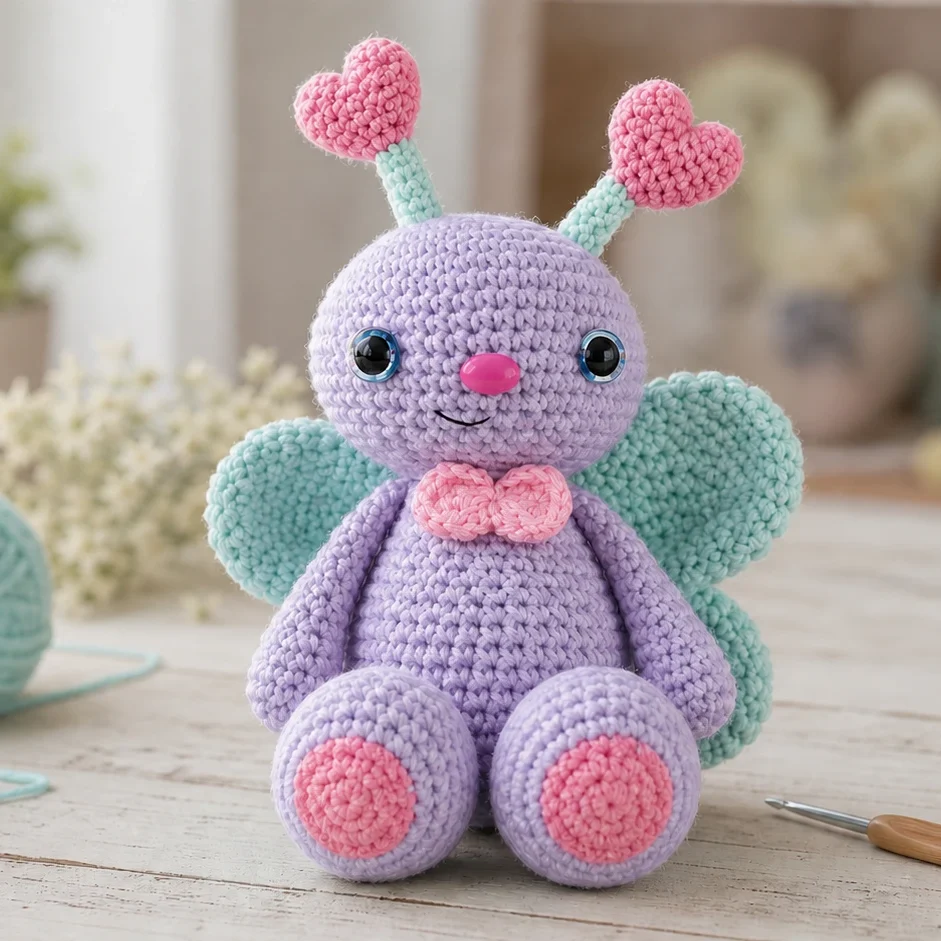
Most crochet butterflies are flat little motifs, but this one is a whole character you can hold. Say hello to Blue the Butterfly, a soft amigurumi doll about 11 inches tall with a round smiling face, chunky wings, heart-tipped antennae, and a bow tied at the neck. This free crochet butterfly pattern lands somewhere between a cuddly toy and a shelf decoration, and it makes a heartfelt handmade gift.
It is an intermediate project, which makes it a great next step for a confident beginner who is ready for a bit of assembly. Everything is written out below, piece by piece, with clear notes on where each part goes. Pick your colors and let’s make her.
A Quick Look at the Project
You crochet Blue as a set of separate pieces and sew them together at the end. The head and body are each worked in the round and then joined, while the arms, legs, wings, antennae, and bow are made on their own. Safety eyes, a small nose, and an embroidered smile finish her friendly face.
Here is what you are signing up for:
- Difficulty: Intermediate, and friendly to confident beginners
- Height when done: About 11 in / 28 cm with weight 4 yarn and a 3.25 mm hook
- How long it takes: A weekend, plus sewing
- Method: Individual pieces in continuous rounds, then assembled
What to Gather Before You Start
- Worsted weight yarn (weight 4), roughly 50 g of the main color and 25 to 50 g of each accent:
- Color A: Mint for the head, arms, upper legs, and antenna tips
- Color B: Purple for the base of the antennae
- Color C: Pink for the legs and bow
- Color D: Variegated for the wings
- A 3.25 mm (US D) hook
- A pair of 15 mm safety eyes
- A 14 mm oval nose (a triangle nose or an embroidered nose works too)
- Fiberfill stuffing
- Black and white embroidery thread
- Scissors, a sewing needle, and a stitch marker
- A pipe cleaner (optional, for the antennae)
Worth repeating: safety eyes and a plastic nose can be a choking risk for the very young. If Blue is headed to a baby, stitch the face with yarn instead.
Crochet Terms Used
This pattern is written in US terminology.
- mr — magic ring
- ch — chain
- sc — single crochet
- sl — slip stitch
- dc — double crochet
- tr — treble crochet
- inc — increase, 2 sc in one stitch
- inc3 — 3 sc in one stitch
- dec — decrease, 2 sc together
- BLO — back loops only
- F/O — fasten off
- (4 sc, inc) x 6 — repeat the bracketed sequence the stated number of times
Work in a continuous spiral, keep a marker at the start of each round, and use both loops unless the pattern says otherwise.
Step-by-Step Crochet Butterfly Instructions
Head
Worked from the top down in Color A (mint).
- 6 sc into a magic ring [6]
- inc in each st around [12]
- (sc, inc) x 6 [18]
- sc, inc, (2 sc, inc) x 5, sc [24]
- (3 sc, inc) x 6 [30]
- 2 sc, inc, (4 sc, inc) x 5, 2 sc [36]
- (5 sc, inc) x 6 [42]
- 3 sc, inc, (6 sc, inc) x 5, 3 sc [48]
9–14. sc in each st around [48]
Set the eyes between rounds 12 and 13 with 10 holes between them, and the nose between the eyes, between rounds 13 and 14. Adjust as needed for your yarn and hook.
- 3 sc, dec, (6 sc, dec) x 5, 3 sc [42]
- (5 sc, dec) x 6 [36]
Begin stuffing the head.
- 2 sc, dec, (4 sc, dec) x 5, 2 sc [30]
- (3 sc, dec) x 6 [24]
- (2 sc, dec) x 6 [18]
F/O and leave a short tail.
Body
In Color A (mint).
- 6 sc into a magic ring [6]
- inc in each st around [12]
- (sc, inc) x 6 [18]
- (inc, 2 sc) x 6 [24]
- (3 sc, inc) x 6 [30]
- 2 sc, inc, (4 sc, inc) x 5, 2 sc [36]
7–13. sc in each st around [36] - (5 sc, dec) x 4, 8 sc [32]
- (4 sc, dec) x 3, 14 sc [29]
- (dec, 7 sc) x 2, dec, 9 sc [26]
- 3 sc, dec, 16 sc, dec, 3 sc [24]
Begin stuffing the body.
- sc in each st around [24]
- 8 sc, dec, 4 sc, dec, 8 sc [22]
- sc in each st around [22]
- dec, 8 sc, dec, 10 sc [20]
- sc in each st around [20]
- (dec, 8 sc) x 2 [18]
F/O and leave a long tail for sewing.
Arms (Make 2)
In Color A (mint).
- 6 sc into a magic ring [6]
- inc in each st around [12]
3–6. sc in each st around [12]
A light stuffing in the hand end is enough from here.
- 5 sc, dec, 5 sc [11]
- sc in each st around [11]
- 4 sc, dec, 3 sc, dec [9]
- sc in each st around [9]
- 7 sc, dec [8]
12–16. sc in each st around [8]
F/O and leave a long tail. Folding and closing each arm makes sewing easier.
Legs (Make 2)
Start in Color C (pink), ch 6.
- inc in the 2nd chain from the hook, 3 sc, 4 sc in the last chain, then along the other side of the chain: 3 sc, inc [14]
- inc3, 4 sc, inc3, 2 sc, inc3, 5 sc [20]
- inc x 3, 5 sc, inc3, 4 sc, inc3, 6 sc [27]
- sc, inc x 3, 8 sc, inc3, 6 sc, inc3, 7 sc [34]
Change to Color A (mint).
5–7. sc in each st around [34]
- 17 sc, dec x 6, 5 sc [28]
Stuff the legs as you go.
- 16 sc, dec x 4, 4 sc [24]
- 15 sc, dec x 4, sc [20]
- 12 sc, dec x 4 [16]
Stop stuffing.
- (dec, 6 sc) x 2 [14]
- sc in each st around [14]
- (dec, 5 sc) x 2 [12]
- sc in each st around [12]
- (dec, 4 sc) x 2 [10]
- sc in each st around [10]
F/O and leave a long tail.
Antennae (Make 2)
Each antenna starts with two little heart humps in Color B (purple).
Heart humps (make 2)
- 6 sc into a magic ring [6]
- (sc, inc) x 3 [9]
- sc in each st around [9]
Do not F/O the second hump.
- sc into the 2nd hump to join the two, 8 more sc around, then 9 sc in the next hump [18]
- sc in each st around [18]
- (4 sc, dec) x 3 [15]
- (3 sc, dec) x 3 [12]
- (2 sc, dec) x 3 [9]
- (sc, dec) x 3 [6]
Stop stuffing and change to Color A (mint).
10–13. sc in each st around [6]
F/O and leave a long tail.
Wings (Make 2)
In Color D (variegated).
- 6 sc into a magic ring [6]
- inc in each st around [12]
- (sc, inc) x 6 [18]
- (2 sc, inc) x 6 [24]
- (3 sc, inc) x 6 [30]
6–7. sc in each st around [30] - (3 sc, dec) x 6 [24]
9–10. sc in each st around [24]
Do not stuff the wings.
- (2 sc, dec) x 6 [18]
12–13. sc in each st around [18] - (sc, dec) x 6 [12]
- sc in each st around [12]
F/O and leave a long tail. Fold each wing in half and sc it closed for easier sewing.
Bow
In Color C (pink).
- Make a magic ring and ch 4
- Into the ring: 3 tr, ch 4, sl st, ch 4, 3 tr, ch 4, sl st
F/O and leave an extra long tail for sewing.
Assembling Your Butterfly
This is the stage where Blue really takes shape, so go slowly and pin first.
- Eyes: Add a white highlight to each eye with embroidery thread, coming up from the bottom of the head to the eye without pulling too tightly. Weave in the ends.
- Head to body: Sew the head to the body, topping up the stuffing as you close.
- Antennae: Insert a twisted half pipe cleaner into the lower part of each antenna if you want them upright, then pin around rounds 6 to 8 and sew them on.
- Arms: Pin to the sides around rounds 21 to 22 and sew at a forward angle.
- Bow: Pin to the front of the neck and sew it on.
- Legs: Turn the body upside down with the face away from you, pin the legs around rounds 4 to 5, and sew.
- Wings: Pin to the back and sew them on.
- Mouth: Embroider a small smile with black thread and weave in the ends.
Give her a soft squeeze to even out the stuffing and your amigurumi butterfly is ready.
Handy Tips for a Neater Butterfly
- Crochet on the tighter side. A firm fabric keeps the stuffing hidden. If gaps appear, try a smaller hook.
- Check eye placement first. Yarn and hook changes move where the eyes should sit, so test before you set them.
- Close flat pieces before sewing. Folding and stitching the arms and wings shut makes them far easier to attach.
- Pin, then sew. Test the pose with pins before committing the wings, arms, and legs.
- Leave the wings unstuffed. They are meant to lie flat.
Frequently Asked Questions
Can a beginner make this crochet butterfly?
It is officially intermediate, but a confident beginner can handle it. Every stitch is basic, and the only trickier bits are the joined heart-hump antennae and the sewing. A little amigurumi experience helps.
Which hook and yarn work best?
Worsted weight (weight 4) yarn with a 3.25 mm hook gives the 11 inch doll. Other yarns and hooks work fine, but the size will change and you may need to move the eyes and nose.
How do I make the butterfly baby-safe?
Skip the plastic eyes and nose and embroider the face with yarn, sew every piece on tightly, and choose a washable yarn.
What if I cannot find an oval nose?
A triangle nose looks adorable, and an embroidered nose works just as well. Any of these is a fine substitute.
How do I keep the antennae upright?
Tuck a folded piece of pipe cleaner into the base of each antenna before sewing. Skip it if you prefer a softer, floppier look.
Wrapping Up
There is something satisfying about a project that looks elaborate but is built from simple pieces, and Blue the Butterfly is exactly that. Change up the colors and you can stitch a whole flutter of them. Gift her, perch her on a shelf, or hand her to a little one who will love her. However you use yours, enjoy every stitch.