Free Crochet Dinosaur Pattern: Make a Cute Amigurumi Dino at Home
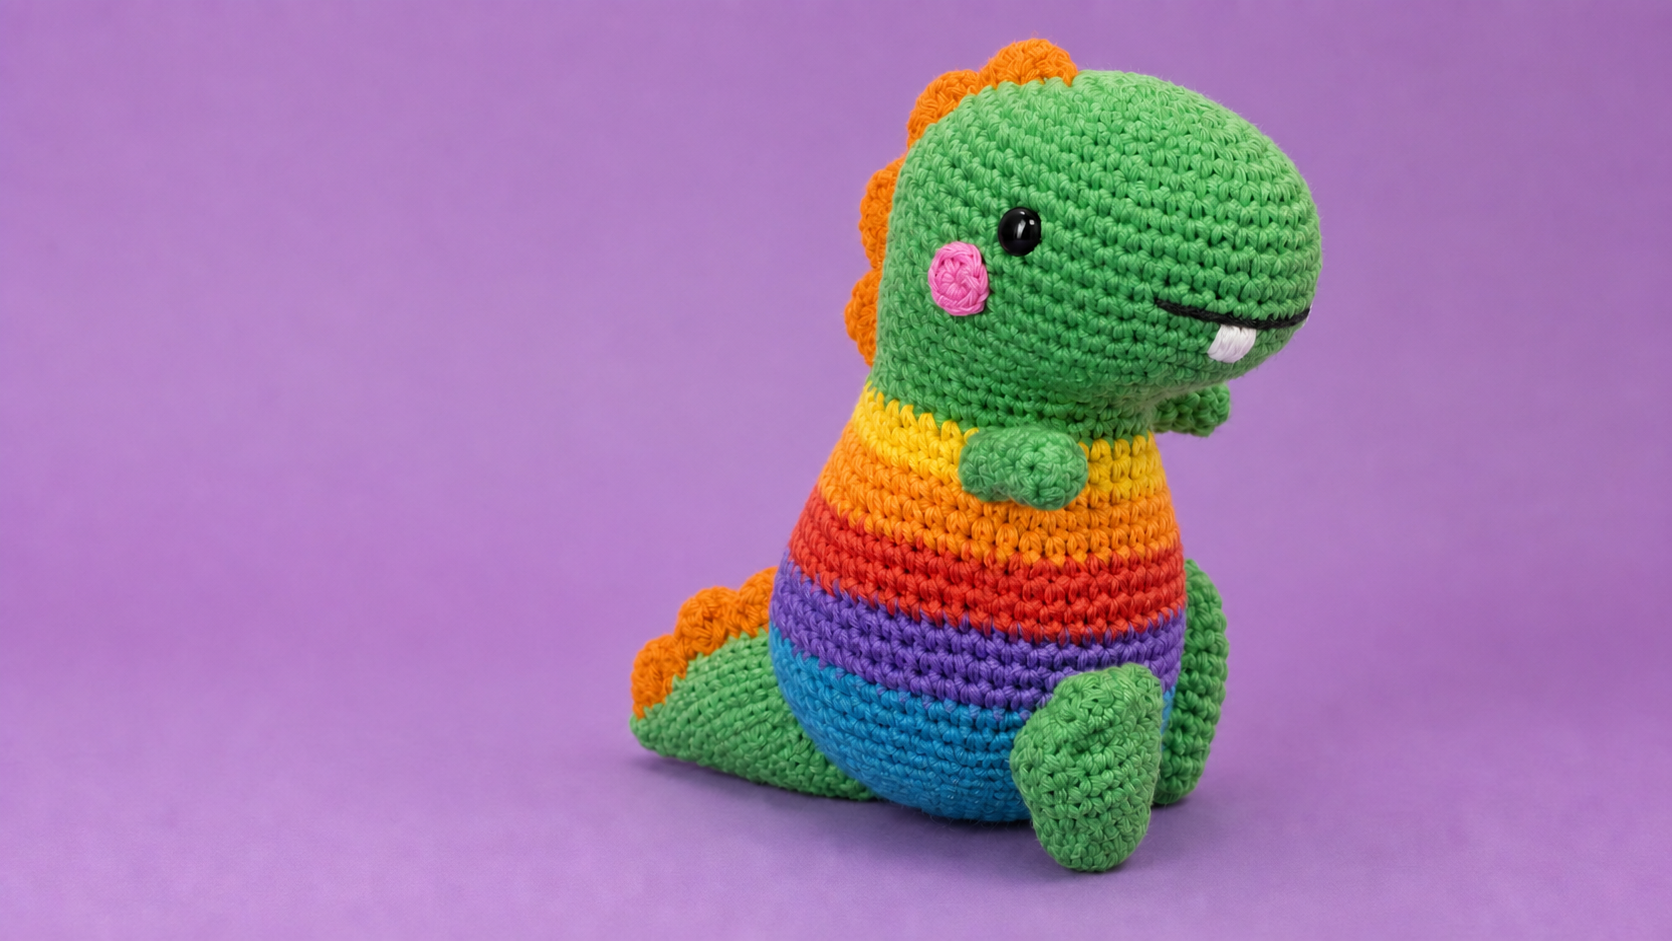
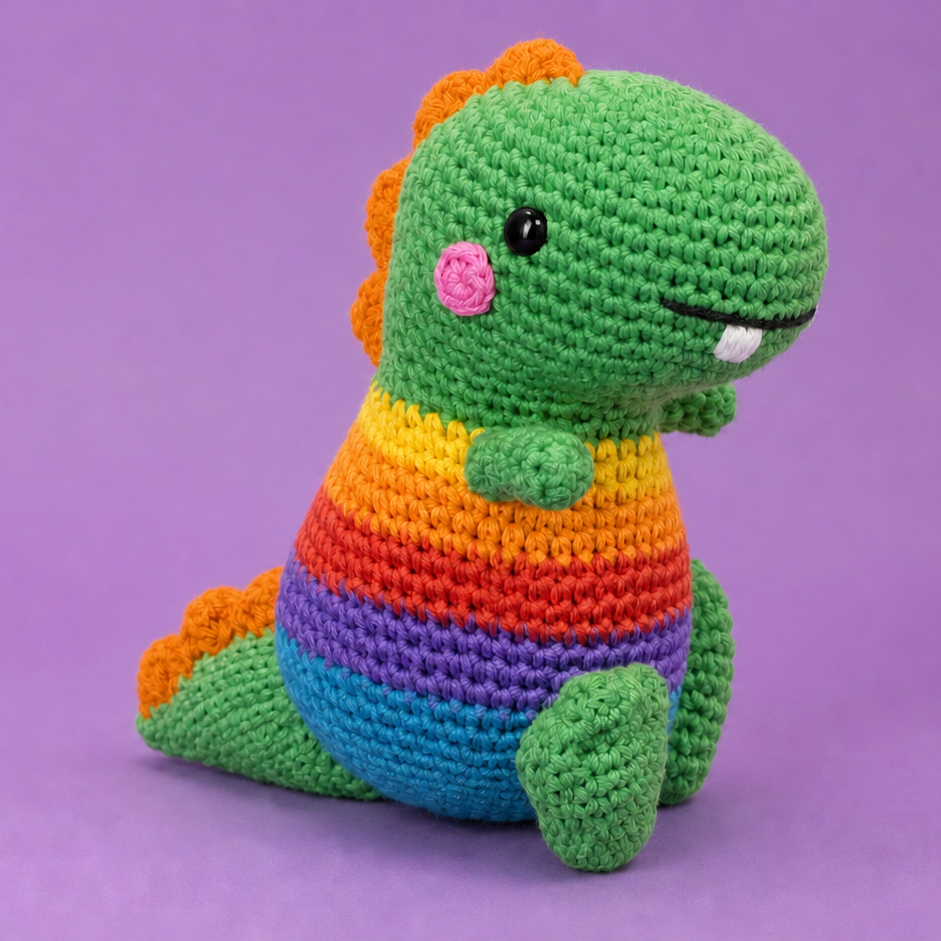
Some amigurumi projects just make you smile the moment they come off the hook, and this little dinosaur is one of them. With its round belly, tiny waving arms, and a friendly face, this free crochet dinosaur pattern gives you a chunky stuffed dino that sits up all on its own. Best of all, it only asks for stitches you probably already know.
I put this pattern together so that newer crocheters would not feel lost, while still leaving enough shaping to keep it interesting for anyone who has made a few amigurumi before. Everything you need is written out below, round by round, from the first magic ring to the final smile.
A Quick Look at the Project
This is a soft, sit-up dinosaur that finishes at roughly 7 inches (18 cm) tall. You crochet the head and body together as a single piece, then make the arms, legs, tail, spikes, and cheeks on their own and stitch them into place. The striped tummy comes from a straightforward color change, so there is no fiddly colorwork to worry about.
Here is what you are signing up for:
- Difficulty: Beginner-friendly with a little sewing at the end
- Height when done: About 7 in / 18 cm
- How long it takes: One relaxed weekend, give or take
- Method: Crocheted in continuous rounds, then assembled
What to Gather Before You Start
- Worsted or aran weight cotton yarn in the following shades:
- Green (A) for the main body
- Cream (C) for a belly stripe
- Teal or light blue (B) for a belly stripe
- Pink (D), just a little, for the cheeks
- Dark green (E), just a little, for the spikes
- A 4 mm (US G/6) crochet hook
- A pair of 10 mm safety eyes
- Toy stuffing
- A yarn needle
- A stitch marker
- Scissors
One thing worth repeating: safety eyes and little sewn-on parts can be a choking risk. If your dino is headed for a baby or young toddler, leave the plastic eyes out and stitch the face with yarn instead.
Crochet Terms Used
This pattern is written in US terminology.
- MR — magic ring
- sc — single crochet
- inc — increase (work 2 sc into one stitch)
- dec — decrease (crochet 2 stitches together)
- st / sts — stitch / stitches
- sl st — slip stitch
- rnd — round
- [ ] — repeat what is inside the brackets as many times as noted
Everything is worked in a spiral rather than joined rounds, so keep a stitch marker in the first stitch of each round and shift it up as you go.
Step-by-Step Crochet Dinosaur Instructions
Head and Body
Begin with color A (green). You will crochet straight from the head down into the body without cutting the yarn, so hold off on fastening until this whole section is finished.
- Rnd 1: 6 sc in a magic ring (6)
- Rnd 2: inc in every st (12)
- Rnd 3: [1 sc, inc] 6 times (18)
- Rnd 4: [2 sc, inc] 6 times (24)
- Rnd 5: [3 sc, inc] 6 times (30)
- Rnd 6: [4 sc, inc] 6 times (36)
- Rnds 7–12: sc around (36)
Fix the safety eyes in place between rounds 9 and 10, about 8 stitches apart, centered over the front where the snout will be.
- Rnd 13: [4 sc, dec] 6 times (30)
- Rnd 14: [3 sc, dec] 6 times (24)
- Rnd 15: [2 sc, dec] 6 times (18)
Begin stuffing the head firmly, and keep topping it up as you go.
- Rnd 16: sc around (18)
- Rnd 17: [2 sc, inc] 6 times (24)
- Rnd 18: [3 sc, inc] 6 times (30)
- Rnd 19: [4 sc, inc] 6 times (36)
Time for the belly stripes. Switch colors at the start of the round.
- Rnd 20: join color C (cream), sc around (36)
- Rnd 21: sc around (36)
- Rnd 22: join color B (teal), sc around (36)
- Rnd 23: sc around (36)
- Rnd 24: join color C (cream), sc around (36)
- Rnd 25: sc around (36)
- Rnd 26: return to color A (green), sc around (36)
- Rnd 27: sc around (36)
- Rnd 28: [4 sc, dec] 6 times (30)
- Rnd 29: [3 sc, dec] 6 times (24)
Pack in the rest of the stuffing now while you can still reach inside.
- Rnd 30: [2 sc, dec] 6 times (18)
- Rnd 31: [1 sc, dec] 6 times (12)
- Rnd 32: dec 6 times (6)
Fasten off and leave a long tail. Run it through the front loops of the last 6 stitches, draw it closed, and weave the end away.
Tail
Work this in color A (green). It is a simple cone that naturally curves once attached.
- Rnd 1: 4 sc in a magic ring (4)
- Rnd 2: inc, 3 sc (5)
- Rnd 3: inc, 4 sc (6)
- Rnd 4: inc, 5 sc (7)
- Rnd 5: inc, 6 sc (8)
- Rnd 6: inc, 7 sc (9)
- Rnd 7: inc, 8 sc (10)
- Rnd 8: sc around (10)
Fasten off, leaving a long tail. Tuck in a little stuffing and set it aside.
Arms (Make 2)
Color A (green).
- Rnd 1: 5 sc in a magic ring (5)
- Rnd 2: inc, 4 sc (6)
- Rnds 3–6: sc around (6)
Fasten off with a long tail. A small pinch of stuffing is all these need.
Legs (Make 2)
Color A (green). Their flat bottoms are what keep the dino upright.
- Rnd 1: 6 sc in a magic ring (6)
- Rnd 2: inc in every st (12)
- Rnd 3: [1 sc, inc] 6 times (18)
- Rnds 4–5: sc around (18)
- Rnd 6: [1 sc, dec] 6 times (12)
Add a light amount of stuffing.
- Rnd 7: sc around (12)
Fasten off, leaving a tail for sewing.
Back Spikes (Make 6)
Color E (dark green). Each spike is a small triangle.
- Chain 4. Work sc in the 2nd chain from the hook, hdc in the next, and dc in the last.
Fasten off each one with a tail. Six spikes make a tidy row from head to tail, but feel free to add more.
Cheeks (Make 2)
Color D (pink).
- Rnd 1: 6 sc in a magic ring, sl st into the first sc to close (6)
Fasten off with a short tail.
Assembling Your Dinosaur
This is the stage where your dino really takes shape, so go slowly and pin things first if you like.
- Legs: Attach both legs to the underside of the body, set apart so the dinosaur balances upright, flat sides down.
- Tail: Sew the tail to the lower back with the tip curling upward.
- Arms: Fasten one arm on each side, around the level of the first belly stripe.
- Spikes: Run the six spikes down the middle of the back, from just behind the head toward the tail, sewing each by its base.
- Cheeks: Stitch the pink cheeks below and slightly outside the eyes, one per side.
- Face: Using a little dark yarn, add two small nostrils near the snout and a curved smile under the eyes. A couple of tiny cream stitches make sweet little teeth if you want them.
Give the finished dino a soft squeeze to even out the stuffing, and your amigurumi dinosaur is ready.
Handy Tips for a Neater Dino
- Crochet on the tighter side. A firm fabric keeps the stuffing hidden. If gaps appear, try a smaller hook.
- Stuff as you close up. Filling the head and body in stages makes it far easier to shape than cramming it all in at the end.
- Never skip the marker. Spirals are easy to miscount, so keep that marker moving.
- Hide tails early. Catching color-change ends inside the body as you crochet means less finishing work later.
- Pin, then sew. Test the pose with pins before you commit the arms and legs.
Frequently Asked Questions
Can a beginner make this crochet dinosaur?
Absolutely. It sticks to single crochet, increases, and decreases, all built off a magic ring. If a basic crochet ball is within reach for you, so is this dino. The sewing at the end just takes patience.
Which yarn works best for amigurumi dinosaurs?
Cotton or a cotton blend in worsted or aran weight gives clean, defined stitches and keeps its shape, which suits amigurumi nicely. Acrylic is softer and more budget-friendly, so it is a solid pick for a toy that will be cuddled often.
What size does the finished dinosaur come out?
Using worsted or aran yarn with a 4 mm hook, it stands close to 7 inches (18 cm) tall. Thinner yarn and a smaller hook shrink it down, while bulkier yarn and a bigger hook scale it up.
How do I make this dino baby-safe?
Skip the plastic safety eyes and embroider the face with dark yarn. Double-check that every piece is sewn on tightly and pick a washable yarn.
How much yarn will I use?
Not much at all. A single 50 g ball of green covers the body with room to spare, and you only need scraps of pink and dark green for the cheeks and spikes.
Wrapping Up
There is something really satisfying about a project that looks like a lot of work but comes together this easily. Once you have one dinosaur finished, you will probably want to reach for different colors and make a whole little family of them. Gift it, perch it on a shelf, or use it to clear out your cotton scraps. However you use yours, enjoy every stitch.