Crochet Amigurumi Pattern Free: Easy Ladybug (Step by Step)
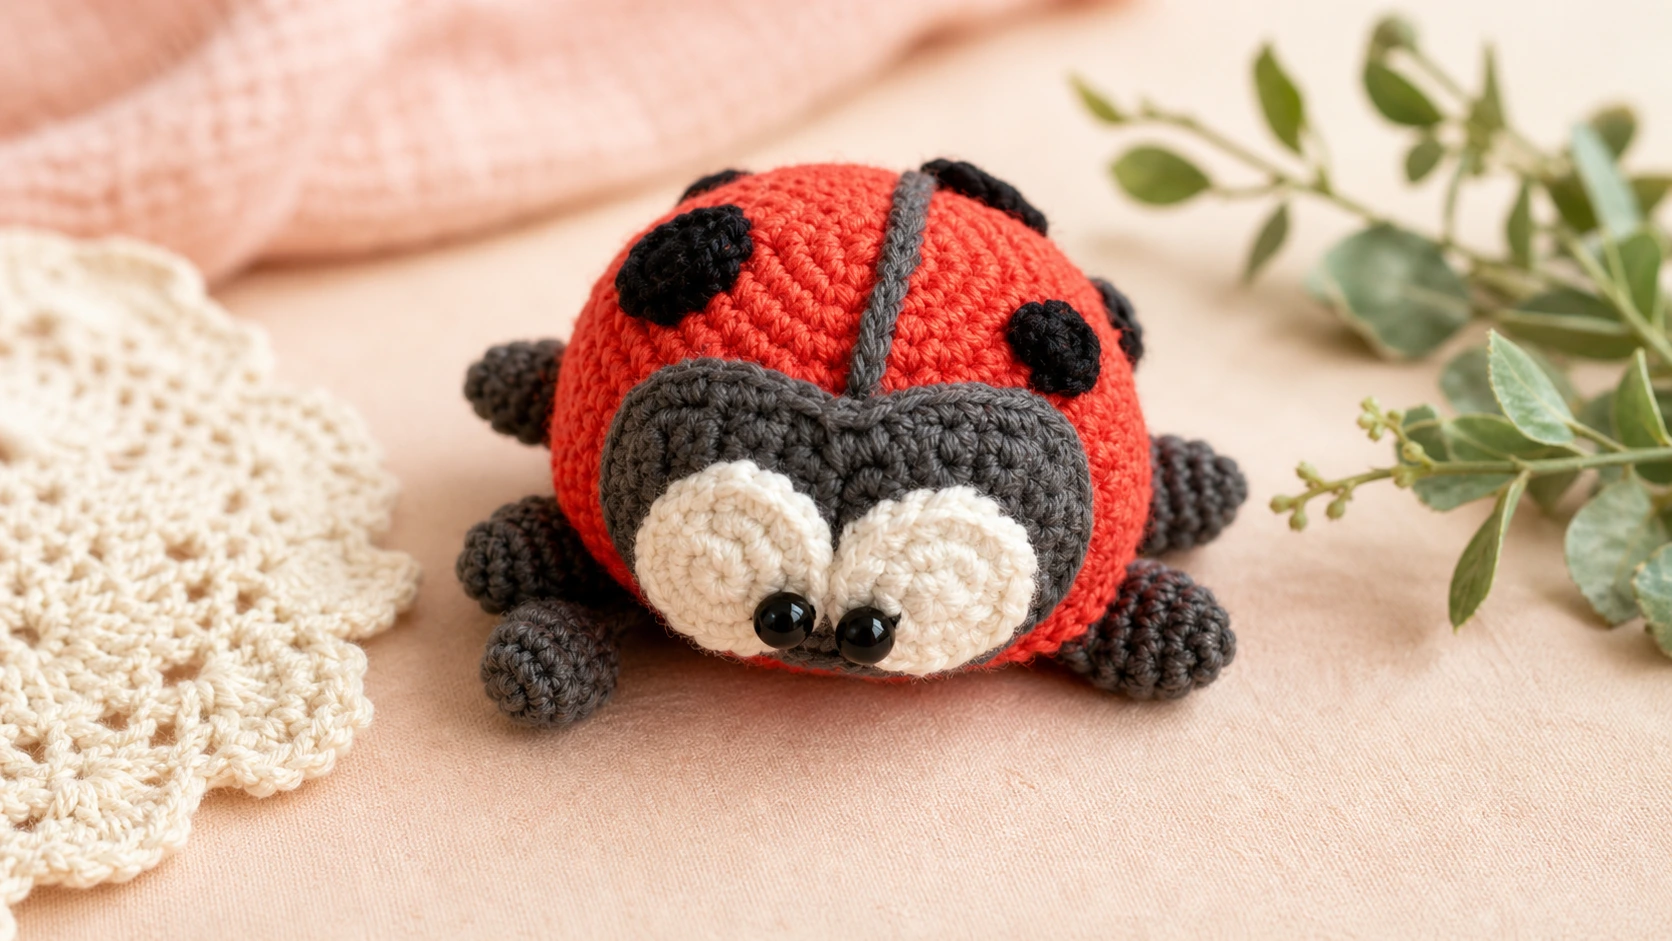
There’s something about a tiny crocheted ladybug that makes people smile before you’ve even finished it. The round red back, the little black spots, the slightly grumpy gray face. This is the project I point new makers toward when they want a first stuffed toy that actually looks finished, and it’s a complete crochet amigurumi pattern free for you to follow start to end on this page.
The whole thing is built from single crochet worked in rounds, which is the gentlest possible introduction to amigurumi. You crochet two halves of a body, sew on a handful of small pieces, and add as many spots as you feel like. No color charts, no counting lace repeats, nothing to unravel three times in frustration.
It works up small, roughly 7 cm (about 2.7 inches), so you get the satisfaction of a finished toy without committing a whole weekend to it. We share crochet amigurumi patterns free here on latifacha.com regularly, and this ladybug is one of the easiest in the collection.
Meet the Ladybug
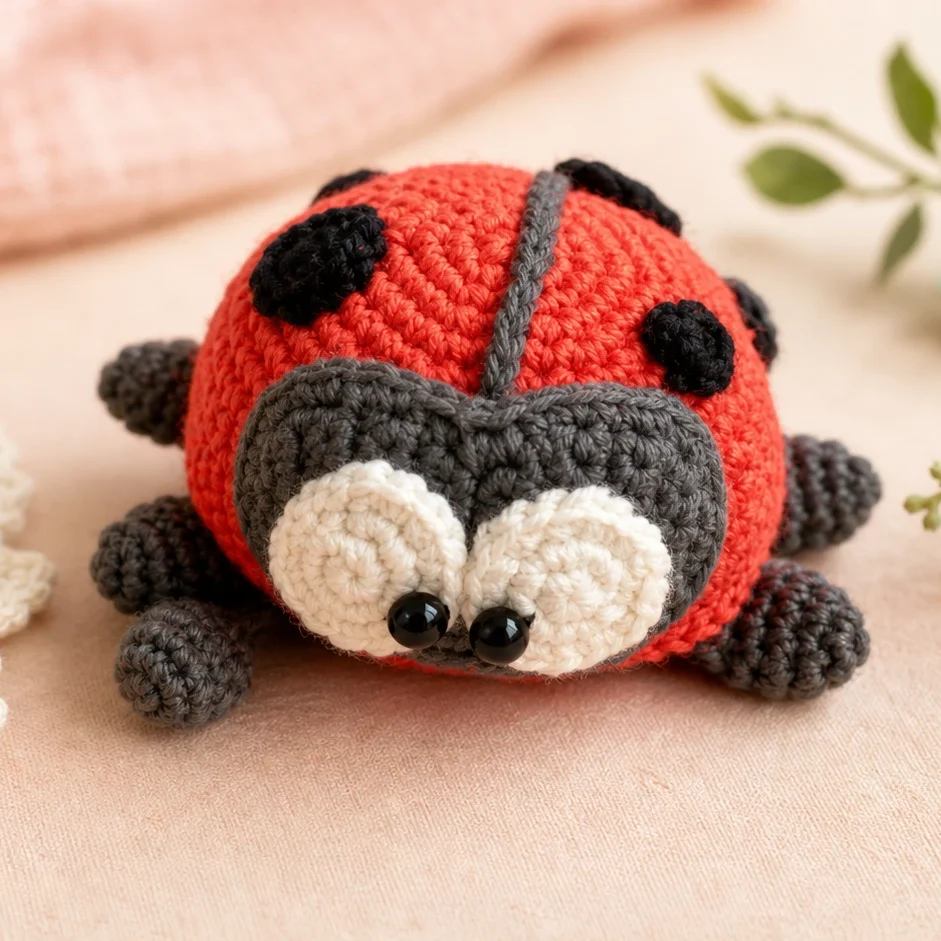
Before the stitch counts, here’s the shape of the project so you know where you’re headed. The ladybug is made of seven simple parts:
- a domed red back
- a flat gray belly that joins to the back
- a small oval gray muzzle for the face
- two round white eyes with black bead pupils
- six short gray paws
- a thin gray center line down the back
- a scatter of black spots
Only the body gets stuffed. Everything else is sewn on flat or folded, which keeps the assembly forgiving.
Is This Crochet Amigurumi Pattern Free Beginner-Friendly?
Yes, and here’s the honest reason it stays easy where some “beginner” toys don’t. The body is two rounded discs, so small tension differences disappear into the curve. There are no joins to fuss over because you work in a continuous spiral. And the face pieces are so small that even a wonky first attempt takes ten minutes to redo.
If you can make a magic ring, a single crochet, an increase, and a decrease, you already have every skill this pattern asks for. People often search for crochet patterns amigurumi and land on projects far above their level. This one genuinely meets a beginner where they are.
What You’ll Need
Yarn
DK-weight cotton in four colors. The sample uses PaintBox Yarns Cotton DK (125 m / 50 g), but any smooth DK cotton behaves the same way.
| Color | Where it goes |
|---|---|
| Red | The back / wings |
| Dark gray | Belly, muzzle, paws, center line |
| White | Eye whites (scrap amount) |
| Black | Spots (scrap amount) |
The white and black are tiny accents, so leftover bits from other projects are plenty.
Tools and notions
- 2.0 mm crochet hook. Yes, smaller than the yarn label suggests. The tight gauge is what hides the stuffing.
- Polyester fiberfill.
- Two 6 mm black beads for pupils (or embroider them, see the care section).
- Yarn needle.
- Stitch marker.
- Pins.
- Scissors.
Stitches and Abbreviations
Written in US crochet terms.
| Short | Full meaning |
|---|---|
ch | chain |
sc | single crochet |
inc | increase (work 2 sc into one stitch) |
dec | decrease (work 2 stitches together) |
sl st | slip stitch |
( ) ×n | repeat what’s in brackets n times |
(00) | total stitch count for that round |
Before You Start: Notes and Sizing
- Skill level: Easy, suitable for a confident first-timer.
- Gauge: Not critical here. Aim for stitches tight enough that no stuffing shows. If gaps appear, go down a hook size.
- Spiral vs rows: The body, belly, eyes, paws, and spots are worked in a spiral with no joining. Mark your first stitch each round. The muzzle is the one piece worked back and forth in rows.
- Finished size: About 7 cm / 2.7 in with the listed yarn and hook.
Ladybug Crochet Pattern (Round by Round)
Back — red
Spiral, red yarn.
- Rnd 1: 6 sc in a magic ring (6)
- Rnd 2: inc in each st around (12)
- Rnd 3: (1 sc, inc) ×6 (18)
- Rnd 4: (2 sc, inc) ×6 (24)
- Rnd 5: (3 sc, inc) ×6 (30)
- Rnd 6: (4 sc, inc) ×6 (36)
- Rnd 7: (5 sc, inc) ×6 (42)
- Rnd 8: sc in each st around (42)
- Rnd 9: (6 sc, inc) ×6 (48)
- Rnd 10: sc in each st around (48)
- Rnd 11: (7 sc, inc) ×6 (54)
- Rnd 12: sc in each st around (54)
- Rnd 13: (8 sc, inc) ×6 (60)
- Rnd 14: sc in each st around (60)
Keep this strand attached. You’ll use it to join the two body halves.
Belly — dark gray
Spiral, dark gray yarn.
- Rnd 1: 6 sc in a magic ring (6)
- Rnd 2: inc in each st around (12)
- Rnd 3: (1 sc, inc) ×6 (18)
- Rnd 4: (2 sc, inc) ×6 (24)
- Rnd 5: (3 sc, inc) ×6 (30)
- Rnd 6: (4 sc, inc) ×6 (36)
- Rnd 7: (5 sc, inc) ×6 (42)
- Rnd 8: (6 sc, inc) ×6 (48)
- Rnd 9: (7 sc, inc) ×6 (54)
- Rnd 10: (8 sc, inc) ×6, sl st (60)
Fasten off and cut.
Muzzle — dark gray
Worked in rows. Begin with ch 5.
- Row 1: Starting in the 2nd ch from the hook: inc, 2 sc, inc, ch 1, turn (6)
- Row 2: inc, 4 sc, inc, ch 1, turn (8)
- Rows 3–6: 8 sc, ch 1, turn (8) — 4 rows total
- Row 7: 6 sc, dec, ch 1, turn (7)
- Row 8: dec, 5 sc, ch 1, turn (6)
- Row 9: 5 sc, inc, ch 1, turn (7)
- Row 10: inc, 6 sc, ch 1, turn (8)
- Rows 11–14: 8 sc, ch 1, turn (8) — 4 rows total
- Row 15: dec, 4 sc, dec, ch 1, turn (6)
- Row 16: dec, 2 sc, dec, ch 1 (4)
Without cutting, work sc evenly all around the outer edge to tidy it, then sl st to close. Leave a long tail for sewing.
Eyes — white (make 2)
Spiral, white yarn.
- Rnd 1: 6 sc in a magic ring (6)
- Rnd 2: inc in each st around (12)
- Rnd 3: (1 sc, inc) ×6, sl st (18)
Fasten off, leaving a tail.
Paws — dark gray (make 6)
Spiral, dark gray yarn.
- Rnd 1: 5 sc in a magic ring (5)
- Rnd 2: inc in each st around (10)
- Rnds 3–5: sc in each st around (10) — 3 rounds
Fold the open end flat and work 4 sc across to close. Ch 1, fasten off, leave a tail. Leave these unstuffed.
Spots — black (make several)
Spiral, black yarn.
Larger spot:
- Rnd 1: 6 sc in a magic ring (6)
- Rnd 2: inc in each st around, sl st (12)
Smaller spot:
- Rnd 1: 6 sc in a magic ring, sl st (6)
Make a mix of sizes. Fasten off each with a tail for sewing.
Putting Your Ladybug Together
Pin everything before you commit to a stitch. That one habit is the difference between a tidy ladybug and a crooked one.
- Close up the body. Hold the red back and gray belly with wrong sides together. With the red strand still on the back, push your hook through both edge loops and sc around the rim. Stuff firmly through the gap as you near the end, then sl st, fasten off, and bury the tail.
- Run the center line. Make a 27 ch chain in gray and sew it down the middle of the red back to split the wings.
- Set the muzzle. Pin the gray muzzle to the front of the body and sew it down around the edge.
- Build the eyes. Fix a 6 mm black bead to the center of each white circle, then sew both eyes side by side onto the muzzle.
- Add the legs. Sew three paws to each side along the lower edge.
- Place the spots. Lay the black spots across the back and sew them on wherever you like.
Tuck in any stray ends and she’s done.
Beginner Tips for a Neater Finish
- A tight, even tension is the whole game with amigurumi. If you spot gaps, switch to a 1.75 mm hook and try again.
- Slide your stitch marker up every round. Spirals wander, and a misplaced increase throws off the shape.
- Feed stuffing in small pinches and shape the dome with your fingers before you seal the seam.
- Sew the eyes on last, after the muzzle is set, so you can nudge their spacing until the face looks right.
Color and Style Ideas
The red-and-black combo is the classic, but this shape takes recoloring beautifully. A soft pink or buttery yellow back reads as a sweeter, storybook bug. Swap the gray belly for cream for a lighter look. You can also vary the spot count from a tidy four to a generous dozen, since every real ladybug is different anyway. Making a little group in mismatched colors turns one quick project into a charming handmade gift set.
Washing and Care
Hand wash in cool water with a small amount of gentle soap. Press out the water rather than wringing, reshape the body by hand, and lay it flat to air dry. Skip the dryer so the stuffing keeps its shape. If you used bead or safety eyes, clean around them by hand instead of soaking. For a baby gift, leave the beads off entirely and embroider the pupils with black yarn so nothing can work loose.
Copyright and Terms of Use
This pattern is free for personal, non-commercial use. Make as many ladybugs as you like for yourself or to give away, and you’re welcome to sell a modest number of finished toys you’ve crocheted by hand. Please don’t copy, republish, or redistribute the pattern text or photos, and don’t sell it as your own work. To share it, link to this page on latifacha.com rather than reposting it. For questions, email contact@latifacha.com.
Ladybug Crochet FAQ
Where can I find this crochet amigurumi pattern free?
Right here. The complete crochet amigurumi pattern free of charge lives on this page, with no email sign-up or download wall. Read it on screen or print it for your own use whenever you’d like to start.
Do I need experience to follow crochet patterns amigurumi like this?
Not much. Crochet patterns amigurumi beginners can manage usually come down to single crochet plus increases and decreases, and that’s all this ladybug uses. If you’ve made a simple granny square or a basic ball, you’re more than ready.
What hook should I use for a crochet pattern amigurumi this small?
Go smaller than the yarn label says. For a crochet pattern amigurumi worked in DK cotton, a 2.0 mm hook gives the dense, gap-free fabric you want. If your stuffing still peeks through, drop to 1.75 mm.
Can I make the ladybug safe for a baby?
Yes. Leave out the beads and embroider the eyes with a few wraps of black yarn so there are no small parts. Safety eyes locked in before you close the eye pieces are another secure choice for older children.
Why are my rounds leaving little gaps?
That’s almost always tension. Hold the yarn a touch firmer and use a smaller hook. Amigurumi fabric should feel stiff and tight compared to a wearable, which is exactly what stops the stuffing from showing.