Free Crochet Lovebird Pattern: Make a Cute Amigurumi Parrot
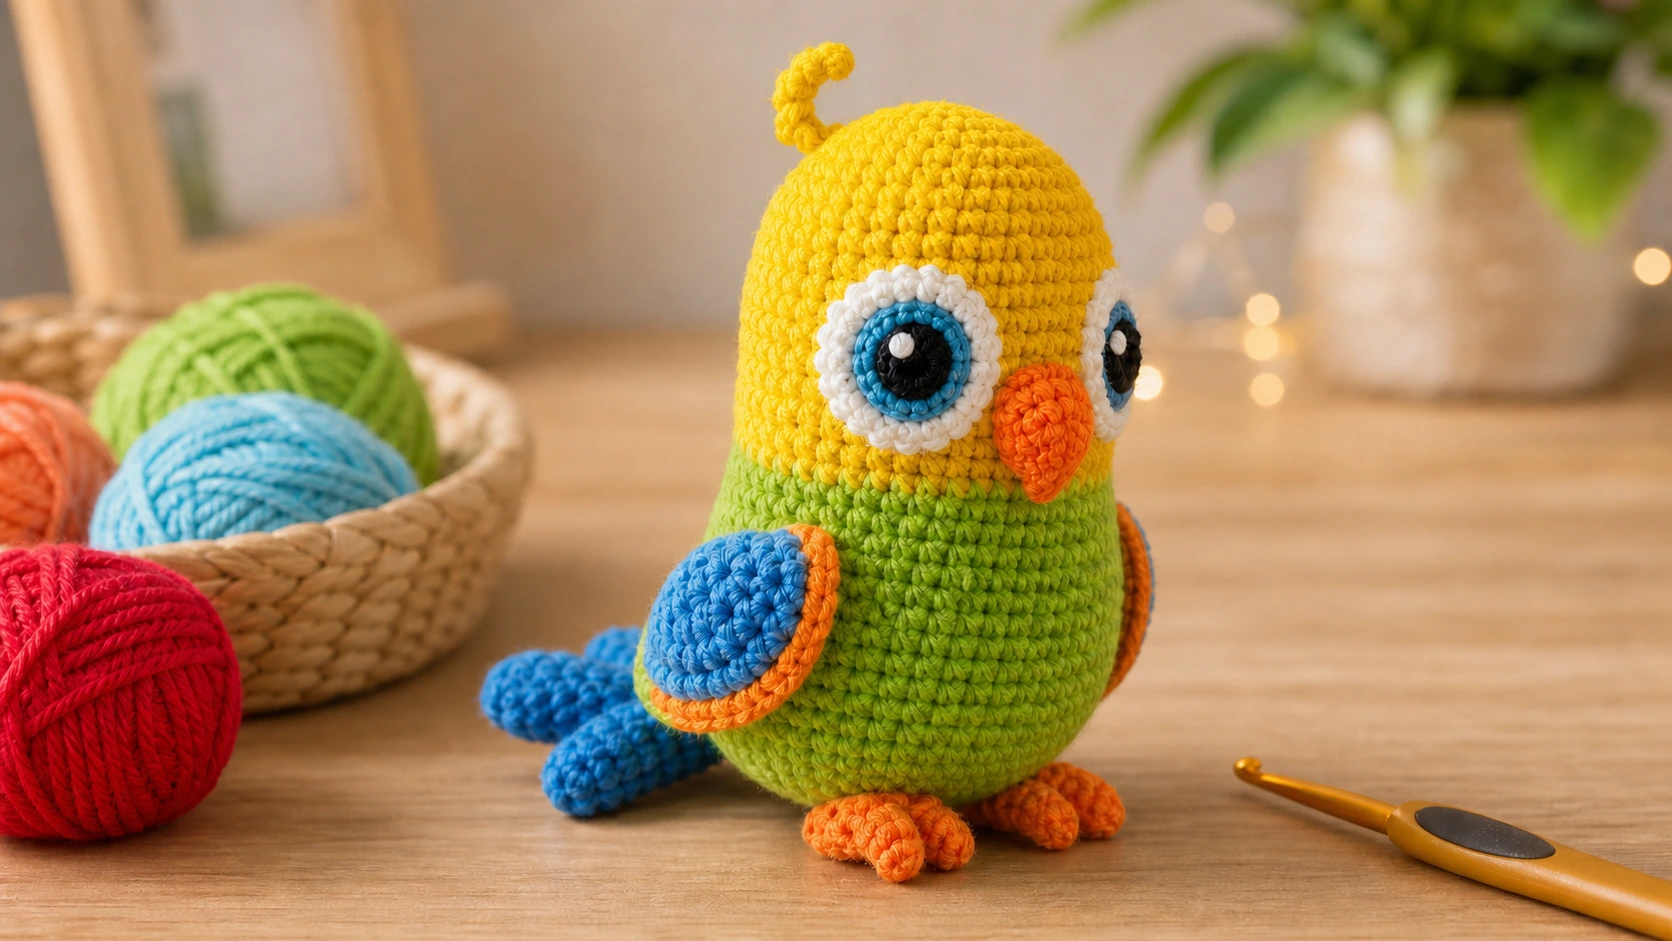
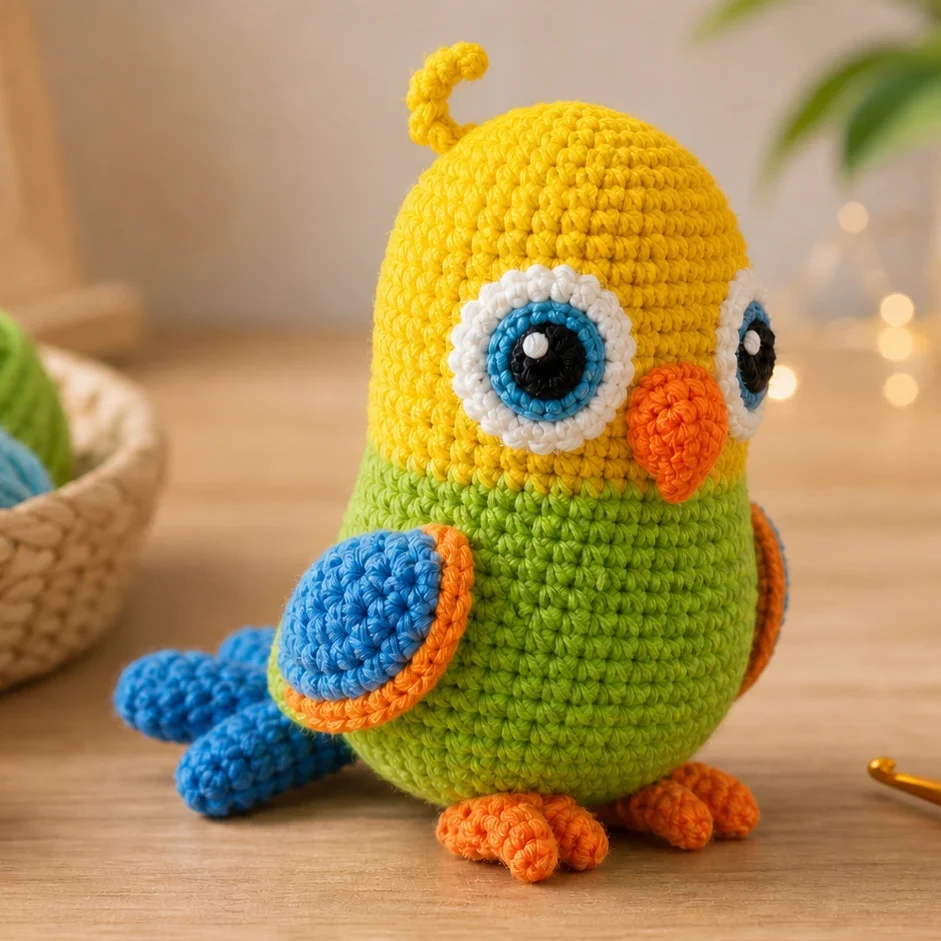
Some amigurumi are all about bright color, and this little lovebird is a perfect example. With a cheerful red head, a green body, blue wings and tail, and a pair of big layered eyes, this free crochet lovebird pattern gives you a rounded parrot full of character. The best part is that the same pattern becomes a yellow parrot with only two small additions, so one project can turn into a whole aviary.
This one rewards a bit of patience rather than speed, and the finished bird really does look the part. Everything is written out below, piece by piece, along with clear notes on assembly. Gather your most colorful yarn and settle in.
A Quick Look at the Project
You crochet the lovebird as a set of separate pieces and join them at the end. The body is a single shaped piece with a color change from red to green, while the wings, tail, legs, beak, tuft, and eyes are made on their own. Those layered eyes, worked in black, blue, and white, are the detail that makes the whole bird come alive.
Here is what you are signing up for:
- Difficulty: Intermediate
- Result: A plump little parrot with expressive eyes and a curled tail
- How long it takes: A weekend, give or take
- Method: Individual pieces in rounds, sewn together at the end
What to Gather Before You Start
- Soft sport or light weight yarn. The sample uses Himalaya Dolphin Baby in:
- Lovebird: red, green, orange, blue, white
- Parrot: yellow, grey, beige, white
- Black, white, and blue yarn for the eyes (the original uses Yarn Art Jeans)
- A 3.5 mm hook for the body and a 2.0 mm hook for the eyes
- Toy stuffing
- Scissors and a large-eye needle
Crochet Terms Used
This pattern uses US terminology.
- MR — magic ring
- sc — single crochet
- dc — double crochet
- ch — chain
- inc — increase, 2 sc in one stitch
- dec — decrease, 2 sc together
- sl st — slip stitch
- t — times to repeat
Work in a spiral and keep a marker in the first stitch of each round unless noted.
Step-by-Step Crochet Lovebird Instructions
Eyes
The two eyes are worked slightly differently. Use the 2.0 mm hook throughout.
Left eye
- Rnd 1: black, 6 sc into MR [6]
- Rnd 2: inc 6t [12]
- Rnd 3: (1 sc, inc) 6t [18]
- Rnd 4: blue, 2 sc, 3 inc, 2 sc, sl st (11 blue sts), then black, 10 sl st [21]
- Rnd 5: white, 1 sl st, (1 sc, inc) 3t, 1 sc, 3 sl st [14], fasten off
- Rnd 6: turn the eye wrong side out and work 10 sl st in black, leaving 4 white sc free
Right eye
- Rnd 1: black, 6 sc into MR [6]
- Rnd 2: inc 6t [12]
- Rnd 3: (1 sc, inc) 6t [18]
- Rnd 4: blue, 1 sl st, 2 sc, 3 inc, 2 sc (11 blue sts), then black, 10 sl st
- Rnd 5: white, 3 sl st, 1 sc, (inc, 1 sc) 3t, 1 sl st [14], fasten off
- Rnd 6: mark the 5th white stitch from the bottom of the round, turn the eye wrong side out, and work 9 sl st in black from there
Body
Begin in red.
- Rnd 1: ch 2, 6 sc into the 2nd chain from the hook [6]
- Rnd 2: inc 6t [12]
- Rnd 3: (3 sc, 3 inc) 2t [18]
- Rnd 4: 3 sc, (1 sc, inc) 3t, 3 sc, (1 sc, inc) 3t [24]
- Rnd 5: 3 sc, (2 sc, inc) 3t, 3 sc, (2 sc, inc) 3t [30]
- Rnd 6: 3 sc, (3 sc, inc) 3t, 3 sc, (3 sc, inc) 3t [36]
- Rnd 7: 3 sc, (4 sc, inc) 3t, 3 sc, (4 sc, inc) 3t [42]
- Rnd 8: 3 sc, (5 sc, inc) 3t, 21 sc [45]
- Rnds 9–16: 45 sc
- Rnd 17: 15 sc, inc, 29 sc [46]
- Rnd 18: 46 sc
- Rnd 19: 15 sc, inc, 30 sc [47]
- Rnd 20: 15 sc in red, change to green, 32 sc
- Rnd 21: 16 sc, inc, 30 sc [48]
- Rnd 22: 48 sc
- Rnd 23: 17 sc, inc, 30 sc [49]
- Rnd 24: 49 sc
- Rnd 25: 18 sc, inc, 30 sc [50]
- Rnd 26: 50 sc
- Rnd 27: 19 sc, inc, 30 sc [51]
- Rnd 28: 19 sc, inc, 31 sc [52]
- Rnd 29: 20 sc, inc, 31 sc [53]
- Rnd 30: 21 sc, inc, 31 sc [54]
- Rnd 31: (dec, 7 sc) 6t [48]
- Rnd 32: 3 sc, (dec, 6 sc) 5t, dec, 3 sc [42]
- Rnd 33: (dec, 5 sc) 6t [36]
- Rnd 34: 2 sc, (dec, 4 sc) 5t, dec, 2 sc [30]
- Rnd 35: (dec, 3 sc) 6t [24]
- Rnd 36: (dec, 2 sc) 6t [18]
- Rnd 37: (dec, 1 sc) 6t [12]
- Rnd 38: dec 6t, or close the hole by stitching
Stuff firmly before you finish closing.
Tail
Large piece (make 1) in blue.
- Rnd 1: ch 2, 6 sc into the 2nd chain from the hook [6]
- Rnd 2: inc 6t [12]
- Rnd 3: 12 sc
- Rnd 4: dec, 10 sc [11]
- Rnd 5: dec, 9 sc [10]
- Rnd 6: dec, 8 sc [9]
- Rnd 7: dec, 7 sc [8]
- Rnd 8: dec, 6 sc [7]
- Rnd 9: dec, 5 sc [6]
- Rnd 10: dec, 4 sc [5]
- Rnd 11: dec, 3 sc [4], leave a tail
Small pieces (make 2)
- Rnd 1: ch 2, 6 sc into the 2nd chain from the hook [6]
- Rnd 2: (1 sc, inc) 3t [9]
- Rnd 3: 9 sc
- Rnd 4: dec, 7 sc [8]
- Rnd 5: dec, 6 sc [7]
- Rnd 6: dec, 5 sc [6]
- Rnd 7: dec, 4 sc [5]
- Rnd 8: dec, 3 sc [4], leave a tail
Wings (Make 2)
In blue.
- Rnd 1: ch 2, 6 sc into the 2nd chain from the hook [6]
- Rnd 2: inc 6t [12]
- Rnd 3: (3 sc, 3 inc) 2t [18]
- Rnd 4: 3 sc, (1 sc, inc) 3t, 3 sc, (1 sc, inc) 3t [24]
Fold in half and slip stitch 12 through both edges.
Legs (Beak Color)
Each leg has one big toe and two little toes.
Big toe
- Rnd 1: ch 10, work 9 sc from the 2nd chain from the hook, turn [9]
- Rnd 2: 9 sc
- Rnd 3: fold lengthwise, work 9 sl st, leave a tail
Little toes
- Rnd 1: ch 8, work 7 sc from the 2nd chain from the hook, turn [7]
- Rnd 2: 7 sc
- Rnd 3: fold, work 7 sl st, leave a tail
Tuft Feather
- ch 8 in red, then from the 2nd chain from the hook: 1 sl st, 1 sc, 3 sc, 1 sc, 1 sl st [7 sts], leave a tail
Beak
In orange.
- Rnd 1: ch 2, 6 sc into the 2nd chain from the hook [6]
- Rnd 2: (1 sc, inc) 3t [9]
- Rnd 3: (2 sc, inc) 3t [12]
- Rnd 4: (3 sc, inc) 3t [15]
- Rnds 5–7: 15 sc
- Rnd 8: stuff lightly, sc 8 through both edges, leave a tail
Eye Whites
- Rnd 1: ch 6, from the 2nd chain from the hook: (3 sc into 1 st, 3 sc) 2t [12]
- Rnd 2: (3 inc, 3 sc) 2t [18]
- Rnd 3: (inc, 1 sc) 3t, 3 sc, 2 sl st, leave a tail
Assembling Your Lovebird
Pin everything first so you can judge the face before sewing.
- Beak: Sew it across rounds 12 to 18 on the front.
- Eyes: Attach the eye whites, then the layered eyes on top, keeping each about 1 stitch from the beak. Add a white flare on each pupil.
- Tail: Sew the large tail piece to the back with a small piece on each side.
- Legs: Attach the legs underneath so the bird sits.
- Wings: Sew one to each side.
- Tuft: Stitch it to the top of the head.
The Yellow Parrot Version
To make the parrot, keep every step the same but switch to the yellow, grey, beige, and white palette and add two extra pieces: cheeks and a second head tuft.
Handy Tips for a Neater Bird
- Work the eyes under good light. They are fiddly but they carry the whole face, so give them your full attention.
- Crochet on the tight side. Dense stitches keep the stuffing hidden and the shape smooth.
- Pin, then sew. The face reads correctly only when the beak and eyes are aligned, so check before you commit.
- Stuff firmly. A well-filled body keeps its round parrot shape.
- Hide tails early. Catch color-change ends inside the body as you crochet to save finishing time.
Frequently Asked Questions
Can a beginner make this crochet lovebird?
It is an intermediate make. The stitches are simple, but the layered eyes and the sewing take patience. If you have finished a couple of amigurumi, you can do it.
Which yarn is best for the lovebird?
A soft sport-weight yarn like Himalaya Dolphin Baby gives the smoothest, plushest result, but any light or DK yarn works. Use a slightly small hook for tight stitches.
Do I have to crochet the eyes, or can I use safety eyes?
Safety eyes are quicker, but the crocheted layered eyes are what give the bird its charm, so they are worth the effort.
How do I make the parrot instead of the lovebird?
Use the yellow palette and add cheeks and a second tuft. The construction is otherwise identical.
What size will my bird be?
With the recommended sport-weight yarn and a 3.5 mm hook, it comes out small and palm-sized. Bulkier yarn and a larger hook make a bigger bird.
Wrapping Up
This colorful little lovebird is a satisfying project that teaches you a few new tricks, especially with its layered eyes, and looks wonderful once it is done. Finish one and the yellow parrot version is right there tempting you to keep going. However many you make, enjoy every stitch.