Crochet Flowers Free Patterns: Easy Step-by-Step Guide
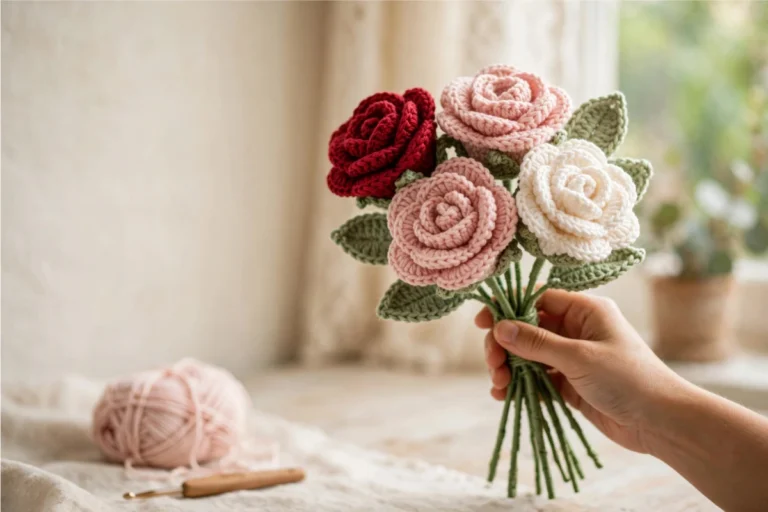
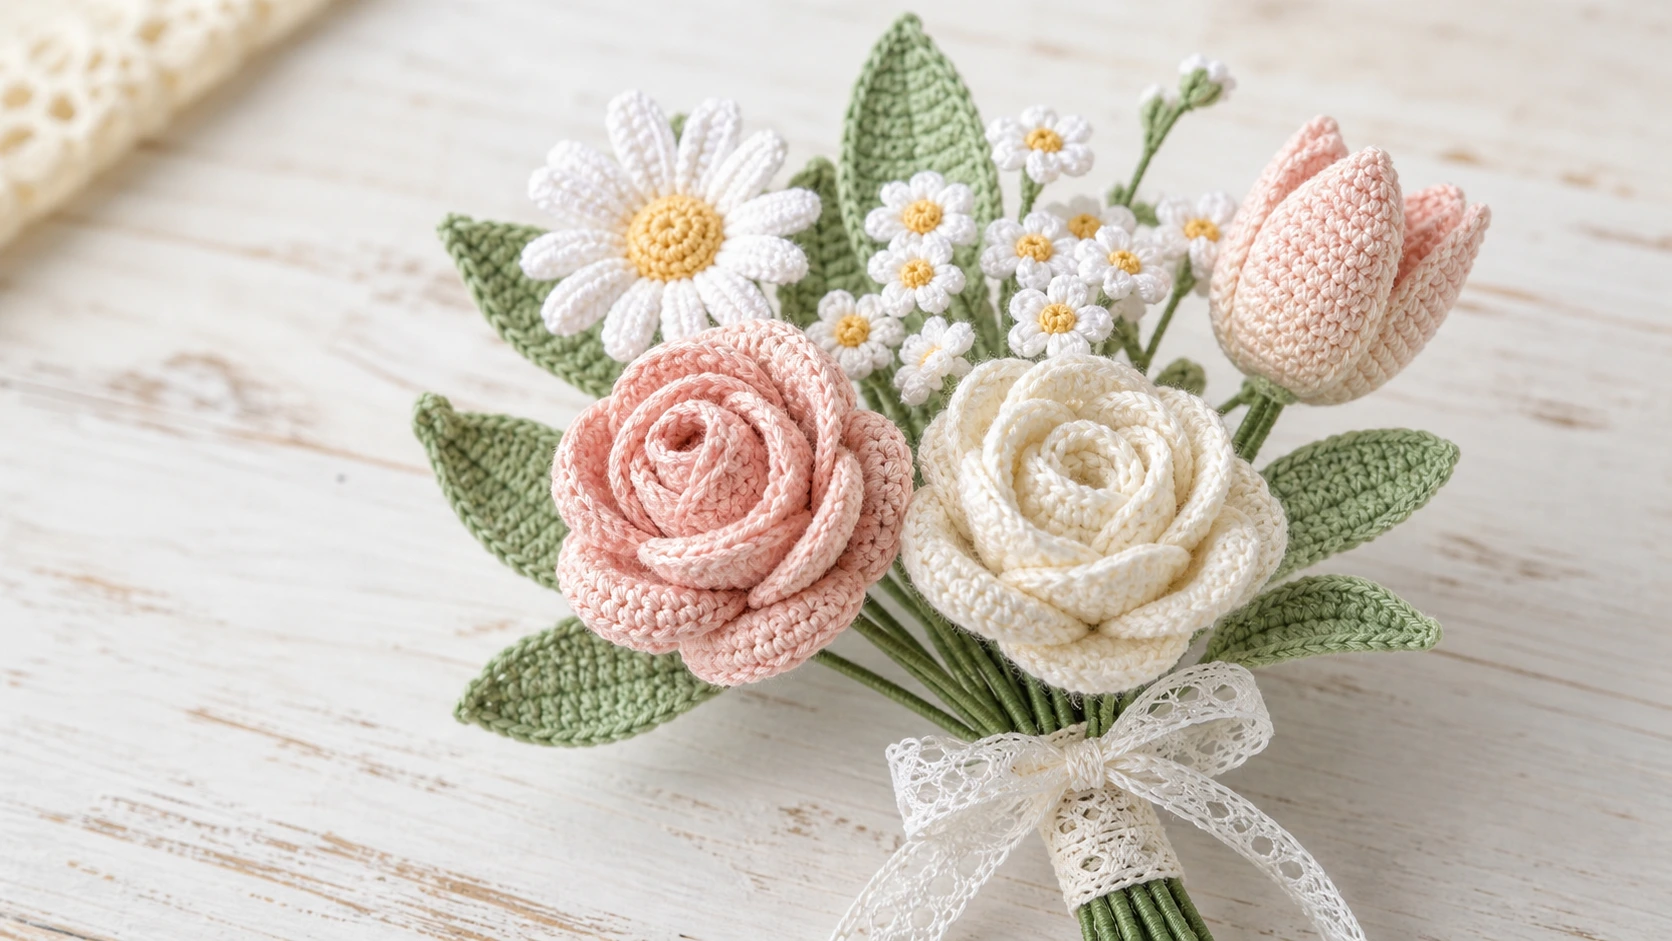
A bouquet of crochet flowers never wilts, never needs water, and lasts for years on a shelf or a desk. That’s exactly why these crochet flowers free patterns are worth a weekend of your time. This set gives you everything to stitch a full arrangement: a soft rolled rose, a fuller layered rose, a cheerful daisy, a cluster of tiny baby daisies, a sweet tulip, and a branch of leaves to tie it all together.
The whole thing is made for beginners. None of the flowers use anything beyond basic stitches, and most of them are small enough to finish in an evening. You can stitch one stem as a quick gift, or work through the full set and wrap them up into the bouquet you see at the top of this post.
The colors are entirely yours to choose. Soft blush, cream, and sage give a romantic, vintage feel, but a brighter mix looks just as lovely. Reach for the yarn you already have and the flowers will turn out beautiful either way.
All instructions are written in US crochet terms. If you usually work in UK terms, glance at the abbreviations below before you pick up your hook.
Supplies You’ll Need
The supply list is short, and you can build the whole bouquet from a few odds and ends.
Yarn
- 4-ply cotton or milk cotton in your flower colors (think pink, white, cream, and yellow)
- A grass or sage green 4-ply for stems, leaves, and the back of the daisy
Hook
- 2 mm to 2.5 mm crochet hook. A small hook keeps the petals neat and dense
For shaping and stems
- Thin bendable floral wire, around 0.6 mm, to shape petals and leaves
- Thicker wire, around 2 mm, or slim wooden sticks for the stems. Bendable wire lets you curve the stems around a vase later
Extras
- Hot glue gun and glue
- A pinch of polyester fiberfill for the daisy center
- Tapestry needle and scissors
- Optional: a little blush or chalk pastel to tint the edges of pale petals
About sizing: a 4-ply yarn paired with a 2 to 2.5 mm hook gives the flower size shown in the photos. Move up to a heavier yarn and a bigger hook and your flowers grow with it, which is great if you want oversized blooms.
Stitch Abbreviations (US Terms)
| Short form | Full stitch |
|---|---|
ch | chain |
sc | single crochet |
hdc | half double crochet |
dc | double crochet |
tr | treble crochet |
inc | increase (two stitches in one) |
dec | decrease |
w | three stitches worked into the same stitch |
MR | magic ring |
BLO | back loop only |
FLO | front loop only |
sk | skip the next stitch |
sl st | slip stitch |
rep | repeat |
FO | fasten off |
YO | yarn over |
Whenever a step says “add wire,” lay a piece of thin floral wire along the edge of the work and crochet over it. That wire is what lets you bend and shape each petal or leaf once it’s done.
Good to Know Before You Begin
- Skill level: easy. If you can chain, sc, hdc, and dc, you can make every flower here.
- Petals grow along a chain. Most start as a foundation chain that you then work down one side, around the tip, and back up the other. The
w(three stitches in one) rounds out the point of a petal or leaf. - Loose chains are your friend. The rose has a long starting chain of 50-plus stitches, and it’s easy to pull those too tight. Keep them relaxed so you can find each stitch on the next row.
- A wobbly count is fine. These are flowers, not amigurumi. A stitch off here or there at the edge of a petal won’t show once everything is assembled.

The Flower Patterns
Below are all six flowers plus the leaf branch, arranged from the quickest to the most involved. Make as many of each as your bouquet needs. There’s no set number, so mix freely.
Baby Daisies
These five-petal mini flowers stitch up in minutes and are perfect for filling gaps.
- R1: 5 sc in MR
- R2: into each sc, work (ch 2, 3 dc, ch 2, sl st), repeat 5 times for 5 petals
For the middle, run a few stitches of a contrasting color through the center to form a small knot. Make a handful, gather their tails onto a single wire, and wrap the wire in green yarn for a shared stem. A light brush of blush on the petal tips gives pale yarn a pretty gradient.
Classic Daisy
Center (make one yellow and one green)
- R1: 6 sc in MR
- R2: 6 inc (12)
- R3: 12 sc, FO
Hold the yellow center (front) and green center (back) with wrong sides facing and stitch around to join them. Tuck a little fiberfill inside before you close the last gap so the middle sits plump.
Petals (12 total)
- Working into the edge stitches, (ch 3, dc, ch 3, sl st), repeat 12 times around the center
That gives a ring of 12 petals around the yellow middle.
Finishing: push the stem straight into the back of the green center, or slip it between the two centers before you finish joining them. Either holds well. Wrap the stem in green yarn.
Tulip
Small petals (make 3)
- R1: ch 12
- R2: (add wire) sk first ch, sc, hdc, 7 dc, hdc, w, hdc, 7 dc, hdc, sc
- R3: 23 sc along the row, sl st, FO
Big petals (make 3)
- R1: ch 13
- R2: sk first ch, 11 sc, w, 11 sc
- R3: (add wire) sc, hdc, 9 dc, hdc, w, hdc, 9 dc, hdc, sc
- R4: 27 sc, sl st, FO
Big leaf (make 1)
- R1: ch 31
- R2: (add wire) sk first ch, 3 sc, 3 hdc, 18 dc, 3 hdc, 2 sc, w, 2 sc, 3 hdc, 18 dc, 3 hdc, 3 sc, sl st, FO
Finishing: glue the three small petals around the top of the stem first, curling them inward so they cup like a closed bud. Add the three big petals around the outside in a ring. Set the leaf lower on the stem, then wrap the whole stem in green yarn to hide the wire.
Leaf Branch
A leafy stem fills out the bouquet and covers any bare wire.
- R1: ch 12
- R2: (add metallic wire to hold the shape) sk first ch, sc, hdc, dc, 5 tr, dc, hdc, w, hdc, dc, 5 tr, dc, hdc, sc, sl st, FO
Make 5 to 7 leaves depending on how full you want the branch, then attach them along one stick or wire so they fan out from the stem. Wrap the whole thing in green yarn so it reads as a single growing branch.
Rolled Rose (Type 1)
This rose looks complicated, but it’s one long ruffled strip you roll up at the end.
Petal strip
- R1: ch 53
- R2: 52 sc
- R3: ch 5, dc into the same stitch, sk 2. For the rest of the row: (dc, ch 2, dc) all in the same stitch, sk 2, repeat to the end
- R4: ch 3, then in the next space work (2 dc, ch 2, 2 dc). In the next space above work (2 dc, ch 2, 2 dc). Repeat to the end
- R5: *ch 1, then work 8 dc in the next space, followed by 1 sc in the following space. Repeat from * to the end, sl st, FO
Flower bottom (calyx)
- R1: in a MR, (ch 3, 20 dc, sl st)
- R2: ch 8, then on that chain work (sk first ch, 2 sc, 2 hdc, 2 dc, 1 tr), sk 3 on the ring, sl st. Repeat 5 times to form a star shape, sl st, FO
Rose leaf
- R1: ch 12, sk first ch, sc, hdc, 7 dc, hdc; then along the other side of the chain: w, hdc, 7 dc, hdc, sc
- R2: (add wire) sc, ch 2, repeat to the end, sl st, FO
Finishing: roll the petal strip up tightly, beginning at the first chain so the smallest ruffles sit at the heart of the rose. Add a dab of hot glue as you roll to lock each turn. Glue the star calyx underneath, attach the leaf and stem, and wrap with green yarn.
Layered Rose (Type 2)
This version is built from separate petals that you wrap one by one, smallest to largest.
Small petal (make 4)
- R1: 10 dc in MR
- R2: 10 hdc inc
- R3: 6 sc, 8 hdc inc, 6 sc
Midi petal (make 4)
- R1: 10 dc in MR
- R2: 10 hdc inc
- R3: (2 sc, sc inc) repeat around
- R4: 8 sc, 9 hdc inc, 9 sc
Big petal (make 5)
- R1: 10 dc in MR
- R2: 10 hdc inc
- R3: (hdc, hdc inc) repeat around
- R4: 8 sc, 6 hdc inc, (hdc, dc in same st), ch 3, (dc, hdc in same st), 6 hdc inc, 8 sc
Flower bottom
- R1: 6 sc in MR
- R2: 6 inc (12)
- R3: (sc, inc) repeat 6 times (18)
- R4: 18 sc
- R5: [ch 9, then on the chain work (sk 1 backward, 2 sl st, 2 sc, 2 hdc, dc, tr), sk 2, sl st] repeat 6 times
Rose leaf: same as the rolled rose leaf above.
Finishing: roll one small petal into a tight tube for the bud center. Wrap the rest of the small petals around it, then the midi petals, then the big petals, gluing the base of each as you go. Work in a spiral so the petals open outward. Add the bottom piece, leaf, and stem, wrap with green yarn, and brush a little blush on the tips for a gradient.
How to Assemble the Bouquet
With every flower stemmed and wrapped, arranging is the relaxing part.
- Lay all the stems out and sort them by height. Roses and tulips usually anchor the center as the focal flowers.
- Place the tallest blooms in the middle first, then build shorter flowers around them, turning the bundle as you go so it looks full from all sides.
- Slot the baby daisy clusters and leaf branches into the gaps to soften the edges.
- Once you’re happy with the shape, gather all the stems in one hand and bind them together with green yarn or floral tape.
- Wrap the base in paper or lace and finish with a ribbon or a strip of lace fabric.
If your stems are bendable wire, curve a few flowers slightly outward for a loose, freshly gathered look.
Helpful Tips and Variations
- Skipping the wire: for flowers you plan to glue flat onto cards, clips, or magnets, you can leave the wire out. You’ll only really need it for stems and any petal or leaf you want to pose.
- Holding the shape: a light spritz of fabric stiffener, or a thin coat of watered-down glue, helps petals stay crisp over time.
- Stem choice: floral wire bends for wrapping around a vase, while wooden skewers stay straight and sturdy in a jar.
- One rose or two styles: the rolled rose is faster, the layered rose is fuller. Using both adds nice variety to a single bouquet.
- Going bigger: worsted yarn with a 4 mm hook turns these same patterns into statement flowers for wreaths and wall decor.
Looking After Your Crochet Flowers
Keep the finished bouquet out of direct sun so the colors stay true. Dust it now and then with a soft brush or a cool hairdryer setting. Since the pieces are glued and wired, skip soaking them. If something needs a clean, spot-treat it with a barely damp cloth and let it dry fully before arranging again.
Terms of Use
This pattern is free for personal use, and you’re welcome to sell the finished flowers you make from it at markets or in your own shop. Please don’t copy, repost, or resell the written pattern, and don’t pass it off as your own. If you share photos of your makes, a credit back to latifacha.com is always appreciated. Questions? Reach out at contact@latifacha.com.
Frequently Asked Questions
Which flowers are included in this pattern?
You get six flower patterns plus a leaf branch: a rolled rose, a layered rose, a full daisy, a cluster of baby daisies, a tulip, and a sprig of leaves. Together they make the bouquet shown at the top, but each one also works as a single stem.
Can I make just one flower instead of the whole bouquet?
Absolutely. Every flower stands on its own. A single rose makes a lovely gift topper, and the daisies are sweet on their own in a tiny vase. Make as many or as few as you like.
What can I use instead of floral wire?
Pipe cleaners or paper-covered craft wire both work in a pinch. For the stems you can use wooden skewers or thin dowels. The main thing is that the stem wire is sturdy enough to stand and the petal wire is thin enough to bend easily.
How many of each flower should I make?
For a bouquet like the one pictured, aim for one or two roses, one daisy, a few baby daisies grouped together, a tulip or two, and a couple of leaf branches. Adjust to the fullness you want.
Will the flowers keep their shape over time?
Yes. The wire holds each petal and the glue locks the assembly, so a finished flower stays put for years. If a petal relaxes, a light coat of fabric stiffener firms it back up.