Crochet Pattern for Bunny: A Soft Plush Snuggler
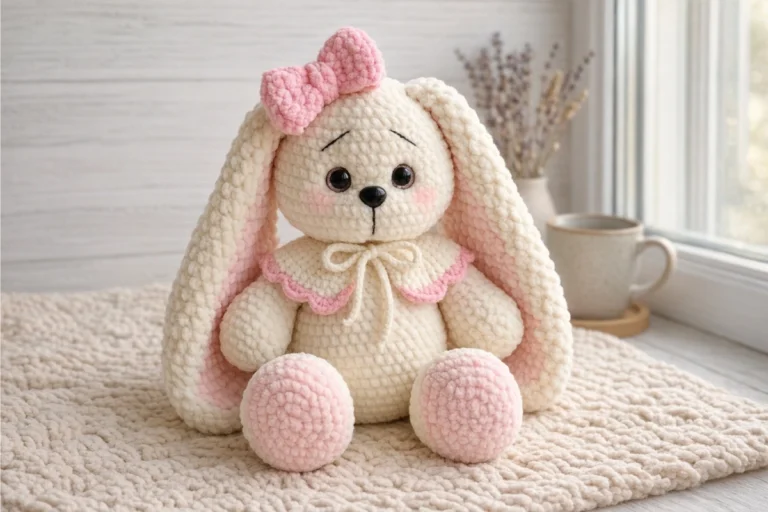
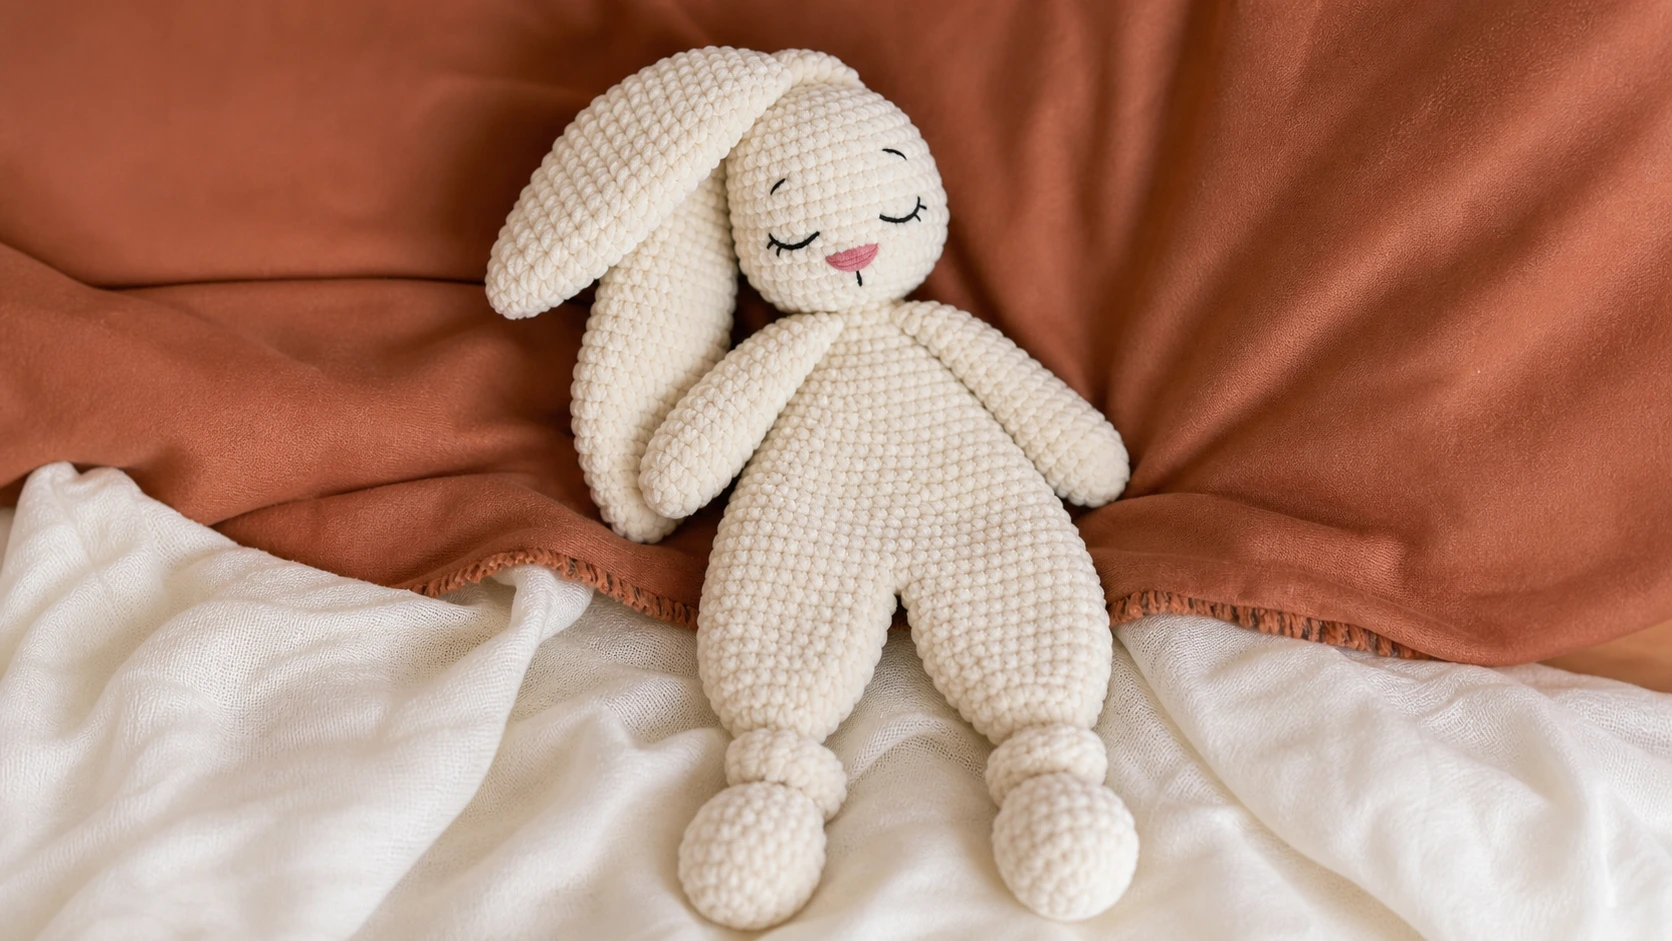
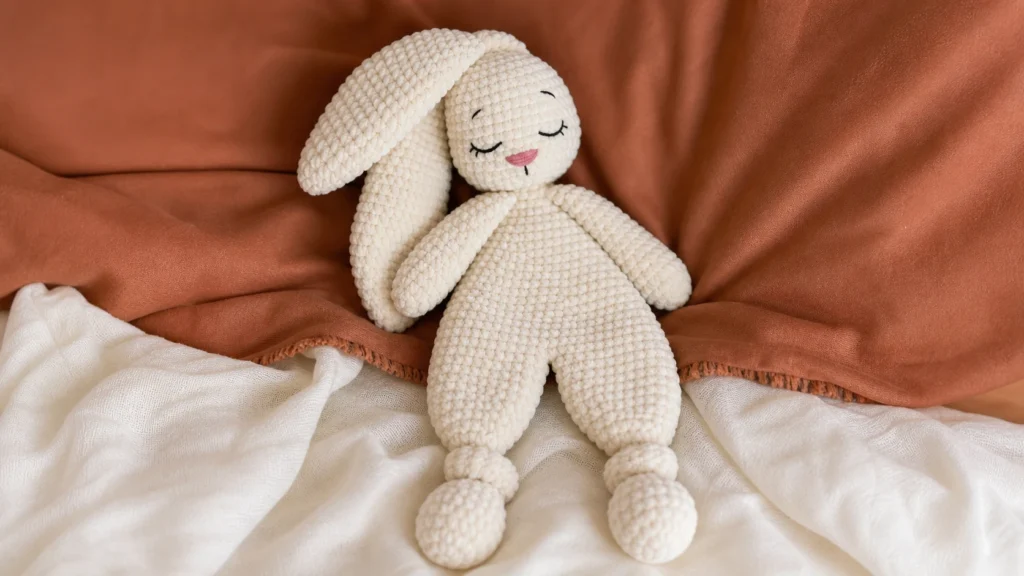
If you are looking for a first cuddle toy for a little one, this crochet pattern for bunny makes the perfect companion. The finished snuggler is a soft, floppy plush bunny about 41 cm (16 inches) long, worked in gentle plush yarn with long droopy ears, dangly legs and arms, and a sleepy embroidered face. It has that relaxed, ready-to-nap look that makes it wonderful for cuddling, and it works up faster than you would expect for its size.
The whole toy is crocheted in a spiral in plush yarn, so there are no fussy color changes beyond an optional two-tone head. Read the pattern through once so you can picture how it comes together, then gather your yarn and get comfortable.
What You Will Make
This is a floppy snuggle bunny with dangling limbs designed for hugging. The legs are made first and joined to form the body, the arms and ears hang loose and soft, and the head can be one color or two if you want a contrasting face. The face is embroidered with a sleepy expression, a little pink nose, and soft lashes, and you can use safety eyes or stitch them for a baby-safe finish.
Quick facts:
- Skill level: Easy to intermediate
- Finished size: About 41 cm (16 in) long
- Time to make: A day or two of relaxed crocheting
- Construction: Legs joined into the body, soft dangling arms and ears, sewn-on head
Materials You Will Need
- Plush yarn (the original uses Wolans Yarns Bunny Baby, 120 m / 100 g):
- 2 skeins of the main color, plus a little secondary color for the head if you want two tones
- if you make it in one color, you need 2 skeins total
- good analogues include Yarn Art Dolce, Premier Parfait Chunky, Katia Bambi, or King Cole Yummy
- 4 mm (G6) crochet hook
- Fiberfill stuffing (or fabric or yarn scraps)
- Stitch markers
- Tapestry needle
- Thread for sewing the pieces
- Rose or pink thread for the nose
- 16 mm safety eyes, or dark thread to embroider the eyes
- Scissors
Abbreviations
This crochet pattern for bunny uses US crochet terms.
- sc — single crochet
- inc — increase
- dec — decrease
- sl st — slip stitch
- MR — magic ring
- ( … ) x n — repeat the bracket n times
- ( n ) — the stitch count for that round
Every piece is worked in a continuous spiral, so you do not join rounds with a slip stitch. Keep your tension even so the plush stays soft but the stuffing does not show.
How to Crochet the Snuggler Bunny, Step by Step
Legs (Make 2)
Use the main color and a magic ring.
- R1: 6 sc inside MR (6)
- R2: 6 inc (12)
- R3: (1 sc, inc) x 6 (18)
- R4–6: 18 sc (18)
- R7: (4 sc, dec) x 3 (15)
- R8: (3 sc, dec) x 3 (12)
Add a little stuffing to the foot.
- R9: (2 sc, dec) x 3 (9)
- R10: (1 sc, dec) x 3 (6)
- R11–25: 6 sc (6)
- R26: (1 sc, inc) x 3 (9)
- R27: (2 sc, inc) x 3 (12)
- R28: (3 sc, inc) x 3 (15)
- R29: (4 sc, inc) x 3 (18)
- R30: (5 sc, inc) x 3 (21)
- R31: (6 sc, inc) x 3 (24)
- R32–36: 24 sc (24)
Cut the yarn on the first leg. Make the second leg the same way, but do not cut the yarn at the end.
Body
Join the legs and continue up the body.
- Assembling round 1: join the second leg to the first (insert the hook and sc where stitch 24 of the last round ended), 23 sc around the first leg, join to the second leg, 23 sc around the second leg (48)
- R2–5: 48 sc (48)
- R6: (6 sc, dec) x 6 (42)
- R7–8: 42 sc (42)
- R9: (5 sc, dec) x 6 (36)
- R10–11: 36 sc (36)
- R12: (4 sc, dec) x 6 (30)
- R13–14: 30 sc (30)
- R15: (3 sc, dec) x 6 (24)
- R16–17: 24 sc (24)
- R18: (2 sc, dec) x 6 (18)
- R19–20: 18 sc (18)
- R21: (1 sc, dec) x 6 (12), sl st
Cut the yarn. The snuggler body stays soft, so only stuff the feet lightly and leave the body loose. Make knots on the legs as shown to finish the dangly look.
Arms (Make 2)
Use the main color and a magic ring.
- R1: 6 sc inside MR (6)
- R2: (1 sc, inc) x 3 (9)
- R3: (2 sc, inc) x 3 (12)
- R4–6: 12 sc (12)
- R7: 10 sc, dec (11)
- R8: 9 sc, dec (10)
- R9–16: 10 sc (10)
Fold the top and sc 5 across to close. Cut the yarn. Make the second arm the same way through round 6, then:
- R7: dec, 10 sc (11)
- R8: dec, 9 sc (10)
- R9–16: 10 sc (10)
Fold and sc 5 across to close.
Head
Start with the secondary color if you want a two-tone face, using a magic ring.
- R1: 6 sc inside MR (6)
- R2: 6 inc (12)
- R3: (1 sc, inc) x 6 (18)
- R4: (2 sc, inc) x 6 (24)
- R5: (3 sc, inc) x 6 (30)
- R6: (4 sc, inc) x 6 (36)
- R7–8: 36 sc (36)
Change to the main color.
- R9–15: 36 sc (36)
If you use safety eyes, attach them between rounds 10 and 11, about 8 stitches apart.
- R16: (4 sc, dec) x 6 (30)
- R17: (3 sc, dec) x 6 (24)
Fill the head with stuffing.
- R18: (2 sc, dec) x 6 (18)
- R19: (1 sc, dec) x 6 (12)
Add more filler.
- R20: 6 dec (6)
Cut the yarn, pull the hole closed, and hide the end inside the head.
Ears (Make 2)
Use the main color and a magic ring.
- R1: 6 sc inside MR (6)
- R2: (1 sc, inc) x 3 (9)
- R3: (2 sc, inc) x 3 (12)
- R4: (3 sc, inc) x 3 (15)
- R5: (4 sc, inc) x 3 (18)
- R6: (5 sc, inc) x 3 (21)
- R7: (6 sc, inc) x 3 (24)
- R8–14: 24 sc (24)
- R15: (6 sc, dec) x 3 (21)
- R16–17: 21 sc (21)
- R18: (5 sc, dec) x 3 (18)
- R19–20: 18 sc (18)
- R21: (4 sc, dec) x 3 (15)
- R22–23: 15 sc (15)
- R24: (3 sc, dec) x 3 (12)
- R25–26: 12 sc (12)
Fold the top and sc 6 across to close. Cut the yarn. Leave the ears unstuffed so they flop.
Tail
Use the main color and a magic ring.
- R1: 6 sc inside MR (6)
- R2: 6 inc (12)
- R3: 12 sc (12)
- R4: (2 sc, dec) x 3 (9)
Cut the yarn and leave a tail for sewing.
Putting Your Snuggler Bunny Together
- Head to body: Sew the head to the top of the body so it sits securely.
- Arms: Sew them to the body, leaving about 4 stitches between them.
- Tail: Sew it to the back.
- Ears: Sew them to the head between rounds 17 and 18 so they drape down.
- Nose: Embroider the nose with pink thread between rounds 8 and 9, aiming for about 5 stitches wide.
- Face: Embroider the eyelashes and brows with dark thread. If you skipped safety eyes, embroider the closed sleepy eyes too.
- Muzzle: Tighten the muzzle with the main color thread to shape the sleepy face.
Tips for a Better Snuggle Bunny
- Keep it floppy. A snuggler is meant to be soft, so stuff only the feet and head and leave the body and limbs loose.
- Stuff the head fully. The head is the one firm part, so pack it well before you close it.
- Go baby-safe. For a newborn gift, skip the safety eyes and embroider a sleepy closed-eye face instead.
- Mind the ear placement. Sewing the ears between rounds 17 and 18 lets them drape naturally for that sleepy look.
Frequently Asked Questions
Is this crochet pattern for bunny beginner-friendly?
Yes, mostly. The stitches are simple single crochet with increases and decreases, and the only slightly tricky step is joining the legs into the body. If you can work in a spiral and count stitches, you can make this snuggler.
What makes it a snuggler rather than a regular toy?
A snuggler is lightly stuffed with long, floppy limbs, so it drapes and cuddles instead of standing up. That soft, relaxed feel is exactly what makes it a comforting first toy.
Can I make it in one color?
Absolutely. Two skeins of a single plush color make the whole bunny. The two-tone head is optional.
Is it safe for a baby?
It can be. Leave out the safety eyes, embroider the face with dark thread, and stitch everything on securely so there are no small parts.
Final Thoughts
A floppy snuggle bunny is one of the sweetest things you can make for a new baby or a little one who loves to cuddle. The plush yarn feels lovely, the light stuffing keeps it soft, and the sleepy face gives it real charm. If you want a heartfelt handmade gift, this crochet pattern for bunny is a beautiful choice. Happy crocheting.