Crochet Bunny Pattern Free: A Plush Bunny with Colorful Ears
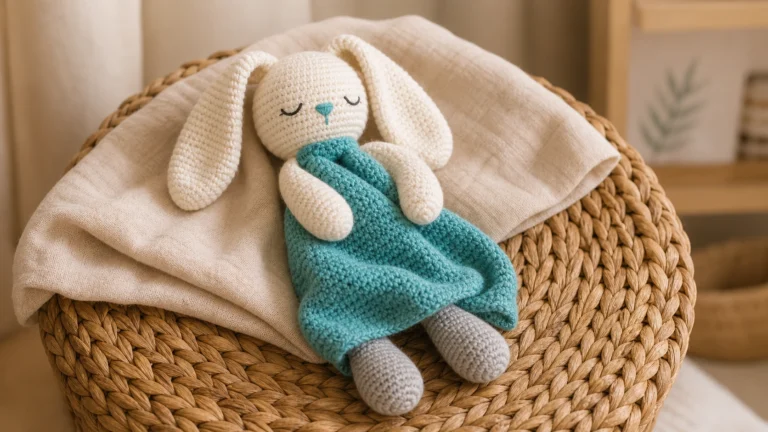
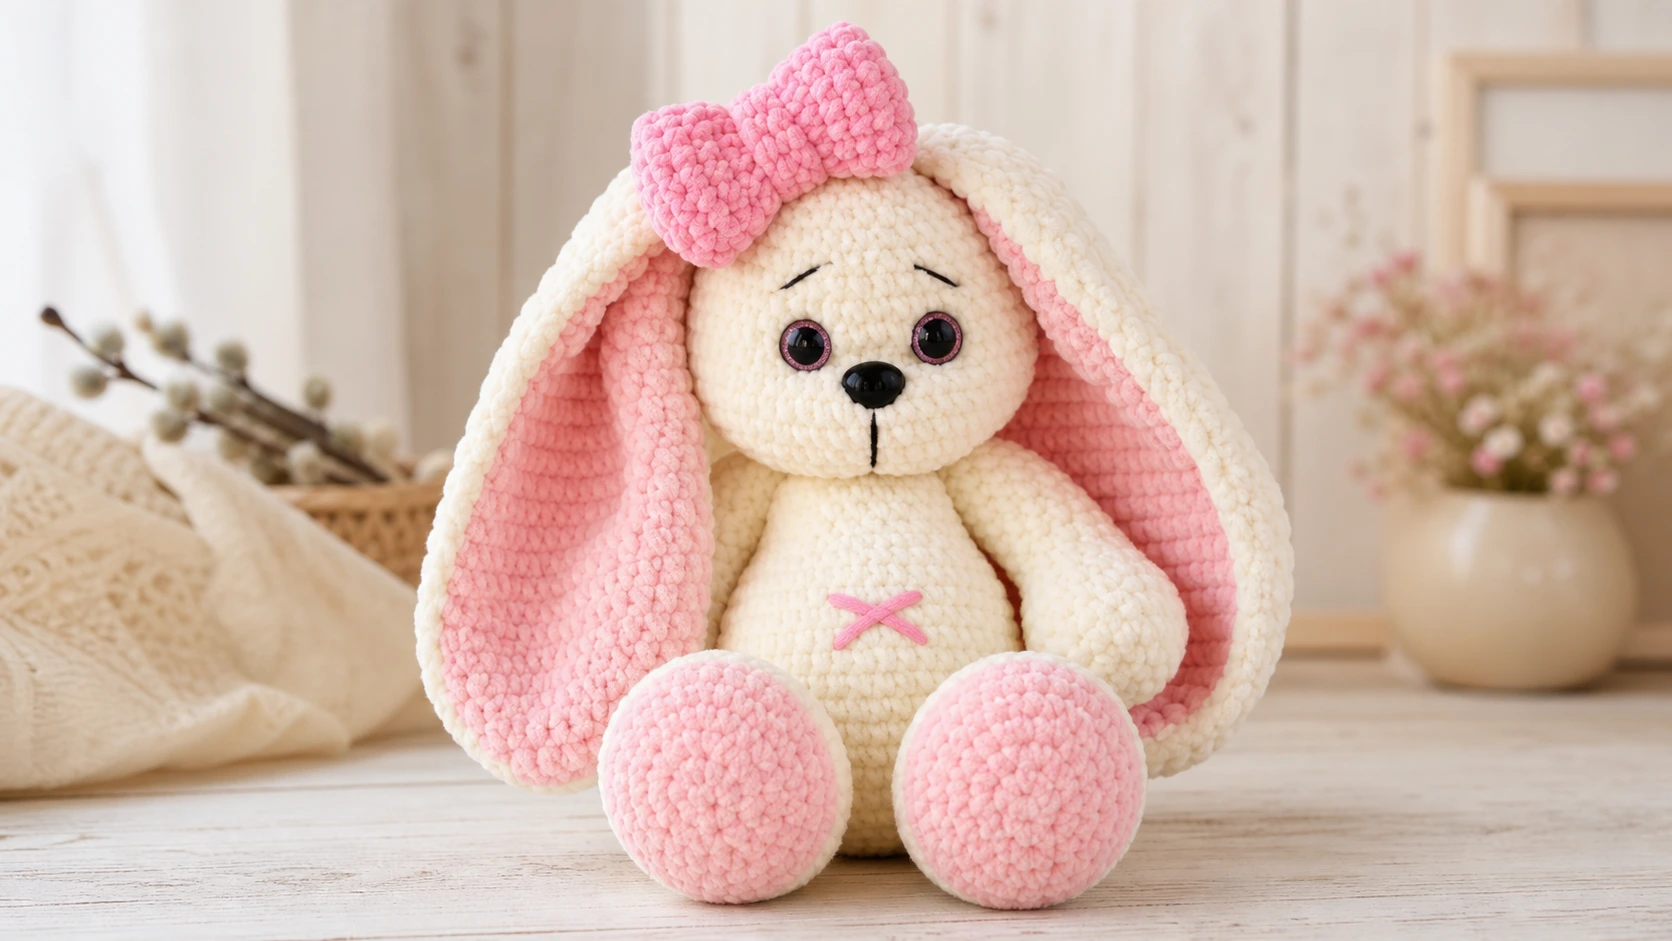
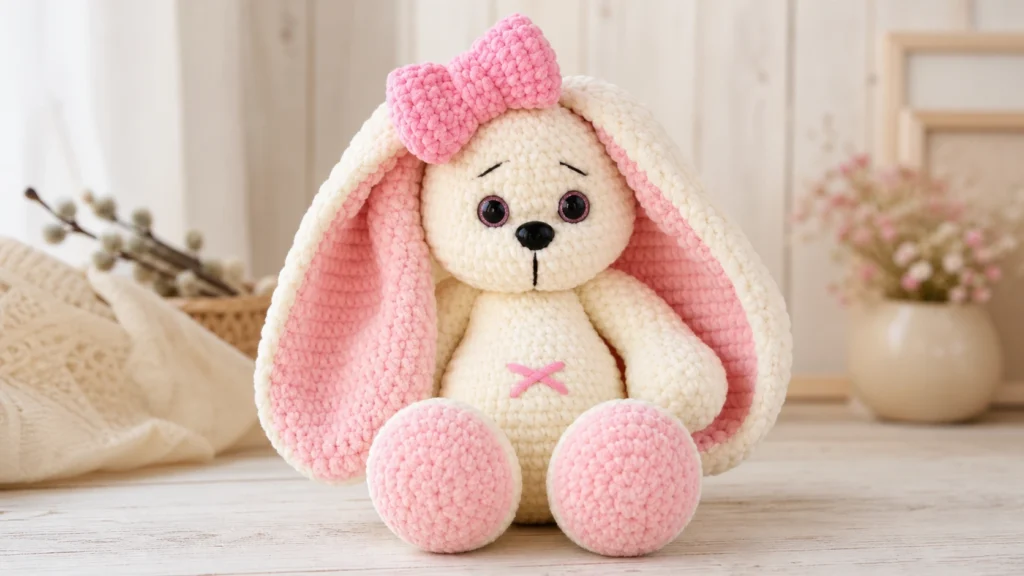
Every so often you want to make something big and huggable, and this crochet bunny pattern free is made for exactly that. The finished rabbit stands around 65 cm (about 25 inches) tall with its ears, worked in soft plush yarn in cream and pink, with long floppy two-tone ears, chunky feet, and a little bow by one ear. It is the sort of bunny a child will drag around by the paw and a keepsake a family holds onto for years.
The body and head are crocheted as one continuous piece, which keeps the shape smooth and saves you a wobbly neck seam. It is a patient, medium-level project rather than a hard one, so read the whole pattern through first, gather your yarn, and enjoy the process.
What You Will Make
This is a large plush sitting bunny with a one-piece head and body, floppy ears made in two colors, softly stuffed legs and arms, a round tail, and a bow for a little personality. The muzzle is cinched with yarn to give a sweet shaped face, and the eyes and nose are added on top. You can lean into the cream-and-pink look shown here or pick your own two colors.
Quick facts:
- Skill level: Intermediate, comfortable amigurumi skills help
- Finished size: About 65 cm (25 in) tall with ears
- Time to make: Several sessions, this is a bigger toy
- Construction: One-piece head and body, sewn-on limbs, ears, tail, and bow
Materials You Will Need
- Plush yarn (the original uses Himalaya Dolphin Baby, 120 m / 100 g) in:
- cream for the body, head, arms, and inner ear
- light pink for the feet and one side of the ears
- bright pink for the bow and belly button
- Black embroidery thread for the muzzle
- Glitter safety eyes, 9 mm
- A crochet nose, 19 mm wide
- 4 mm crochet hook
- Fiberfill stuffing
- Stitch markers
- Tapestry needle
- Craft glue (the original uses Moment Crystal glue)
- Scissors
Abbreviations
This crochet bunny pattern free uses US crochet terms.
- ml — magic loop
- ch — chain
- sc — single crochet
- hdc — half double crochet
- inc — increase
- dec — decrease
- sl st — slip stitch
- BLO — back loop only
- [ … ] x n — repeat the bracketed steps n times
- ( n ) — the stitch count for that round
Work in a spiral and stuff each piece as you go so the shaping stays smooth. Keep your tension firm so no stuffing shows through the plush.
How to Crochet the Pretty Bunny, Step by Step
Body and Head (Made as One Piece)
Start with cream yarn and stuff as you go.
- R1: 6 sc in ml
- R2: inc x 6 (12)
- R3: [1 sc, inc] x 6 (18)
- R4: [2 sc, inc] x 6 (24)
- R5: [3 sc, inc] x 6 (30)
- R6: [4 sc, inc] x 6 (36)
- R7: sc across (36)
- R8: [5 sc, inc] x 6 (42)
- R9: [6 sc, inc] x 6 (48)
- R10–16: sc across (48)
- R17: [6 sc, dec] x 6 (42)
- R18: [5 sc, dec] x 6 (36)
- R19: 3 sc, 6 dec, 21 sc (30). This shapes the belly. Place a stitch marker between the 3rd and 4th dec to guide the muzzle later.
- R20–23: sc across (30)
- R24: [3 sc, dec] x 6 (24)
- R25: sc across (24)
- R26: dec x 12 (12)
Remember to keep stuffing. Now start the head and stuff it as you go, packing the neck (between R26 and R27) firmly so the head does not wobble.
- R27: inc x 12 (24)
- R28: [1 sc, inc] x 12 (36)
- R29: (5 sc, inc) x 6 (42)
- R30: (6 sc, inc) x 6 (48)
- R31: (7 sc, inc) x 6 (54)
- R32: (8 sc, inc) x 6 (60)
- R33–37: sc across (60)
- R38: [8 sc, dec] x 6 (54)
- R39: [7 sc, dec] x 6 (48)
- R40: [6 sc, dec] x 6 (42)
- R41: sc across (42)
- R42: [5 sc, dec] x 6 (36)
- R43: [4 sc, dec] x 6 (30)
- R44: sc across (30)
- R45: [3 sc, dec] x 6 (24)
- R46: sc across (24)
Stuff the head firmly but leave enough give to cinch it later. Place the eyes using the belly marker as your center guide, roughly between R35 and R36 with 7 to 8 stitches between them.
- R47: [2 sc, dec] x 6 (18)
- R48: [1 sc, dec] x 6 (12)
- R49: dec across, fasten off and weave in the ends.
Legs (Make 2)
Stuff as you go. Start with light pink yarn and ch 7.
- R1: starting in the 2nd ch from the hook and working in rounds: 5 sc, 3 sc in the last ch, 4 sc, inc (14)
- R2: inc, 4 sc, 3 inc, 4 sc, 2 inc (20)
- R3: 1 sc, inc, 5 sc, inc, 3 sc, inc, 5 sc, inc, 2 sc (24)
- R4: 2 sc, inc, [5 sc, inc] x 3, 3 sc (28)
- R5: [1 sc, inc] x 2, 5 sc, inc, 1 sc, inc, 3 sc, inc, 1 sc, inc, 5 sc, inc, 1 sc, inc, 2 sc (36)
Change to cream yarn.
- R6: working in the BACK loop, sc across (36)
- R7–8: sc across (36)
- R9: 9 sc, dec, [1 sc, dec] x 5, 8 sc, dec (29)
- R10: 8 sc, 2 dec, 3 sc, 2 dec, 8 sc, dec (24)
- R11: 8 sc, 4 dec, 8 sc (20)
- R12: 6 sc, dec, 4 sc, dec, 6 sc (18)
- R13: 7 sc, 2 dec, 7 sc (16)
- R14–20: sc across (16)
- R21: dec x 8 (8)
Make 2 sc, fold the top edge in half, and sc 4 through both sides to close. Leave a tail for sewing.
Arms (Make 2)
Stuff as you go, using cream yarn. Ch 4.
- R1: starting in the 2nd ch from the hook: 2 sc, 3 sc in the last ch, 1 sc, inc (8)
- R2: inc, 1 sc, 3 inc, 1 sc, 2 inc (14)
- R3: 1 sc, inc, 3 sc, inc, [1 sc, inc] x 2, 3 sc, inc (19)
- R4–8: sc across (19)
- R9: 7 sc, dec, 1 sc, dec, 7 sc (17)
- R10: 4 sc, 2 dec, 1 sc, 2 dec, 4 sc (13)
- R11–19: sc across (13)
- R20: dec x 6 (7)
Make 2 sc, fold the top in half, and sc 3 through both edges to close.
Ears (Make 4: 2 light pink, 2 cream)
Work in turning rows in hdc, turning at the end of each row. Use sc for the decreases. Ch 4.
- R1: starting in the 2nd ch from the hook, 2 inc, turn (4)
- R2: 2 ch, inc, 2 hdc, inc, turn (6)
- R3: 2 ch, [inc, 1 hdc] x 3, turn (9)
- R4: 2 ch, [inc, 1 hdc] x 4, inc, turn (14)
- R5: 2 ch, [inc, 2 hdc] x 4, inc, 1 hdc, turn (19)
- R6–10: hdc across (19)
- R11: 2 ch, [7 hdc, inc] x 2, 3 hdc, turn (21)
- R12: hdc across (21)
- R13: 2 ch, [7 hdc, dec] x 2, 3 hdc, turn (19)
- R14: 2 ch, [6 hdc, dec] x 2, 3 hdc, turn (17)
- R15: 2 ch, 8 hdc, dec, 7 hdc, turn (16)
- R16: 2 ch, 7 hdc, dec, 7 hdc, turn (15)
- R17: 2 ch, dec, 11 hdc, dec, turn (13)
- R18–20: hdc across (13)
- R21: 2 ch, 5 hdc, 2 dec, 4 hdc, turn (11)
- R22: 2 ch, [2 hdc, dec] x 2, 1 hdc, dec, turn (8)
- R23: 2 ch, 1 hdc, 2 dec, 1 hdc, dec, turn (5)
- R24: 2 ch, 2 hdc, dec, 1 hdc, turn (4)
- R25: hdc across (4)
Do not fasten off the cream yarn. Lay a pink ear piece on a cream one, and sc through both pieces with the cream yarn all the way around. Leave a tail for sewing. Make the second ear the same way.
Tail
Cream yarn.
- R1: 6 sc in ml
- R2: inc x 6 (12)
- R3: [inc, 1 sc] x 6 (18)
- R4: dec x 9 (9)
Sl st and fasten off, leaving a tail. Stuff lightly.
Bow
Work in turning rows, starting with bright pink yarn. Ch 7.
- R1: 6 sc starting in the 2nd ch from the hook, turn (6)
- R2–17: 2 ch, 6 hdc, turn (6)
Fasten off, leaving a tail about 30 cm long. Make a small band the same way with ch 3, then 2 sc and rows of 2 hdc for 6 rows. Sew the ends of the bow together, fold it into neat pleats, wrap the band around the middle, and secure it with a needle.
Putting Your Pretty Bunny Together
- Cinch the muzzle: Using cream yarn, insert the needle at the base of the muzzle (between R26 and R27) and out near one eye, skip a stitch or two, and return to the start. Repeat for the other eye socket, and pull to shape a soft muzzle. Weave in the ends.
- Face: With black embroidery thread, sew the brows and the line from the nose to the mouth. Glue the crochet nose in place.
- Arms: Sew them between R26 and R27.
- Legs: Sew them right under the arms at R7.
- Ears: Position them on top of the head, adjust until you like the look, and sew with 4 to 5 sc between them.
- Bow and tail: Sew the bow near one ear and the tail to the back. Add a bright pink belly button with a couple of stitches.
Tips for a Better Plush Bunny
- Stuff as you go. With a piece this big, stuffing at the end leaves lumps, so pack it firmly round by round.
- Firm up the neck. The join between body and head carries all the weight, so stuff it well to keep the head upright.
- Keep the muzzle soft. Do not overstuff the head, or you will not be able to cinch the face nicely.
- Match your ear layers. Line the pink and cream pieces up evenly before you sc them together for a clean edge.
Frequently Asked Questions
Is this crochet bunny pattern free good for beginners?
It is best for an advancing beginner or an intermediate maker. The stitches are simple, but it is a large project with a one-piece body, turning-row ears, and muzzle cinching, so a little amigurumi experience helps.
Why are the ears made in two colors?
Each ear is a pink piece and a cream piece crocheted, then joined with a round of sc, which gives that pretty two-tone floppy look front and back.
Can I change the colors?
Yes. Cream and pink is the classic look, but any two plush colors you love will work just as well.
How do I keep the head from flopping?
Stuff the neck between R26 and R27 very firmly. That short section does all the support work, so pack it well and the head will sit upright.
Final Thoughts
A big floppy-eared bunny like this is pure comfort, and the two-tone ears and little bow make it feel special rather than plain. It takes a few sittings, but the finished rabbit is worth every round. If you have been wanting a hug-sized make, this crochet bunny pattern free is a wonderful place to start. Happy crocheting.