Crochet Amigurumi Patterns Free: Easy Chubby Cow Plush
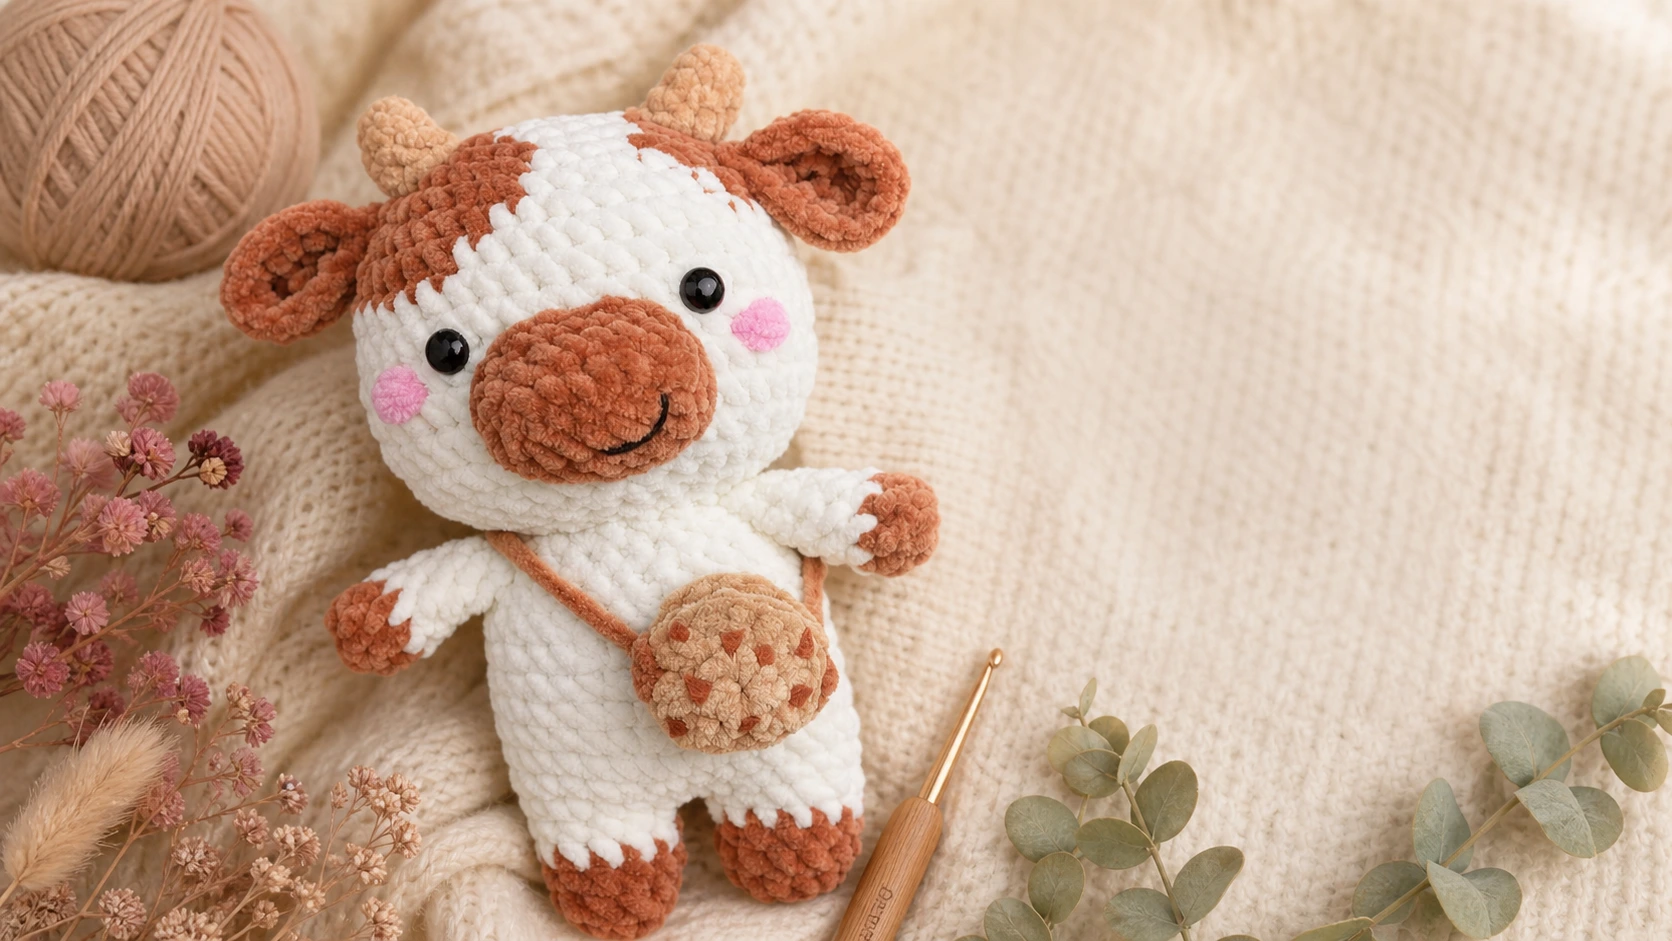
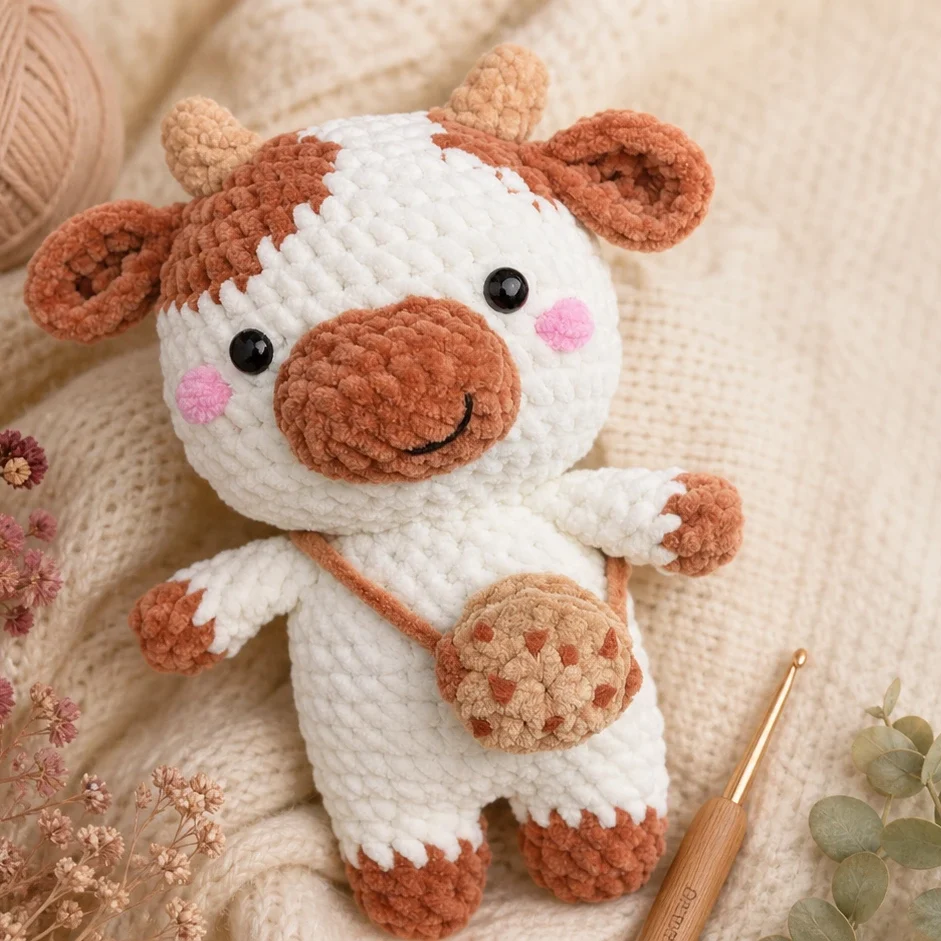
There is something irresistible about a round little cow, and Buttercup the Milk Cow leans all the way into it. She is soft, squishy, and worked in chunky chenille yarn with a cream coat, cocoa-brown patches, stubby horns, and a tiny cookie bag slung across her body.
If you have been collecting crochet amigurumi patterns free from around the web and want one that is calm to make and impossible not to squeeze at the end, this is a lovely place to land. No fancy stitches, no pressure, no rushing. Just simple single crochet worked in the round, a forgiving chunky yarn, and a finished plush that sits up and waits to be cuddled.
The whole tutorial is written in US terms, with stitch counts in bold at the close of every round so you never lose your spot.
Crochet Amigurumi Patterns Free: What You’ll Make
Buttercup comes together in separate pieces that you sew up at the end: a chubby head, a round sitting body, two little arms, two legs, a soft muzzle, two cupped ears, two tiny horns, a short tail, and an optional cookie bag. None of it is complicated. The chunky yarn does most of the visual work for you, so even slightly wobbly stitches vanish into the plush once she is stuffed.
What You’ll Need
| Item | Details |
|---|---|
| Cream / off-white chenille yarn | Chunky / velvet weight (Himalaya Dolphin Baby, Yarn Art Dolce, Bernat Baby Velvet, or similar). Less than one skein. |
| Brown chenille yarn | Same weight, for the patches, muzzle, ears, and hooves. Small amount. |
| Honey / light brown chenille yarn | Small amount, for the horns. |
| Tan / beige chenille yarn | Small amount, for the cookie bag. |
| Crochet hook | 5 mm (or 4.5 mm for a tighter, firmer fabric). |
| Safety eyes | One pair, 10–12 mm. |
| Fiberfill stuffing | Polyester toy filling. |
| Yarn needle | For assembly. |
| Stitch marker | To mark the start of each round. |
| Scissors | Sharp, for clean chenille cuts. |
| Pink yarn or blush | Optional, for the cheeks. |
| Dark brown felt or scraps | Optional, for the cookie’s chips. |
A gentle heads-up on chenille: that velvety texture hides individual stitches, which is wonderfully forgiving but makes counting sneaky. Lean on your stitch marker and count by feel as well as by eye.
Abbreviations (US Terms)
| Short | Meaning |
|---|---|
| MR | magic ring |
| sc | single crochet |
| inc | increase (2 sc in one stitch) |
| dec | decrease (invisible decrease) |
| ch | chain |
| sl st | slip stitch |
| hdc | half double crochet |
| dc | double crochet |
| BLO | back loop only |
| (…)*n | repeat the bracketed steps n times |
Work every round as a continuous spiral unless a round says otherwise. No joining, no turning. Just shift your marker up each time you begin a new round.
Notes, Gauge and Skill Level
- Skill level: Beginner-friendly. Single crochet, increase, and decrease are all you need.
- Gauge: Not critical here. Aim for a fabric snug enough that stuffing does not peek through. If it does, go down a hook size.
- Finished size: Around 20 cm / 8 inches tall in chunky chenille on a 5 mm hook. [Maker’s note: measure Buttercup once she’s done and swap in your real number.]
- US vs UK: Written in US terms. UK makers: US single crochet = UK double crochet.
- Resize her easily: Thicker yarn and a bigger hook make her larger, thinner yarn and a smaller hook make her tiny. The counts stay the same either way.
The Pattern
Stuff each piece firmly as you work, apart from the ears and the flat sections. Buttercup is meant to be plump, so be generous with the filling.
Head (cream)
- Rnd 1: MR, 6 sc (6)
- Rnd 2: 6 inc (12)
- Rnd 3: (1 sc, inc)*6 (18)
- Rnd 4: (2 sc, inc)*6 (24)
- Rnd 5: (3 sc, inc)*6 (30)
- Rnd 6: (4 sc, inc)*6 (36)
- Rnd 7: (5 sc, inc)*6 (42)
- Rnds 8–13: 42 sc (42)
- Rnd 14: (5 sc, dec)*6 (36)
- Rnd 15: (4 sc, dec)*6 (30)
- Rnd 16: (3 sc, dec)*6 (24)
- Rnd 17: (2 sc, dec)*6 (18)
Place the safety eyes between Rnds 10 and 11, roughly 7 stitches apart. Stuff the head firmly and round it out before closing.
- Rnd 18: (1 sc, dec)*6 (12)
Fasten off, leave a tail, and run it through the final 12 stitches to draw the top closed. Set aside.
Brown Head Patch (brown) — make 1
The off-center marking that makes her read as a cow.
- Rnd 1: MR, 6 sc (6)
- Rnd 2: (1 sc, inc)*3 (9)
- Rnd 3: (2 sc, inc)*3 (12)
Fasten off, leave a tail, and sew it flat onto one side of the head near the top. For a spottier look, make a smaller second patch (stop after Rnd 2) for the opposite side.
Muzzle (brown)
- Rnd 1: MR, 6 sc (6)
- Rnd 2: 6 inc (12)
- Rnd 3: (1 sc, inc)*6 (18)
- Rnd 4: 18 sc (18)
Fasten off, leave a long tail, and stuff lightly. This little dome is her soft round nose.
Ears (brown) — make 2
- Rnd 1: MR, 6 sc (6)
- Rnd 2: 6 inc (12)
- Rnd 3: (1 sc, inc)*6 (18)
- Rnds 4–5: 18 sc (18)
Leave unstuffed. Fasten off, leave a tail, and flatten the opening. Pinch the lower edge in a touch before sewing so the ear cups forward.
Horns (honey / light brown) — make 2
- Rnd 1: MR, 4 sc (4)
- Rnd 2: (1 sc, inc)*2 (6)
- Rnds 3–4: 6 sc (6)
Fasten off, leave a tail, and stuff barely at all. Small and stubby is the look.
Body (cream) — sitting
- Rnd 1: MR, 6 sc (6)
- Rnd 2: 6 inc (12)
- Rnd 3: (1 sc, inc)*6 (18)
- Rnd 4: (2 sc, inc)*6 (24)
- Rnd 5: (3 sc, inc)*6 (30)
- Rnd 6: (4 sc, inc)*6 (36)
- Rnds 7–14: 36 sc (36)
- Rnd 15: (4 sc, dec)*6 (30)
- Rnd 16: (3 sc, dec)*6 (24)
- Rnd 17: (2 sc, dec)*6 (18)
Stuff firmly through the last rounds. Fasten off and leave a long tail to join the head later. You want a soft barrel that sits on its own.
Arms (brown + cream) — make 2
With brown yarn:
- Rnd 1: MR, 6 sc (6)
- Rnd 2: 6 sc (6)
Switch to cream yarn:
- Rnds 3–7: 6 sc (6)
Leave unstuffed or barely stuffed. Fasten off, leave a tail, and flatten the top for sewing. The brown tip is her hoof.
Legs (brown + cream) — make 2
With brown yarn:
- Rnd 1: MR, 6 sc (6)
- Rnd 2: 6 inc (12)
- Rnd 3: 12 sc (12)
Switch to cream yarn:
- Rnds 4–6: 12 sc (12)
Stuff lightly. Fasten off and leave a tail.
Tail (cream + brown)
With brown yarn:
- Rnd 1: MR, 5 sc (5)
- Rnd 2: 5 sc (5)
Fasten off and tuck the starting tail inside for a small tuft.
With cream yarn, chain 6 and leave long tails on both ends. Sew one end to the brown tuft and the other to the back of the body.
Cookie Bag (tan / beige) — optional
Make two matching discs:
- Rnd 1: MR, 6 sc (6)
- Rnd 2: 6 inc (12)
- Rnd 3: (1 sc, inc)*6 (18)
Hold the discs together and sc around the edge through both layers, leaving a 5–6 stitch gap open at the top so it functions as a real pouch. For the strap, chain about 30 and sew both ends to the top corners. Add dark brown felt dots or French knots for chocolate chips.
Putting Buttercup Together
Pin before you sew so you can adjust placement. Follow this order:
- Head onto body. Center the head over the neck opening and whip stitch around, adding a little extra stuffing into the neck so she holds her head up.
- Muzzle. Sew it low and centered below the eyes, tucking in a bit more filling before you close it so it stands proud.
- Ears. Place them on the sides of the head, about level with the top of the eyes, angled out and slightly down, cupped edge facing forward.
- Horns. Set them on top, just inside the ears.
- Patch. Sew the brown head patch wherever you’d like her main marking.
- Arms. Sew to the upper sides of the body near the neck.
- Legs. Sew to the front-bottom so she sits with her legs out.
- Tail. Sew to the lower back.
- Face. A small curved smile under the muzzle, plus soft pink cheeks if you like them.
- Cookie bag. Hang it crossbody.
Tips, Swaps and Little Variations
- Skip the safety eyes for a baby’s toy and embroider the eyes with black yarn instead.
- Yarn substitutes: any plush or velvet chunky yarn works. With worsted cotton or acrylic, drop to a 3.5–4 mm hook for a smaller, firmer cow.
- Color ideas: trade the brown for grey, charcoal, or pastel pink for a strawberry-milk version. The pattern doesn’t change.
- Counting in fuzz: thread a smooth scrap of contrasting yarn through the first stitch of each round as a movable marker. It shows up far better than plastic in chenille.
- Stuff plump, not hard. Chenille stretches, so aim for squishy. Overstuffing forces the stitches apart.
Caring for Your Finished Cow
Hand wash gently in cool water with a mild soap. Don’t wring chenille, since it sheds and distorts. Press the water out in a towel, then air dry flat and reshape by hand. Keep her away from direct heat. For a toy that’ll be loved daily, embroidered eyes and a quick seam check keep her safe.
Terms of Use
This is a free pattern from latifacha.com, designed by Latifacha. Make Buttercup for yourself, for gifts, or to sell as finished handmade items in small quantities; a credit to latifacha.com is always appreciated. Please don’t copy, repost, redistribute, or translate the pattern text, or claim it as your own. Questions are welcome at contact@latifacha.com.
Frequently Asked Questions
Where can I find good free crochet amigurumi patterns for beginners?
Plenty of designers share free crochet amigurumi patterns online, and the best ones for beginners use only single crochet, increases, and decreases worked in a spiral, exactly like Buttercup. Look for patterns with clear stitch counts after each round and a simple piece-by-piece build, which is the gentlest way to learn.
What makes a crochet pattern amigurumi beginner-friendly?
A beginner-friendly crochet pattern amigurumi keeps the stitch list short, works in continuous rounds rather than joined rows, and breaks the toy into small, simple shapes. Chunky yarn helps too, since it builds quickly and hides minor mistakes. This cow ticks all of those boxes.
Can I sell toys I make from crochet patterns amigurumi designers post for free?
Often yes for finished items, but each designer sets their own rules, so read the terms first. For this design, you may sell finished cows in small handmade quantities. What’s never allowed across crochet patterns amigurumi makers share is reselling or reposting the written pattern itself.
How much yarn do these crochet amigurumi patterns free projects use?
Buttercup needs less than one skein of chunky chenille in cream, plus small amounts of brown, honey, and tan. That makes her a brilliant scrap-buster and a budget-friendly way to try crochet amigurumi patterns without buying much yarn.
How long does Buttercup take to crochet?
A relaxed beginner can finish her in roughly two to four hours of crocheting, plus a little sewing. Chunky yarn grows fast, so she’s one of those crochet amigurumi patterns you can complete in a single cozy afternoon.