How to Make Crochet Patterns Amigurumi at Home
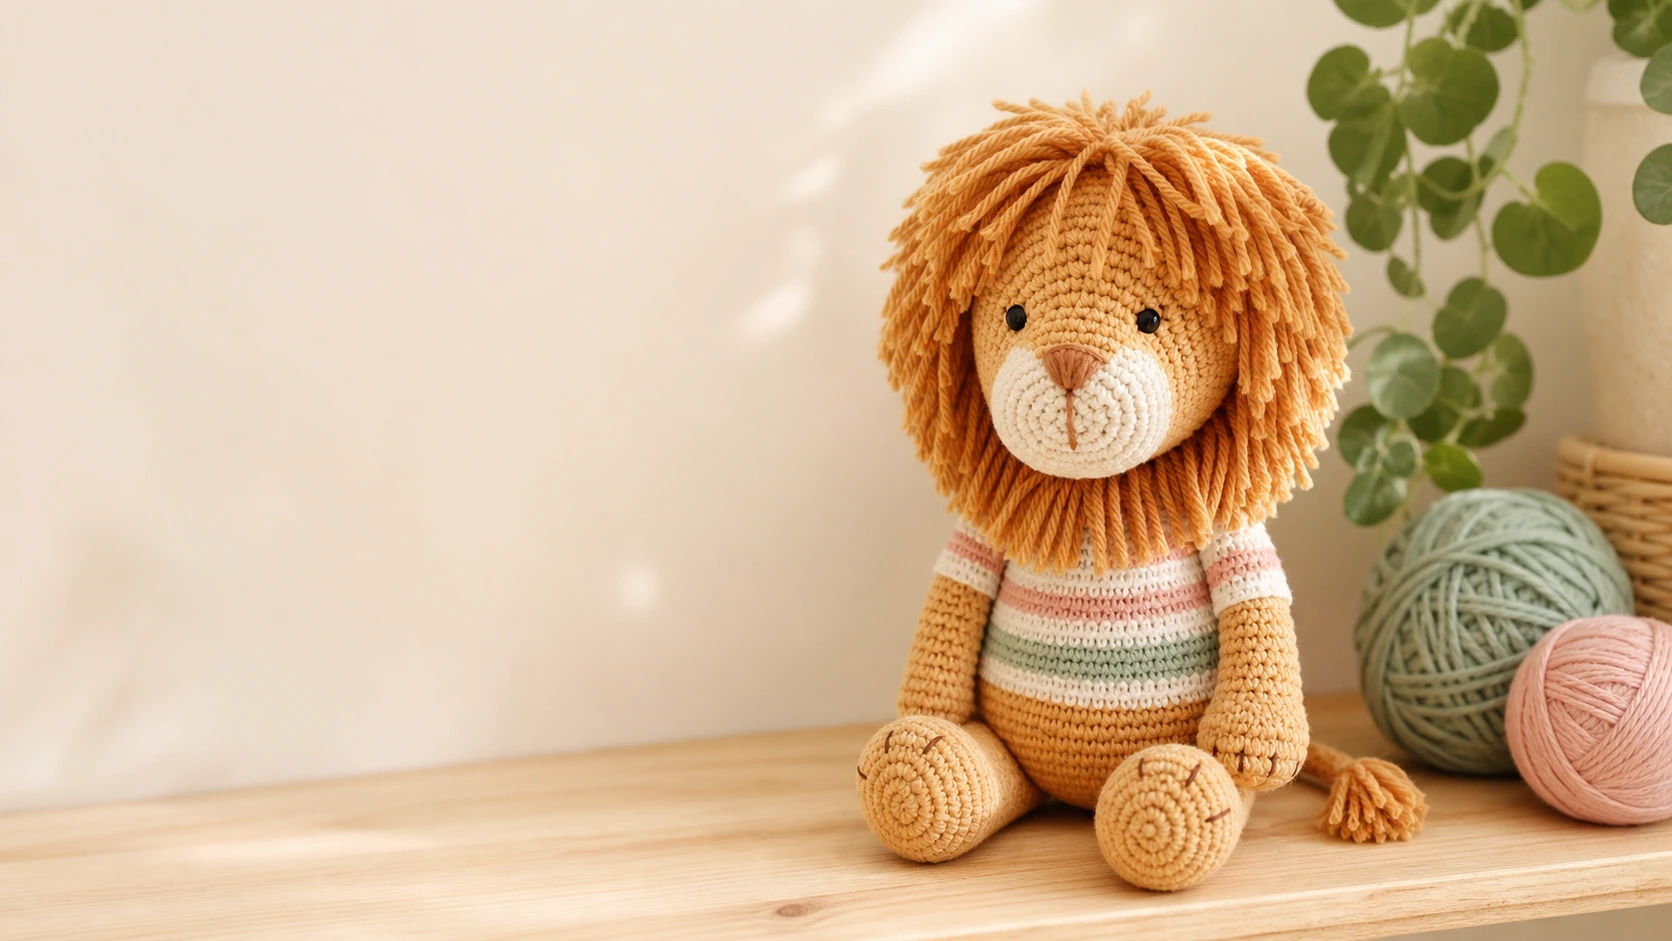
A lion is one of the most rewarding first projects you can pick, and this is the kind of crochet amigurumi patterns free download you can actually finish in a weekend. He’s worked in plain single crochet, the shapes are forgiving, and that big fluffy mane covers a multitude of beginner wobbles. If your first head comes out a little lopsided, nobody will ever know once the mane goes on.
I kept this one deliberately small and low-stress. Two yarn colors do most of the work, the body sits up by itself, and the only “advanced” looking part — the mane — is really just short lengths of yarn knotted around the face at the very end.
Everything you need is below: a tidy materials list, the US abbreviations, full instructions for each piece, and a step-by-step assembly walk-through with notes on where each part sits. Follow it in order and you’ll have a finished lion to show for it.
Materials & Tools You’ll Need
- Worsted / aran weight yarn (cotton or acrylic):
- Golden or light caramel (main color) — around 50 g
- Cream (muzzle and inner ears) — a small amount
- A darker gold or rust for the mane — around 30 g
- Brown — a little, for the embroidered nose
- Optional shirt color(s) if you want stripes
- 3.5 mm crochet hook (4 mm is fine too; size down if your fabric looks gappy)
- 8 mm black safety eyes, or black yarn to stitch them on
- Polyester fiberfill stuffing
- Tapestry needle
- Stitch marker
- Scissors
One habit that makes everything easier: crochet tighter than you think you should. Amigurumi wants a firm, closed fabric, so a hook a size or two below the yarn label keeps the stuffing hidden.
Abbreviations (US Terminology)
Written in US crochet terms.
- ch — chain
- sc — single crochet
- inc — increase (work 2 sc into one stitch)
- dec — decrease (sc 2 stitches together; an invisible decrease looks neatest)
- sl st — slip stitch
- Rnd — round
- ( ) x6 — repeat what’s in the brackets the stated number of times
- (00) — total stitches in that round
Notes & Gauge
- Work in a continuous spiral. Pop a marker in the first stitch of each round and shift it up as you go, or you’ll lose your place fast.
- Exact gauge doesn’t matter here — even, snug stitches matter far more than a magic number. Roughly, 4 sc by 4 rounds should land near 2 cm.
- Finished size: about 18–20 cm tall with the yarn and hook listed. Go chunkier for a bigger lion, finer for a pocket-sized one.
- Skill level: beginner.
- Stuff firmly as you close each piece unless told otherwise. Soft stuffing settles into lumps later.
The Pattern
Each piece opens with 6 sc in a magic ring. Not comfortable with the magic ring yet? Chain 2 and put 6 sc into the second chain from the hook instead, then cinch the tail at the end.
Head
Main (golden) color.
- Rnd 1: 6 sc in a magic ring (6)
- Rnd 2: inc in every stitch (12)
- Rnd 3: (1 sc, inc) x6 (18)
- Rnd 4: (2 sc, inc) x6 (24)
- Rnd 5: (3 sc, inc) x6 (30)
- Rnd 6: (4 sc, inc) x6 (36)
- Rnd 7 to Rnd 12: sc around — 6 rounds (36)
Set the safety eyes between Rnd 8 and Rnd 9, about 7 stitches apart. The muzzle tucks in just below them, so leave a gap.
- Rnd 13: (4 sc, dec) x6 (30)
- Rnd 14: (3 sc, dec) x6 (24)
- Rnd 15: (2 sc, dec) x6 (18) — begin stuffing firmly
- Rnd 16: (1 sc, dec) x6 (12)
- Rnd 17: dec x6 (6)
Top up the stuffing, fasten off, run the tail through the last 6 front loops, and pull closed. Weave in.
Muzzle
Cream.
- Rnd 1: 6 sc in a magic ring (6)
- Rnd 2: inc in every stitch (12)
- Rnd 3: (1 sc, inc) x6 (18)
- Rnd 4: sc around (18)
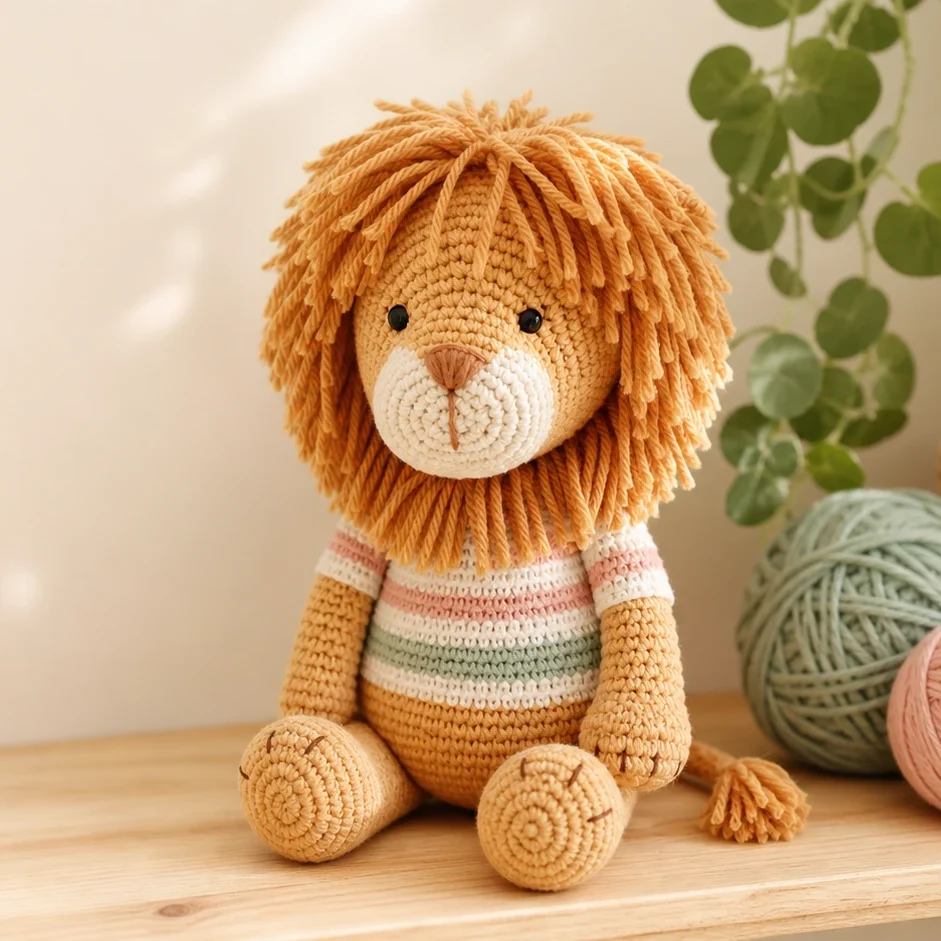
Sl st and leave a long sewing tail. Skip the stuffing (or barely a pinch). Embroider a small brown nose near the top, drop a short vertical line beneath it, and add a little curved smile. Then sew it to the lower front of the head, just under the eyes.
Ears (make 2)
Main color.
- Rnd 1: 6 sc in a magic ring (6)
- Rnd 2: (1 sc, inc) x3 (9)
- Rnd 3: sc around (9)
Sl st, fasten off, leave a tail. No stuffing — pinch them flat into little half-moons.
Body
Main color. (Want a striped tee? Switch colors at Rnd 6.)
- Rnd 1: 6 sc in a magic ring (6)
- Rnd 2: inc in every stitch (12)
- Rnd 3: (1 sc, inc) x6 (18)
- Rnd 4: (2 sc, inc) x6 (24)
- Rnd 5: (3 sc, inc) x6 (30)
- Rnd 6 to Rnd 10: sc around — 5 rounds (30)
- Rnd 11: (3 sc, dec) x6 (24)
- Rnd 12 to Rnd 13: sc around — 2 rounds (24)
- Rnd 14: (2 sc, dec) x6 (18) — start stuffing
- Rnd 15: sc around (18)
- Rnd 16: (1 sc, dec) x6 (12)
Finish stuffing firmly, fasten off, and keep a long tail for joining to the head.
Arms (make 2)
Main color.
- Rnd 1: 6 sc in a magic ring (6)
- Rnd 2: (1 sc, inc) x3 (9)
- Rnd 3 to Rnd 9: sc around — 7 rounds (9)
Stuff lightly so they stay soft, flatten the top, fasten off with a tail.
Legs (make 2)
Main color.
- Rnd 1: 6 sc in a magic ring (6)
- Rnd 2: inc in every stitch (12)
- Rnd 3: (1 sc, inc) x6 (18)
- Rnd 4 to Rnd 5: sc around — 2 rounds (18)
- Rnd 6: (1 sc, dec) x6 (12)
- Rnd 7 to Rnd 11: sc around — 5 rounds (12)
Pack the foot firmly and leave the top softer so it bends to sit. Fasten off, leave a tail.
Tail
Main color.
- Rnd 1: 6 sc in a magic ring (6)
- Rnd 2 to Rnd 10: sc around — 9 rounds (6)
Leave it unstuffed, fasten off with a tail. Knot a few short mane strands through the tip for a tuft and trim them even.
Mane
Mane color. This is what makes him a lion, and it’s far less fussy than it looks.
- Cut a pile of strands roughly 12 cm long all at once — it’s quicker than stopping to cut each one.
- Fold a strand in half. Hook through a stitch at the edge of the face, grab the fold, and draw it partway out.
- Feed the two loose ends through that loop and pull snug. One tuft done.
- Ring the whole face with tufts, then go around again right behind the first pass so it reads as full.
- Trim into shape last, snipping a little at a time. You can always take more off; you can’t put it back.
Assembly
Pin first, check the face from the front, then sew.
- Muzzle and eyes — fix the muzzle to the lower front of the head and make sure the eyes sit just above it.
- Ears — attach to the top sides of the head, set back a little from the eyes.
- Mane — add it now, while the bare head is still easy to handle.
- Head to body — sew on firmly, muzzle facing forward.
- Legs — join at the front-bottom of the body so he can sit.
- Arms — one on each side, just below the head seam.
- Tail — sew to the lower back.
- Trim — shape the mane and you’re finished.
Tips, Substitutions & Variations
- For babies: skip the safety eyes and embroider them instead, and tug-test every seam before gifting.
- Yarn choice: cotton gives sharp, defined stitches; acrylic is softer, cheaper, and kinder to small mistakes. A faintly fuzzy yarn makes a richer mane with fewer tufts.
- Color play: cream lion with a beige mane reads gentle and nursery-soft; marigold with rust is punchier. Leave the shirt off for a classic look.
- Sizing up: run the exact same pattern in chunky yarn with a 5–5.5 mm hook for a bigger lion, no recalculating needed.
- [Maker’s note — fill in before publishing: the exact yarn brand and shade you used and how it behaved as you worked it.]
- [Maker’s note: the part that tripped you up and how you’d tell a first-timer to handle it.]
Care Instructions
Hand wash in cool water with a little gentle soap, press out the water without wringing, reshape while damp, and dry flat. Keep him away from the dryer — heat can flatten or felt the mane. For a baby’s toy, embroidered eyes are the safer call.
Terms of Use / Copyright
This pattern is free for personal use. Sell the finished lions you make if you’d like, and a credit to Latifacha (latifacha.com) is always welcome. Please don’t repost, resell, or redistribute the pattern text, or pass the design off as your own. Sharing the link to the original post is the way to go.
© Latifacha · latifacha.com · contact@latifacha.com
FAQ
What makes a good first crochet amigurumi project?
Look for simple shapes, a single yarn weight, and not too many pieces — which is exactly why beginner-friendly crochet amigurumi patterns like this lion work so well. A forgiving design (here, a mane that hides imperfections) lets you build confidence without frustration on your very first make.
Do I need to count every round exactly?
For the increase and decrease rounds, yes — those shape the piece, so the stitch counts in brackets matter. For the plain “sc around” rounds you have a little wiggle room. A stitch marker in the first stitch of each round is the single best habit for keeping your place.
Can I make this lion without safety eyes?
Absolutely. Embroider two small black dots with yarn instead. It’s the safer option for babies and toddlers, and many makers actually prefer the softer look it gives.
Are these crochet amigurumi patterns free to sell from?
Yes. This is one of our crochet amigurumi patterns free for personal use, and you’re welcome to sell the items you create from it. The only line we draw is on the pattern itself — please don’t redistribute the text. If you enjoy our free crochet amigurumi patterns and want more crochet patterns amigurumi to try, the blog has a growing shelf of them, and most are free too.
How do I stop the mane from looking thin?
Two things: work a second full pass of tufts directly behind the first, and don’t be shy with how many strands you add around the face. Wool or a slightly fuzzy yarn fills out faster than smooth cotton. If a spot still looks sparse after trimming, just hook in a few extra tufts.