Crochet Flowers Pattern Free: An Easy Rose Tutorial
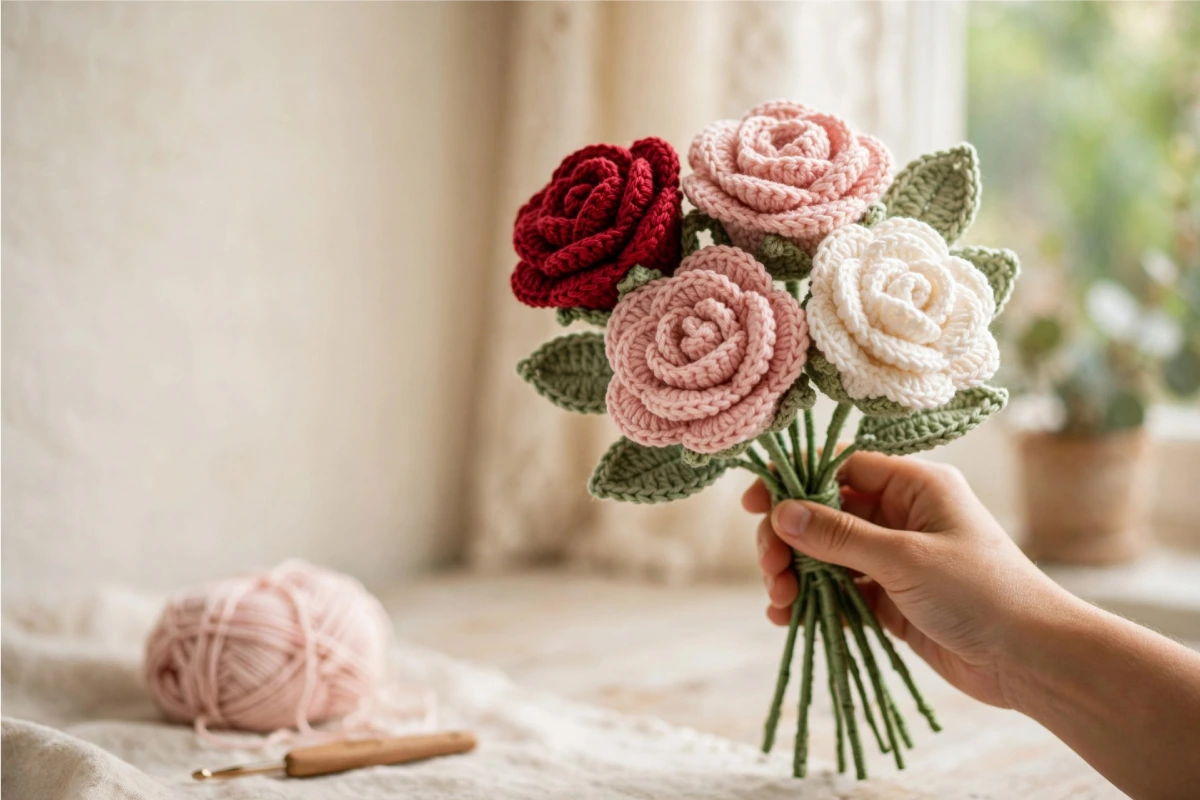
A crochet rose never wilts, never needs water, and lasts for years on a shelf or in a vase. That makes it one of the most rewarding things a beginner can stitch. This crochet flowers pattern free tutorial walks you through a single rose from the first chain to the finished stem, then shows you how to bundle a few together into a bouquet.
The trick that makes this rose so approachable is the construction. Instead of stitching individual petals and sewing them together, you crochet one long ruffled strip and roll it into a spiral. The petals form themselves as you coil, so the flower comes out looking far more advanced than the stitches actually are. Pick your favorite color, grab a 4.0 mm hook, and let’s get started.
Before You Start
A few notes that will save you trouble later:
- Terminology: every stitch below uses US crochet terms.
- Yarn matters here. Reach for a standard Weight 4 (worsted) acrylic such as Big Twist Value or Red Heart Super Saver. A heavier or chunky yarn makes the rose bulky and softens the petal detail.
- Tension is forgiving. Roses are not symmetrical in nature, so a few uneven stitches will not show in the finished bloom.
- You can stop early. The flower alone makes a brooch, hair clip, or appliqué. The stem, calyx, and leaf are extras for a standing bouquet flower.
Skill level: beginner, basic stitches Approximate finished size: a 2.5 to 3 inch (6 to 7.5 cm) bloom on a 15 inch (38 cm) stem Time: roughly an hour for the flower head, a little more with the full stem
Everything You Need
Core supplies:
- Worsted weight yarn (Weight 4), about 15 to 20 g per rose in your petal color
- Worsted weight yarn (Weight 4) in green, about 10 g per stem for the calyx and leaf
- 4.0 mm crochet hook
- Tapestry or darning needle
- Scissors
To build the stem:
- Hot glue gun with glue sticks
- A 2 mm floral stem, about 15 inches long, one per rose
- 22 gauge flexible floral wire for the optional leaf
To dress up a bouquet (optional):
- Ribbon
- Decorative paper
- Ruffled mesh
Stitch Abbreviations (US Terms)
| Short form | Stitch |
|---|---|
| ch | chain |
| sc | single crochet |
| hdc | half double crochet |
| dc | double crochet |
| tr | treble crochet |
| sk | skip |
| sl st | slip stitch |
| MR | magic ring |
| FO | fasten off |
| ( ) | stitch count for the row |
What Makes This Rose Beginner Friendly
If you have tried other free crochet patterns for flowers and given up partway through, the difference here is that the shaping is built into one repeating row. You are not counting decreases or following a complicated chart. You chain, work a row of clustered double crochet groups, and those clusters become petals when you roll the strip. The hardest part is the rolling, and even that gets easier the second time.
This is also a pattern that scales. One rose is a quick evening project. Five or six in mixed colors give you a full bouquet without learning anything new along the way.
How to Crochet the Rose
Work this part in your petal color.
Step 1: Ch 47. (47)
Step 2: Beginning in the 2nd chain from the hook, work 1 hdc in each chain across. (46)
Step 3: Ch 5 and turn. Work 1 dc into the same stitch as the chain. Now sk 2 and work (1 dc, ch 3, 1 dc) into the next stitch. Continue the repeat [sk 2, (1 dc, ch 3, 1 dc)] all the way across, and finish with 1 dc in the last stitch. This row gives you a line of small ch-3 loops, each one the base of a petal.
Step 4: Ch 3 and turn. In the first ch-3 loop, work [3 dc, 1 tr, 3 dc], then sl st into the gap between the two dc of the row below. Ch 1. Carry on with the repeat [(3 dc, 1 tr, 3 dc), sl st, ch 1] across, working one petal cluster into each ch-3 loop. Place 3 dc in the final loop. FO and leave a long tail, around 12 inches, for sewing.
You should be holding a long, wavy strip with rounded petals along one side. That strip is the whole rose. The shaping comes next, during assembly.
Crocheting the Calyx
The calyx is the small green star that tucks under the bloom and hides the join. Work it in green.
Step 1: Place 6 dc into a magic ring. After the sixth dc, sl st into the top of the first dc to close the round. Leave the center hole open rather than cinching it shut. You want a gap wide enough to pass your floral wire through later.
Step 2: [Ch 7. Starting in the 1st stitch from the hook, work (sl st, sc, hdc, dc, dc, tr).] Sl st into the next stitch of the magic ring. Repeat the full sequence 6 times for 6 pointed green leaves. FO after the last one with a short tail, knot that tail to the magic ring tail, and weave both in.
Adding a Leaf (Optional)
This stem leaf is crocheted over a piece of wire so it keeps its shape. Skip it if you only want the flower and calyx. Before you begin, cut a piece of 22 gauge flexible floral wire about 8 inches long.
Step 1: Ch 12. (12)
Step 2: You will work around the wire as you crochet. Lay the wire next to your chain, insert the hook through the chain, and complete each stitch so it captures the wire inside. Starting in the 3rd chain from the hook, work: sc, hdc, dc, dc, tr, tr, dc, dc, hdc, then 3 sc into the last chain.
Step 3: Fold the wire in half with your finished side on the right. Work back down the other side of the foundation chain from right to left, crocheting over the tail as you go: sk 1 st, hdc, dc, dc, tr, tr, dc, dc, hdc, sc.
Step 4: Happy with it? FO and leave a short tail, weave it in, and twist the loose wire ends at the base so nothing slides off.
Step 5 (optional ridge): For a textured, veined edge, work sl st, ch 1, sl st into the next stitch, repeating all the way around the leaf. FO, weave in, and trim. The ch 1 between slip stitches is what raises the ridge.
Rolling and Securing the Rose
Here is where the flat strip turns into a flower.
- Start at the end of the strip with no long tails, keeping the right side facing you.
- Fold the very first petal in half on itself so its outer corners meet. This becomes the tight center of the rose.
- Keep coiling the strip from right to left, folding each petal against the one before it. The bloom builds up as you wrap.
- When you reach the end, fan the petals into shape. A tight center with looser outer petals looks the most natural.
- Thread the tapestry needle with the longest tail.
- Sew a few horizontal stitches across the last petal to hold it against the bundle.
- Stitch back and forth through the base to lock the coil. Neatness does not matter here, and more stitches mean a sturdier flower.
- Bring both tails together with one last stitch, knot them, weave in the ends, and trim.
That is a finished rose head. Leave it as is for a flat project, or mount it on a stem below.
Mounting the Rose on a Stem
You will need a 2 mm floral stem and your hot glue gun.
- Push the wire up through the center of the rose. Flip the flower over to confirm the wire does not show through the top. When it looks right, pull the wire out, dab hot glue on the tip, and slide it back in to set.
- With the wrong side of the calyx facing up, thread the wire down through the center hole of the magic ring and slide the calyx up until it meets the base of the rose.
- Rotate the calyx so a green point falls between each petal.
- Add a little hot glue around the base of the bloom, then press the calyx up into it.
- Run a thin bead of glue along each green point, leaving the tips free, and press each one against the flower. Do all six.
- Put a dab of glue where the calyx meets the wire, press the end of your green yarn into it, and twist the wire to start wrapping yarn down the stem before the glue cools.
- After about 1.5 to 2 inches, lay the leaf wire parallel to the stem and wrap the yarn around both together to bind it on. Keep wrapping down the rest of the stem.
- At the base, add a final dab of glue, wrap over it to lock everything in place, and trim the excess.
Turning Single Roses into a Bouquet
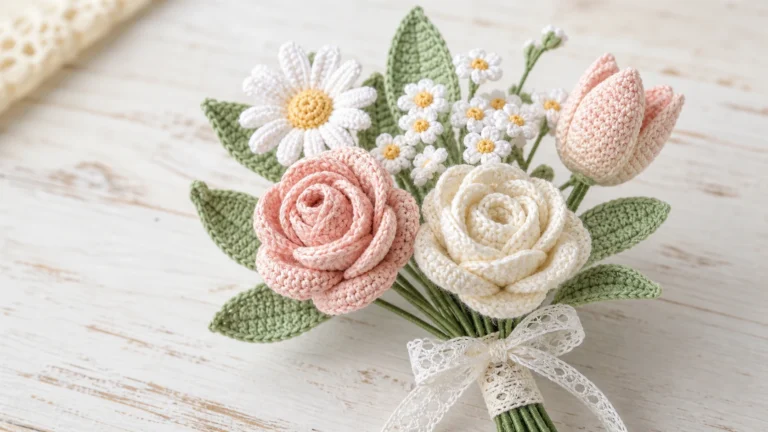
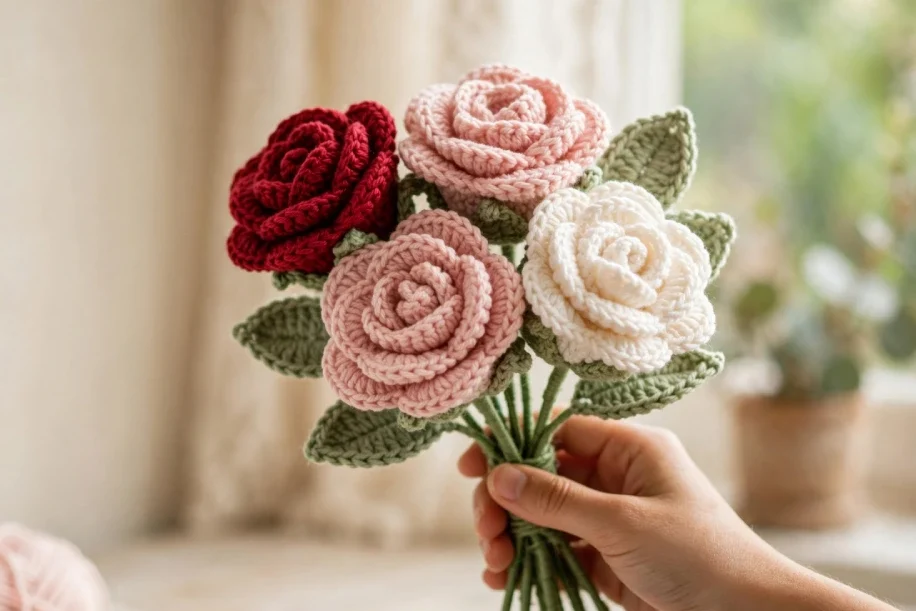
To build the bouquet in the photos, make several roses in different shades, mount each on its own stem with a calyx and leaf, then gather the stems in one hand. A mix of one bold red, a soft pink, and a clean white reads beautifully together. Wrap the bundle in decorative paper, tuck in ruffled mesh if you like the fuller look, and finish with a ribbon tied at the base.
Troubleshooting and Variations
- My rose is floppy. Drop down half a hook size for firmer petals, or add a few more securing stitches through the base.
- My rose is too chunky. This almost always comes from heavy yarn. Switch to a standard Weight 4 acrylic.
- I want a flat flower. Stop after rolling and securing the bloom, then glue a clip or pin to the back.
- I want a bud instead of an open rose. Coil the strip tighter and skip fanning the outer petals.
- I would rather sew than glue. You can stitch the calyx and stem on with the yarn tails, though glue holds the wire more firmly.
- Color ideas. Cream, dusty rose, and burgundy make a soft vintage set. Bright red and white feel classic.
Keeping Your Crochet Roses Looking Good
Keep finished roses out of long stretches of direct sun, since acrylic can fade over time. Dust them gently, or wipe the petals with a barely damp cloth and let them air dry. Try not to soak a glued, wired stem, as water can loosen the hot glue. Stored upright or laid flat in a box, your roses will keep for years.
Terms of Use
This pattern is free for personal use, and you may sell the finished roses you make from it. Please do not copy, reprint, or republish the pattern text or photos as your own. If you share your makes online, a link back to latifacha.com is always welcome. For any questions about usage, reach out to contact@latifacha.com.
Frequently Asked Questions
Can I make this crochet rose without a stem?
Yes. The flower head stands on its own. Stop after you roll and secure the bloom, and you have a flat rose ready for a clip, headband, card, or appliqué. The stem, calyx, and leaf are only needed for a bouquet.
What hook size works best for crochet flowers?
A 4.0 mm hook pairs well with Weight 4 yarn for this rose. If your bloom turns out loose, go down half a size. If the petals feel stiff and crowded, go up half a size.
How much yarn does one rose use?
Plan on roughly 15 to 20 g of your petal color per rose, plus about 10 g of green for the calyx and leaf on each stem. A single skein goes a long way, so a small stash is enough for a whole bouquet.
Why did my rose come out too chunky?
The most common cause is yarn that is too thick. This crochet flowers pattern free tutorial is written for standard Weight 4 acrylic. Heavier yarns bulk up the petals and blur the rose shape, so switching yarn usually fixes it.
What is the calyx and do I actually need it?
The calyx is the little green star under the flower. It hides the join where the wire meets the bloom and gives the rose a finished, realistic look. For a flat flower you can leave it off, but it is worth adding on a stemmed rose.
Can I wash a crochet flower bouquet?
Stick to spot cleaning. Wipe the petals with a slightly damp cloth and air dry. Avoid submerging a glued, wired stem in water, since soaking can weaken the hot glue holding everything together.