Cute Crochet Patterns: Make Skye the Plush Airplane (Free)
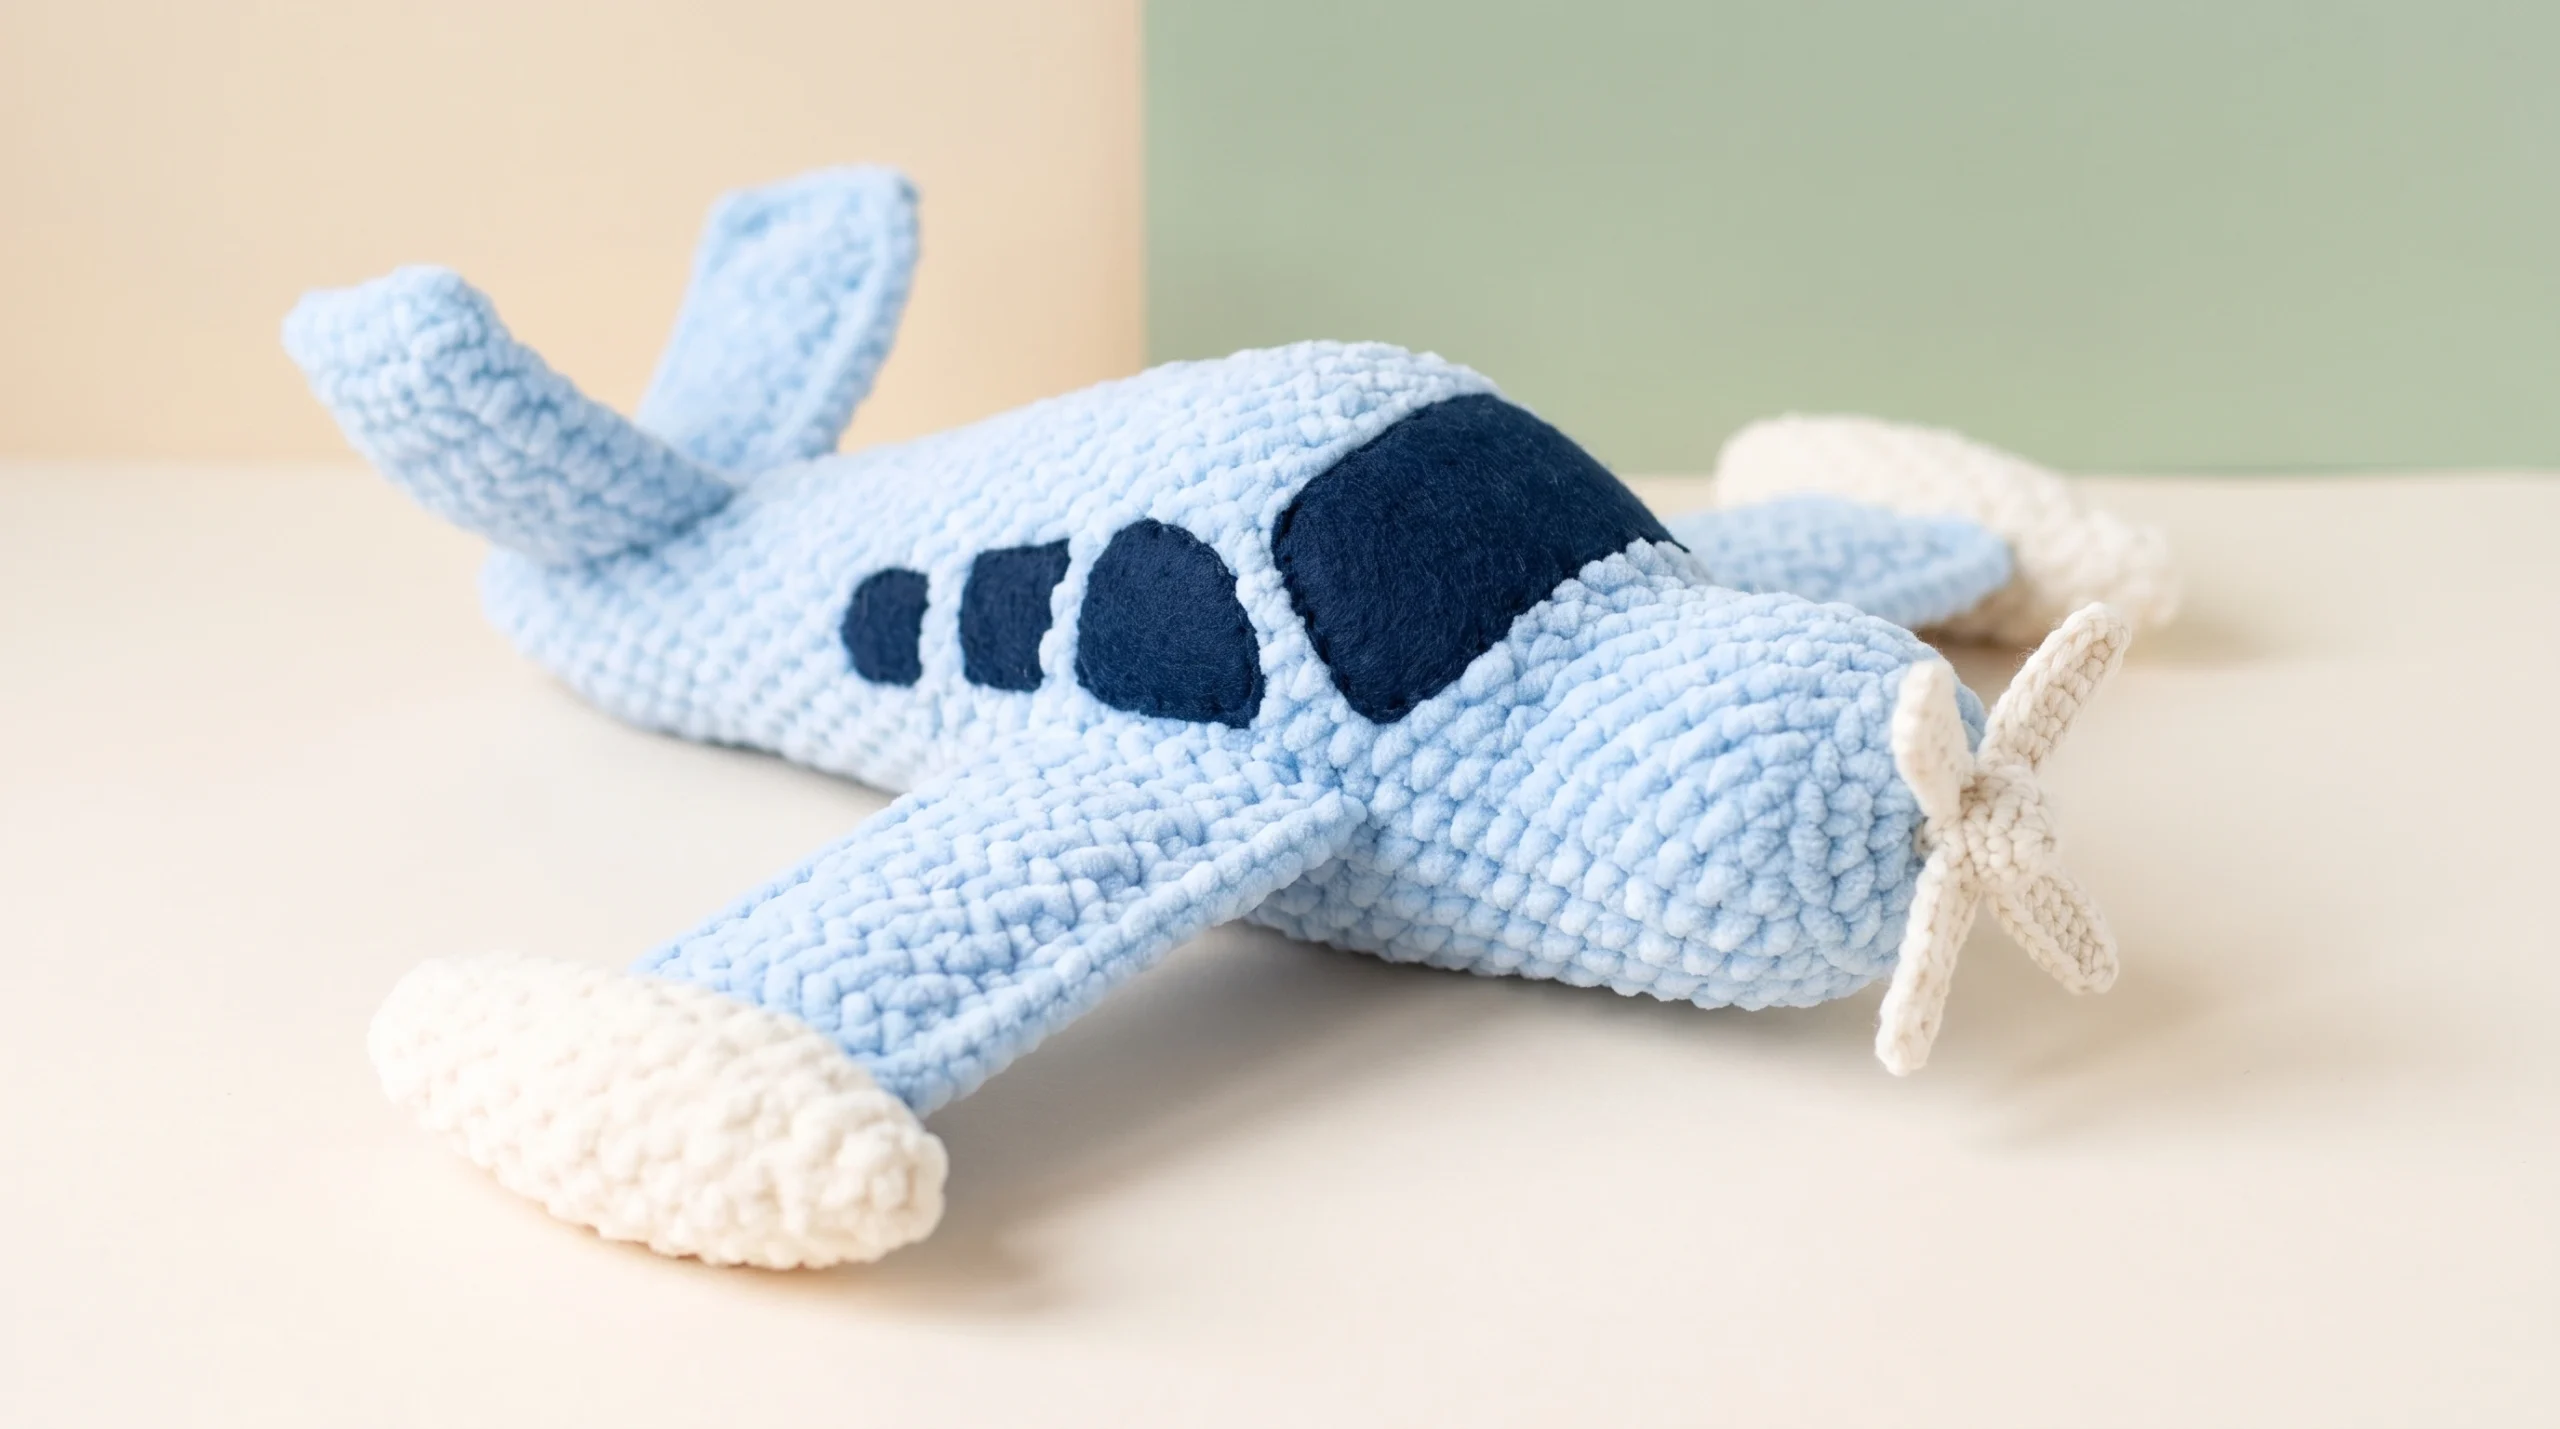
If you’ve been saving cute crochet patterns to try but keep getting scared off by complicated shaping, meet Skye. This soft little airplane is a calm, beginner-friendly make built almost entirely from single crochet. No safety eyes, no tricky face to embroider, just a fuzzy plush plane that comes together in an afternoon.
The full pattern is written below in plain US terms, with a stitch count on every single line so you never lose your place. Pick up your blue and cream yarn and let’s make Skye together.
What Makes Skye Such a Friendly First Plush Project
A lot of cute crochet patterns photograph beautifully and then turn into a wrestling match once you read the instructions. Skye stays gentle the whole way. The body is one simple tapered tube. The wings and tail are flat panels worked in straight rows. The floats and propeller are quick little extras you add at the end.
Here’s why this one is so kind to newer makers:
- The plush hides everything. Chenille-style yarn has a fuzzy surface, so slightly uneven tension just melts into the texture.
- Every piece is small. Nothing takes long on its own, so you get that nice “another part done” feeling all the way through.
- No fiddly details. The face is just felt windows you pin and sew, with nothing delicate to get wrong.
If you’ve been working through easy crochet patterns and want something that feels like a real toy without the stress, Skye is a satisfying next step.
Materials and Tools You’ll Need
| Item | Details |
|---|---|
| Blue plush yarn | Chenille / velvet weight (e.g. YarnArt Dolce or similar, approx. 100 g / 120 m). One skein is plenty. |
| Cream / milk plush yarn | Same weight, small amount for the floats and propeller base. |
| Thin matching yarn | A fine cotton (e.g. YarnArt Jeans, 50 g / 160 m) in blue and cream for the propeller and sewing pieces on. |
| Dark navy felt | Small piece, for the cockpit window and side portholes. |
| Crochet hooks | 4 mm for the plush pieces; 2.5 mm for the propeller. |
| Polyester fiberfill | For stuffing the body and floats. |
| Notions | Stitch markers, tapestry needle, pins, sharp scissors, matching sewing thread (or fabric glue for the windows). |
Tip: With plush yarn, going one hook size smaller than the label suggests gives tighter stitches and keeps the stuffing from peeking through.
Abbreviations (US Terms)
This pattern uses US crochet terminology.
| Abbreviation | Meaning |
|---|---|
MR | magic ring |
ch | chain |
sc | single crochet |
hdc | half double crochet |
inc | increase (2 sc in the same stitch) |
dec | invisible decrease |
sl st | slip stitch |
(...)*n | repeat the instructions in brackets n times |
(00) | stitch count at the end of the round |
Notes and Gauge
- Skill level: Easy. Great for confident beginners.
- Finished size: About 28 cm / 11 in long with a 30 cm / 12 in wingspan in plush yarn. Yours will vary slightly with yarn and tension.
- Gauge: Exact gauge isn’t important for a toy. Aim for a firm fabric with no gaps so the stuffing stays hidden.
- The body is worked in continuous rounds (use a stitch marker). The wings and tail are worked in turning rows.
The Pattern
Body (blue plush)
Worked in continuous rounds. The closed magic-ring end becomes Skye’s nose; the tapered end becomes the tail.
- Rnd 1: 6 sc in MR (6)
- Rnd 2: 6 inc (12)
- Rnd 3: (1 sc, inc) *6 (18)
- Rnd 4: (2 sc, inc) *6 (24)
- Rnd 5: (3 sc, inc) *6 (30)
- Rnds 6–17: 30 sc (30)
- Rnd 18: (3 sc, dec) *6 (24)
- Rnds 19–21: 24 sc (24)
- Rnd 22: (2 sc, dec) *6 (18) — start stuffing the nose firmly here
- Rnds 23–25: 18 sc (18)
- Rnd 26: (1 sc, dec) *6 (12)
- Rnds 27–29: 12 sc (12) — add more stuffing
- Rnd 30: 6 dec (6)
Finish stuffing, fasten off, and close the small hole with the tail. Set aside.
Wings (blue plush) — make 4 panels, join into 2 wings
Each wing is two panels held together and crocheted around for a firm, flat shape.
- Ch 9. Starting in the 2nd ch from the hook:
- Row 1: 7 sc (7)
- Rows 2–15: ch 1, turn, 7 sc (7)
Make 4 panels. For each wing, hold two panels together with wrong sides facing. Crochet 1 sc through both layers all the way around the edge. In each corner, work (1 sc, 1 hdc, 1 sc) into the same stitch so the corner stays sharp and doesn’t curl. Fasten off, leaving a tail for sewing. Repeat for the second wing.
V-Tail Fins (blue plush) — make 4 panels, join into 2 fins
Same method as the wings, just smaller.
- Ch 6. Starting in the 2nd ch from the hook:
- Row 1: 5 sc (5)
- Rows 2–9: ch 1, turn, 5 sc (5)
Make 4 panels. Join in pairs the same way as the wings to make 2 firm fins. Leave a tail on each for sewing.
Floats (cream plush) — make 2 small + 1 large
Small floats (make 2, for the wing tips):
- Rnd 1: 6 sc in MR (6)
- Rnd 2: 6 inc (12)
- Rnds 3–9: 12 sc (12)
- Rnd 10: 6 dec (6) — stuff lightly, close.
Large belly float (make 1):
- Rnd 1: 6 sc in MR (6)
- Rnd 2: 6 inc (12)
- Rnd 3: (1 sc, inc) *6 (18)
- Rnds 4–11: 18 sc (18)
- Rnd 12: (1 sc, dec) *6 (12)
- Rnd 13: 6 dec (6) — stuff, close.
Propeller (cream cotton, 2.5 mm hook)
- Rnd 1: 6 sc in MR (6), sl st to join. Don’t cut yet.
- Blades: ch 6, then sl st back into the same center stitch — repeat 3 times around so you have three even loops radiating out. Sl st to secure, leave a long tail for sewing.
Windows (navy felt)
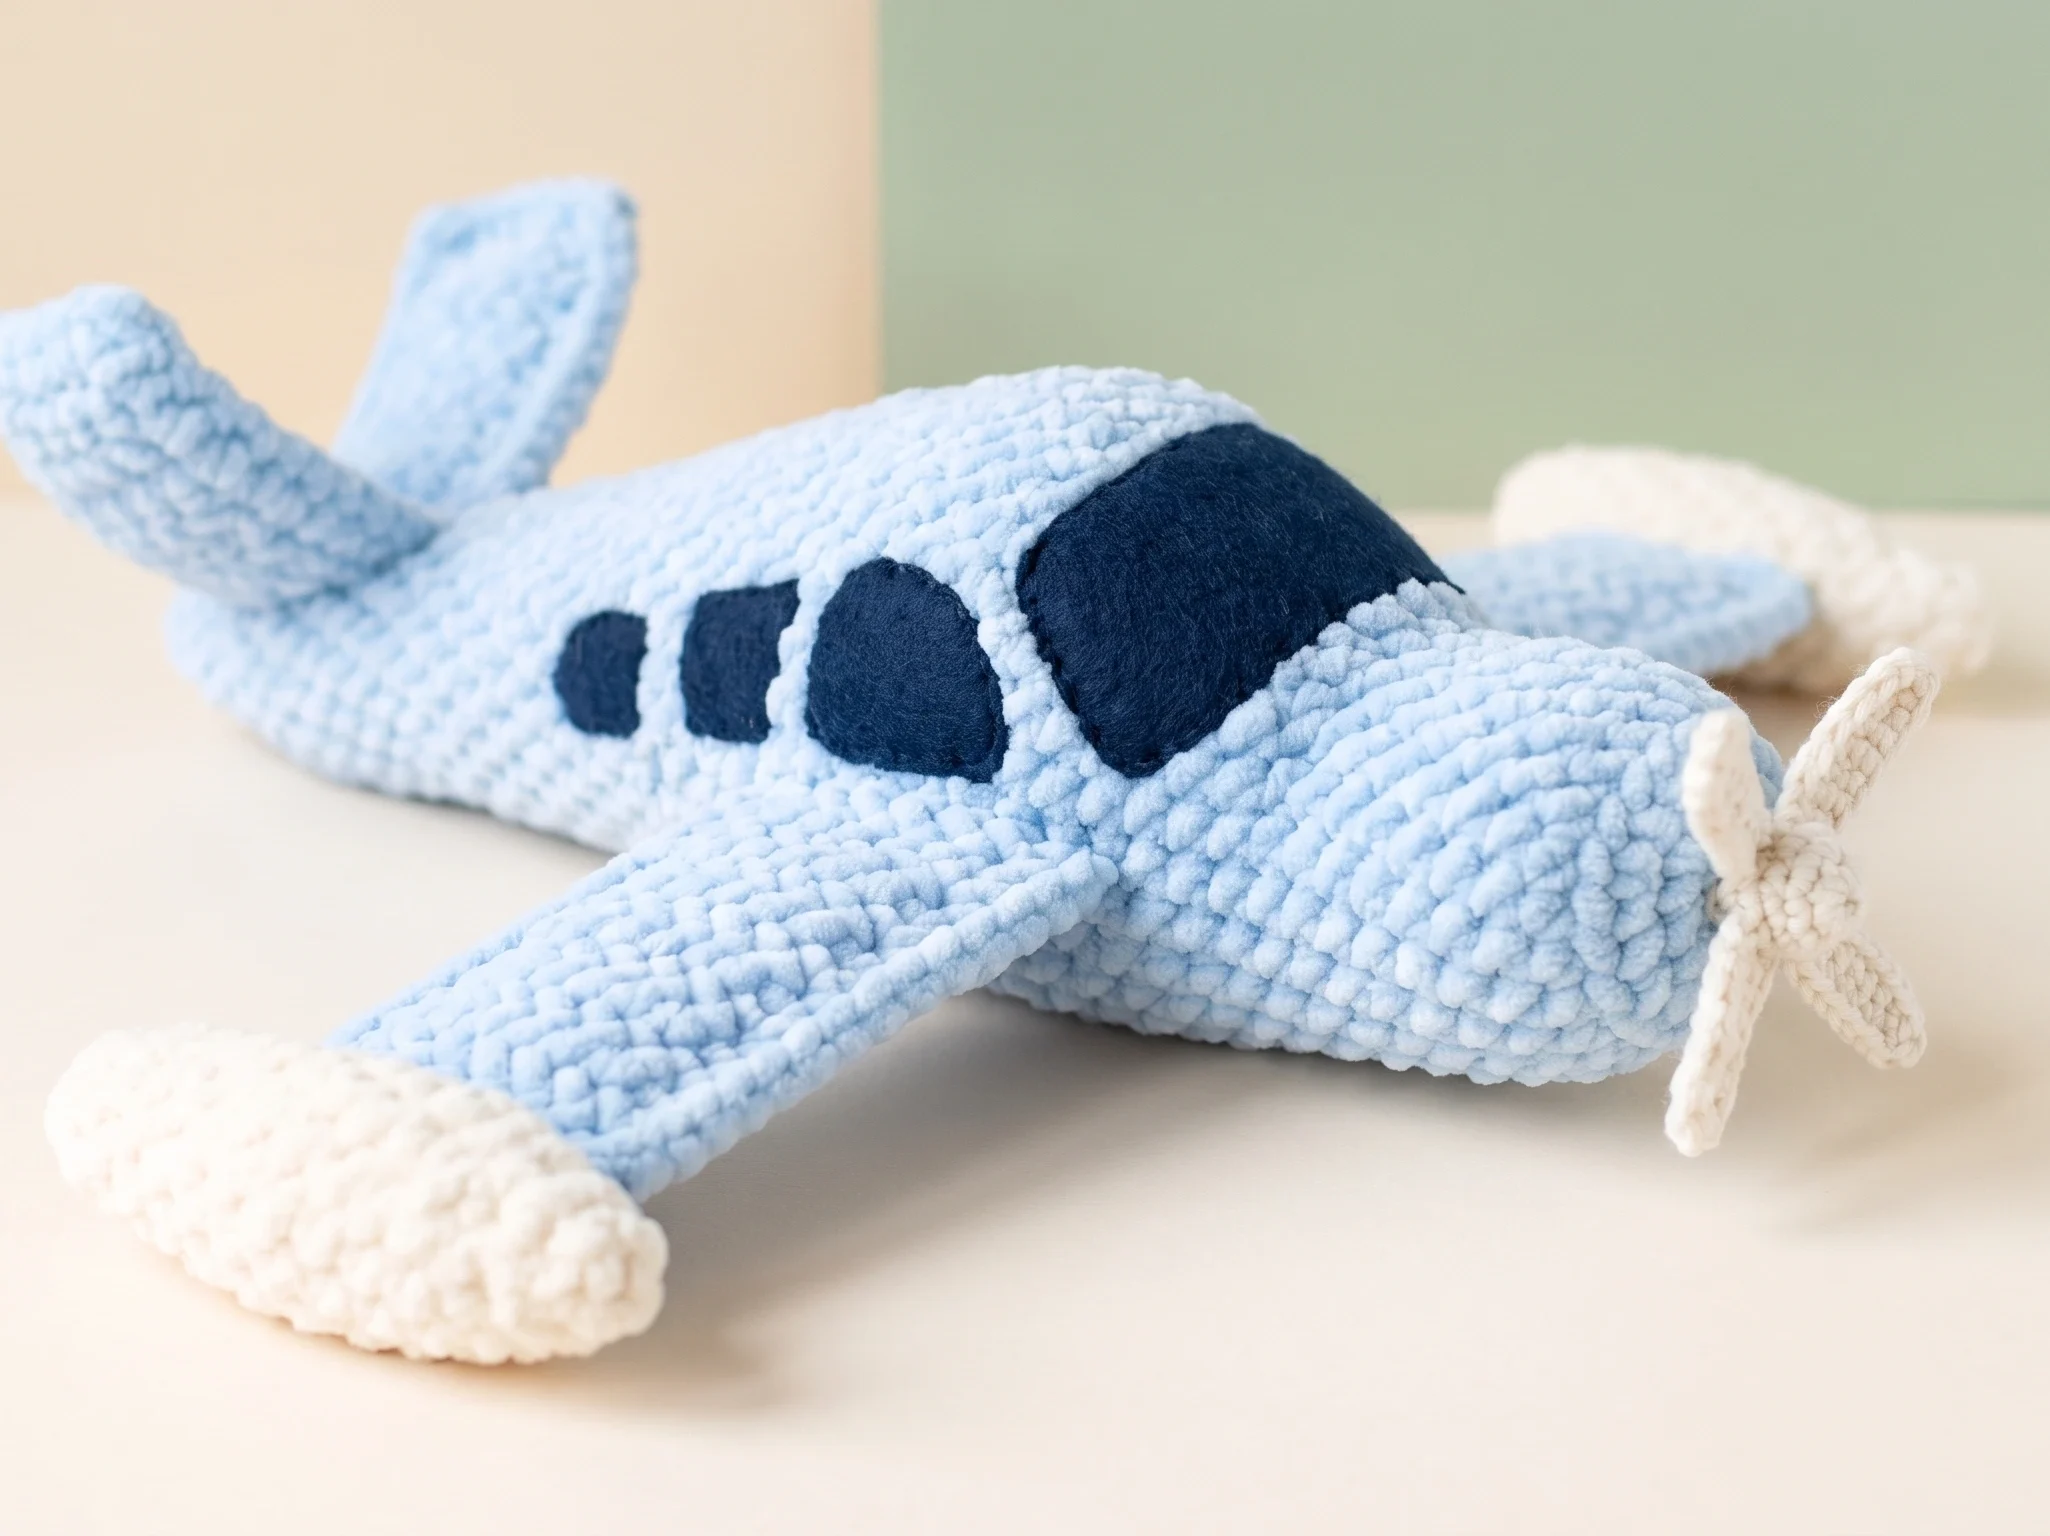
From dark navy felt, cut one larger rounded “cockpit” shape for the front and four small ovals for the side portholes. Keep the edges soft and rounded so they read as a friendly little face.
Assembly
Work in this order and pin each piece before sewing so you can check the look first.
- Find the center line along the top of the body and mark it lightly with pins.
- Attach the wings. Pin one wing to each side, level with each other and set slightly forward of the middle. Sew around the base of each wing with the thin matching yarn. Tie off securely inside the body.
- Add the V-tail. Pin both fins near the tapered tail end, angled outward and upward so they form a V that touches in the middle. Sew along the base of each fin.
- Sew on the floats. Attach one small float to each wing tip, and the large float to the belly underneath the wings. Pull the ends through, knot, and hide the tails inside.
- Add the propeller. Center it on the very tip of the nose and sew through the middle so the blades sit flat against the front.
- Place the windows. Pin the cockpit shape near the front top, then space the small portholes evenly along one or both sides. Sew with matching thread, or glue them down if the toy isn’t meant for a young child.
Tips, Substitutions, and Variations
- Switch up the colors. Soft grey with white floats, or mint with cream, both make lovely versions if blue isn’t your thing. The pattern works in any plush shade.
- No felt on hand? Embroider the windows in navy yarn instead, or leave them off for a cleaner, more minimal Skye.
- Make a little fleet. These are small crochet projects, so they add up fast. A few planes in different colors make a sweet nursery garland or shelf lineup.
- Stuffing showing through? Drop a hook size and add stuffing gradually as you close each section rather than all at once.
Care Instructions
Spot clean with a damp cloth and mild soap, then air dry. For a full wash, hand wash gently in cool water and press out the excess (don’t wring the plush). Reshape while damp and dry flat. Skip the dryer, which can flatten the chenille texture.
Terms of Use
This is an original design by Latifacha and is free for personal use. You’re welcome to sell finished items you make from it; a credit to latifacha.com is appreciated. Please don’t copy, redistribute, or republish the pattern text or photos as your own. Questions? Reach out at contact@latifacha.com.
Frequently Asked Questions
Is Skye a good project for a complete beginner?
Yes. It’s built almost entirely from single crochet, with no safety eyes or shaping tricks, which puts it among the friendlier cute crochet patterns to start with. If you can make a magic ring, work in rounds, and crochet in rows, you’re ready.
How long does the plush airplane take to crochet?
Most makers finish in an afternoon or two. The pieces are small, so it stays a quick, rewarding make rather than dragging on for weeks.
What’s the best yarn for this amigurumi airplane pattern?
A chenille or velvet-weight plush yarn gives that soft, cloud-like finish and hides uneven stitches. Any similar plush yarn around 100 g / 120 m will work, so use what you already have.
Can I make a mini version?
Absolutely. A lighter yarn and a smaller hook shrink the whole plane, which is perfect if you like small crochet projects for keychains, ornaments, or baby mobiles. Just keep your stuffing firm so the shape holds.
Is the finished toy safe for babies?
With glued felt windows, it’s best kept decorative or for older children. For a baby-safe Skye, sew the windows on securely (or embroider them) and make sure every piece is firmly attached with no loose parts.